If you own an iPod in the era of smartphones and wireless music systems, it is considered a rare collection. We understand that recovering deleted files from an iPod can be challenging due to the limited options available. This article aims to assist those who are attempting to recover deleted or lost files from their iPods. The most effective method to retrieve files from an iPod is by using Remo Recover
Recover Deleted Files from iPod
Remember listening to music on the iPod? Irrespective of which smartphone you have, it doesn't come close to nostalgic feel with iPod. If you are still one of the users who fancies the iPod and lost or deleted your important playlists, photos or files on your iPod even in 2023, this article is for you.
"IPOD Music Recovery"
Many moons ago I attempted to add everything on my old skool IPOD to Spotify and managed to delete everything on my IPOD instead. First, is all that data recoverable b/c we are talking years of accumulated tunes? Second, if it is recoverable, can be be done without costing me a ton?"
Source: Reddit
In this article you will learn the hassle-free solutions on how to recover your deleted files from iPod effortlessly. Before moving ahead with solutions, let us understand more about the data loss in iPod. Before moving ahead with solutions, if you accidentally deleted the files on iPod and wish to recover them back, go to the ‘The Recently Deleted Folder’ and unerase iPod files.
If you have encountered any of the above-mentioned cases with the help of right approaches mentioned below, you will be able to address the issue without any hassle.
Note 📌 : This method is applicable only if you have enabled backup on through your iTunes.
You can perform iPod data recovery from iCloud and recover files that were deleted in the past 30 days.
Check if the deleted or lost files are recover from iPod, this method is only applicable if you have enabled the cloud backup for your iPod
If you are in that circumstance of Data loss right now then, you will need a reliable data recovery tool like Remo Recover. This software is a powerful file recovery tool which can be used to recover data from ipod in recovery mode, all the lost or deleted photo, audio and video files. Apart from this, the tool can also be used to recover deleted video files from iPod and any storage media like hard drives, USB drives, memory cards.
Check if the deleted or lost files are recover from iPod, this method is only applicable if you have enabled the cloud backup for your iPod. If you do not have a backup, you will need a reliable data recovery tool like Remo Recover to get them back
If you are not tech-savvy enough to implement the manual methods, we recommend you to go ahead with a reliable data recovery tool to recover deleted files from iPod. Download the software now!
Note 📌: Remo Recover supports recovery from iPod till the 4th generation
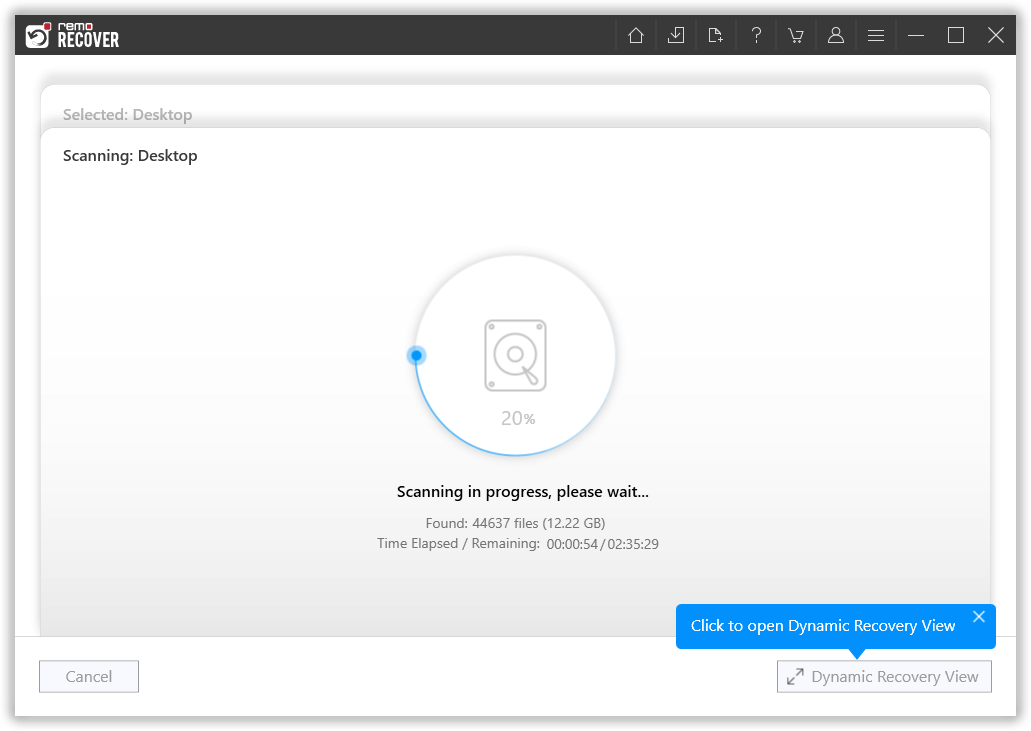
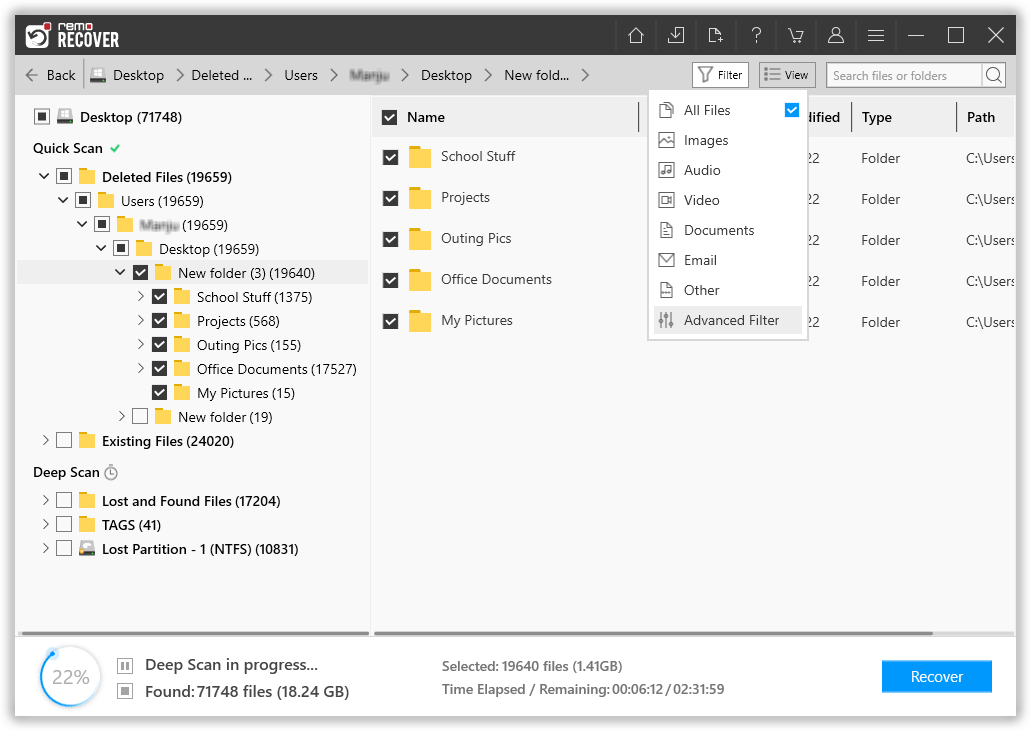
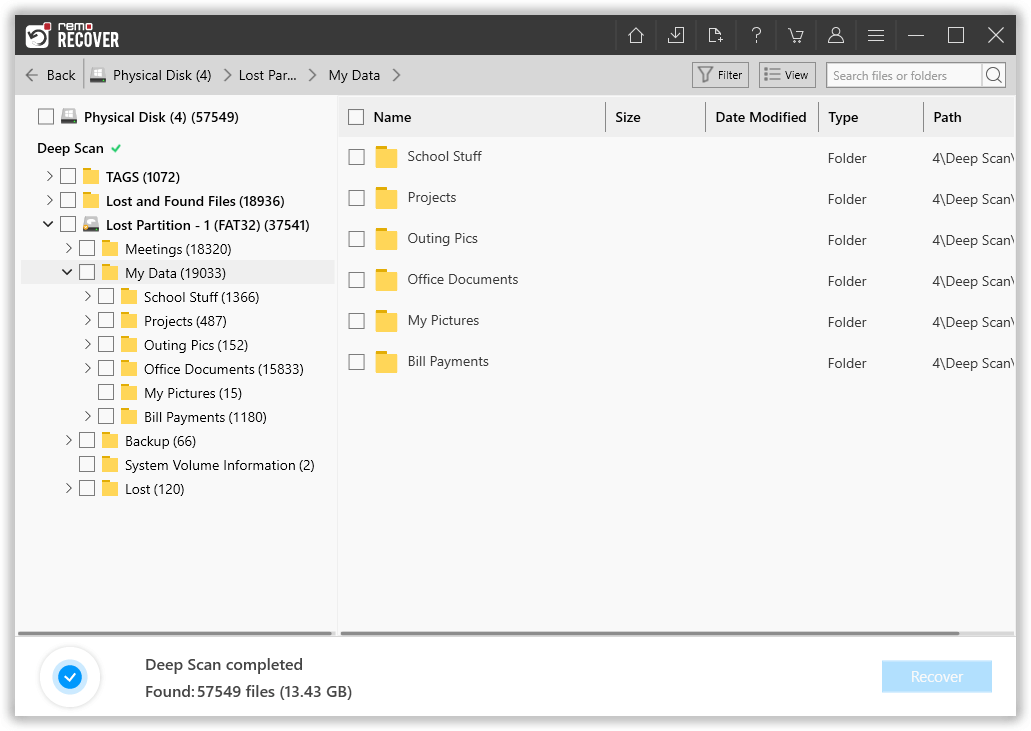
Follow the simple steps provided below to recover audio files deleted files from iPod.
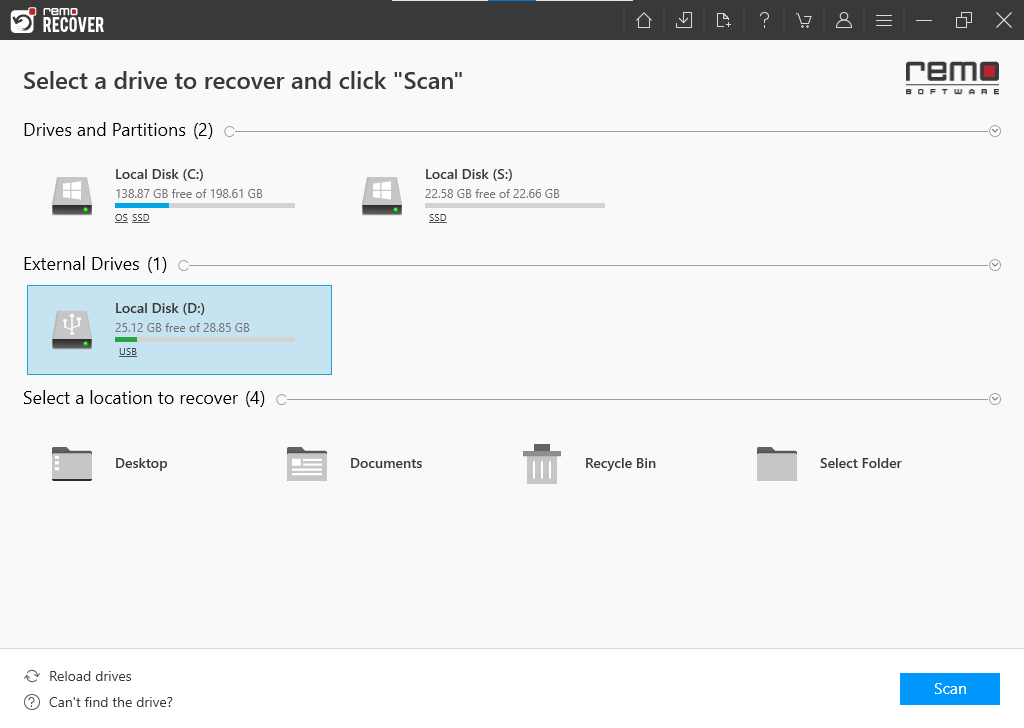

Supported iPod devices: iPod Classic, iPod Mini, iPod Shuffle and iPod Nano.
Note: iPod Touch and iPhone is not supported.
Features of Remo
Growing up listening to music on iPods means you likely have a vintage music library that you simply cannot afford to lose. The collection of music files, photos, and videos stored on your iPod holds special value. If, unfortunately, you have misplaced or mistakenly deleted some of these files without any backups, Remo Recover is an excellent solution to retrieve them flawlessly.

Why Choose Remo?
100% safeSecure
100% SatisfactionGuarantee
10 Million+Downloads
Free TechSupport
Live Chat24/7 Support