ISO files, also known as disk images, are digital replicas of optical discs such as CDs, DVDs, or Blu-rays. These files contain the entire contents of the disc, including the file system and boot sectors. They are widely used for distributing software, creating bootable media, and backing up data.
However, ISO files can be lost due to accidental deletion, formatting, or system errors. But fret not, as in this article, we will help recover your deleted or lost ISO files using 4 proven methods.
What is an ISO File?
Before diving into the recovery methods, it's essential to understand how ISO files work. An ISO file is an archive file that stores the data of an optical disc in a single file. It is an exact copy of the data on the disc, allowing users to access and use the contents without needing the physical disc.
Common Reasons for ISO File Loss
Several reasons can lead to the accidental deletion or loss of ISO files:
- Accidental Deletion: You might have unintentionally deleted the ISO file while clearing disk space or organizing files.
- Formatting: Accidentally formatting the drive containing the ISO file can cause its loss.
- Corruption: File corruption due to system errors or hardware issues can render the ISO file inaccessible.
- Software Glitches: Errors in software or application updates can result in data loss.
- Virus or Malware: Malicious software can cause damage to ISO files.
4 Methods to Recover ISO Files
Below we have added 4 proven methods to help you recover your lost or deleted ISO files.
Method 1: Check Recycle Bin or Trash
The first step to recover a deleted ISO file is to check the Recycle Bin (on Windows) or Trash (on macOS). If you accidentally deleted the file, it might still be in these folders. To restore it, simply follow the below simple steps.
For Windows:
- Open the Recycle Bin.
- Find the deleted ISO file.
- Right-click the file.
- Select "Restore."
For macOS:
- Open the Trash.
- Locate the deleted ISO file.
- Right-click the file.
- Choose "Put Back."
Method 2: Restore from Backup
If you regularly back up your data, you may find the lost ISO file in your backup storage. Many operating systems offer built-in backup utilities, such as Windows File History and macOS Time Machine.
Here are the steps to restore the ISO file using Backup.
For Windows:
- Open the "Control Panel" on your computer.
- Navigate to "System and Security," then "Backup and Restore."
- Click on "Restore my files."
- Follow the prompts to select the latest backup containing the ISO file.
- Locate the ISO file in the backup and restore it to its original location.
For macOS:
- Click on the Apple menu and select "System Preferences."
- Choose "Time Machine."
- Click on "Enter Time Machine."
- Use the timeline on the right to navigate to the backup date containing the ISO file.
- Find the ISO file in the backup and click "Restore" to recover it.
Method 3: Employ System Restore
System Restore is a feature available in Windows that allows you to revert your system's state to a previous point in time. You can use this feature to recover the file if you created a system restore point before the ISO file got lost.
- Press the "Windows + R" keys together to open the "Run" dialog box.
- Type "rstrui" in the dialog box and click "OK."
- This will open the "System Restore" window.
- Click "Next" to proceed.
- Select a restore point created before the ISO file was lost.
- Click "Next" and then "Finish" to start the restoration process.
Method 4: Use File Recovery Software
When a file is deleted from the Recycle Bin or Trash, it is not permanently erased from the storage drive. Instead, the space it occupied is marked as available for new data. File recovery software can help scan the drive and recover deleted files. One of the best file recovery software is Remo Recover.
Remo Recover is a powerful and user-friendly file recovery software designed to help you effortlessly retrieve your deleted or lost files. Whether it's an accidentally deleted ISO file, photos, videos, documents, or any other data, Remo Recover can efficiently restore them from various storage devices such as your computer's internal drive, external hard drives, USB flash drives, memory cards, and more.
Steps to Recover Deleted ISO Files Using Remo Recover
Follow the below steps to start the recovery process from your hard drive using Remo Recover:
- Download and install Remo Recover software on your computer.
- Launch Remo Recover and select the drive where the ISO file was deleted.
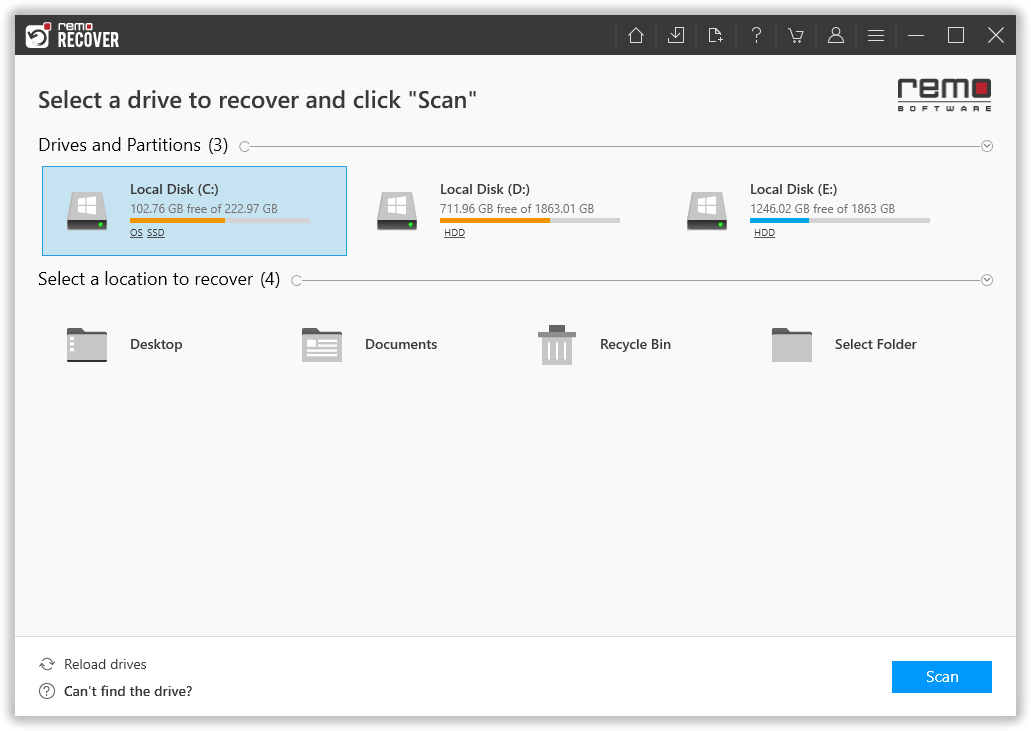
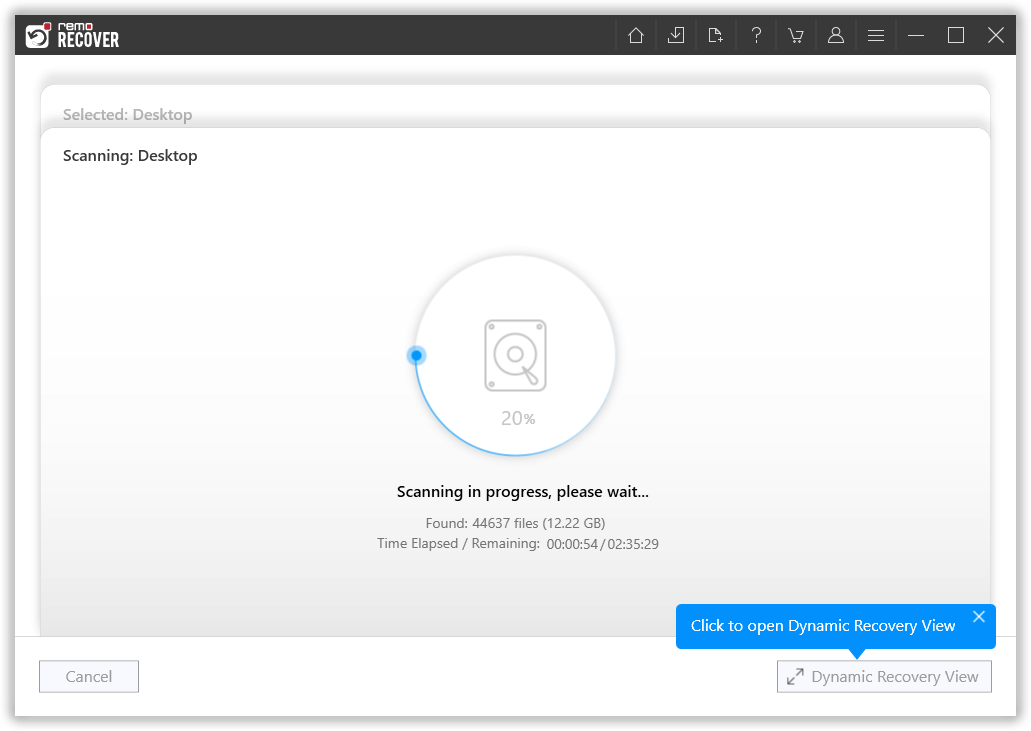
- Click on "Scan" to start the scanning process.
- After the scan, find the ISO file under the "Lost and Found" or "Lost Partition" folder.
- Use search and filters to locate the ISO file easily, if needed.
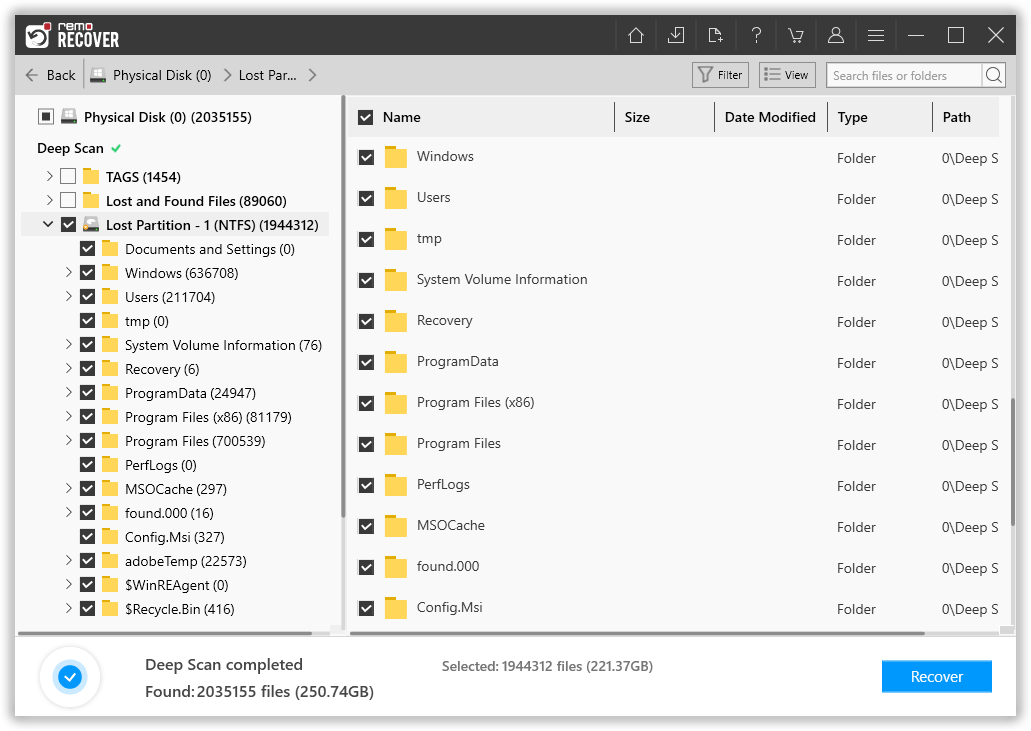
- Double-click on the ISO file to Preview it for free.

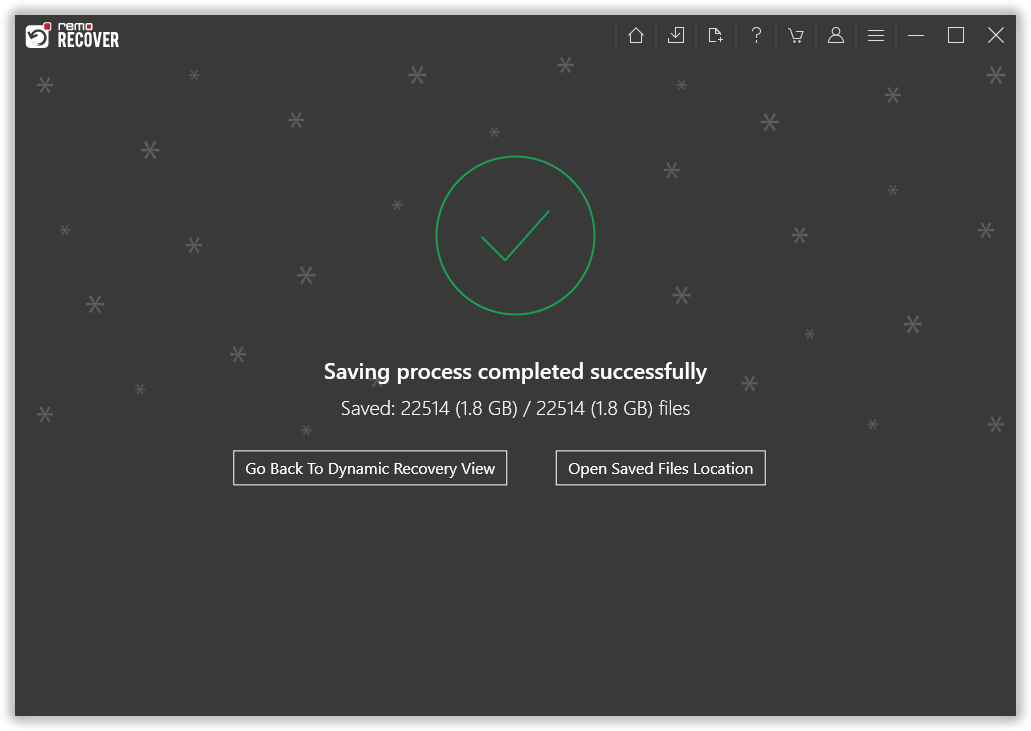
- Select the ISO file and hit the "Recover" button to save the ISO file to your desired location on your computer.
Tips to Avoid Data Loss
To avoid future ISO file loss, follow these preventive measures:
- Regularly back up your ISO files to external storage or cloud services.
- Be cautious while deleting files and double-check before proceeding.
- Keep your system and antivirus software up to date to prevent malware attacks.
- Consider using reliable disk imaging software to create backups of your discs.
Conclusion
This article highlights four proven methods to recover ISO files effectively. Using data recovery software like Remo Recover is the most effective approach among the methods discussed. Remember to be proactive in backing up your files and utilize recovery software when needed to retrieve your valuable data effortlessly.