Formatting is one of the troubleshooting methods employed to fix any error on the hard drive. Apart from fixing errors, hard drives can also be formatted to install a new operating system. Either way, files will be erased from the drive once the drive is formatted.
Recovering the files and folders from the storage drive after formatting is the only way to regain access to the file or folders that existed before format. Let us see, if it is possible to recover data after formatting the hard drive. If yes, let us see how to recover data from formatted hard drive?
Table of Contents:
Yes, you can recover files after formatting. Usually, when you quickly format any storage drive such as hard disk, SSDs, SD cards, or USB drives, a new file system will be created. A file system is responsible for distributing all the data across the various sectors of the hard drive.
When you format the drive with any file system such as NTFS, exFAT, HFS or APFS, a new registry will be created. Therefore the information of the old data will be erased.
However, the old files and folders remains on the drive until it's rewritten by new data. Hence, you still have a good chance of recovering data after formatting the hard drive. This can be done with the help of a professional data recovery software- Remo Recover
To recover files after formatting your hard drive or SSD, follow the below-mentioned steps:
Step 1: Download and install Remo Recover software on your PC / laptop to recover files from formatted hard drive.
Step 2: Once you have installed and launched the software, select the formatted hard drive and hit the Scan button.
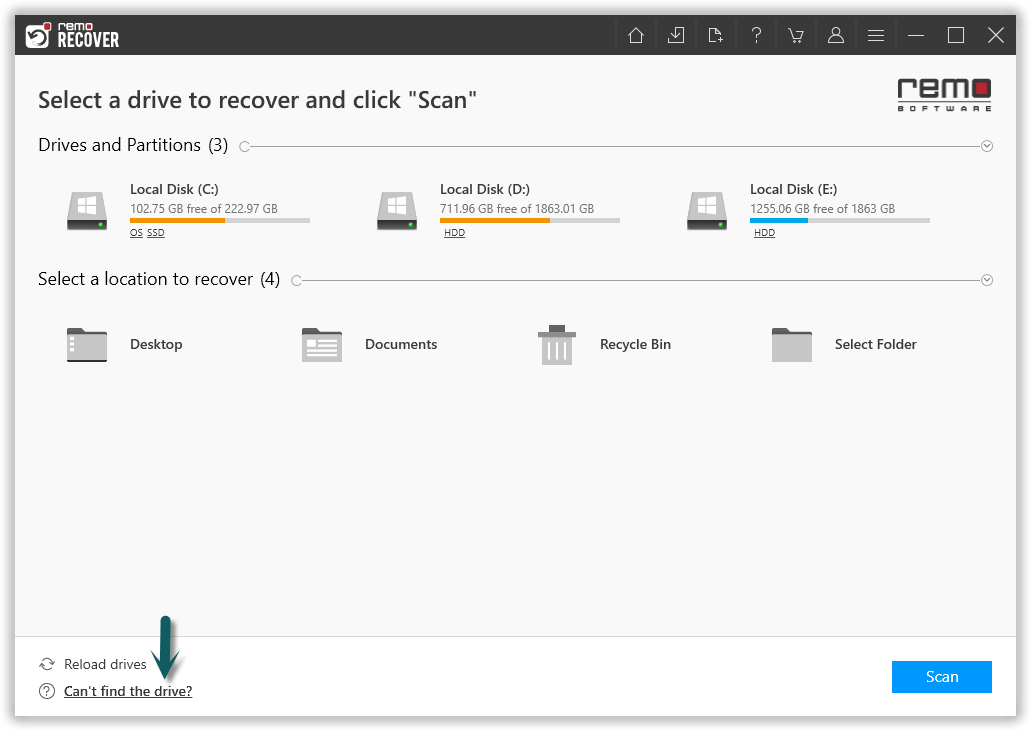
Note: If the drive is not available, click on the Can’t find Drive? option.
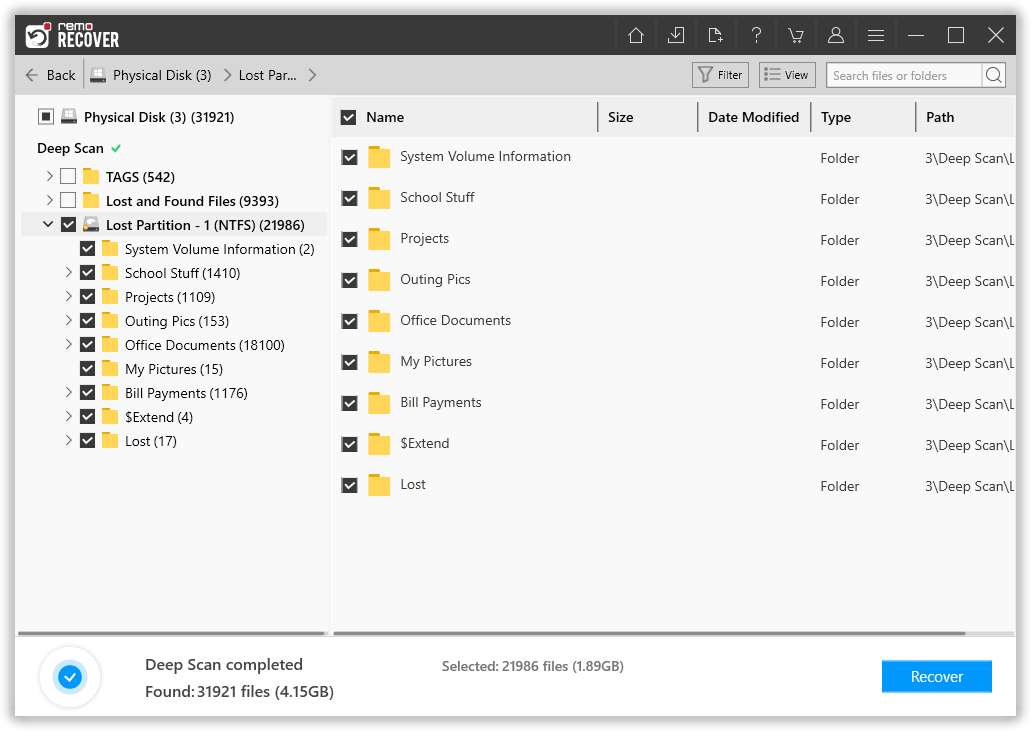
Step 3: After completion of the scanning process, the rescued data will be displayed in the Lost and Found folder or Lost Partition folder.
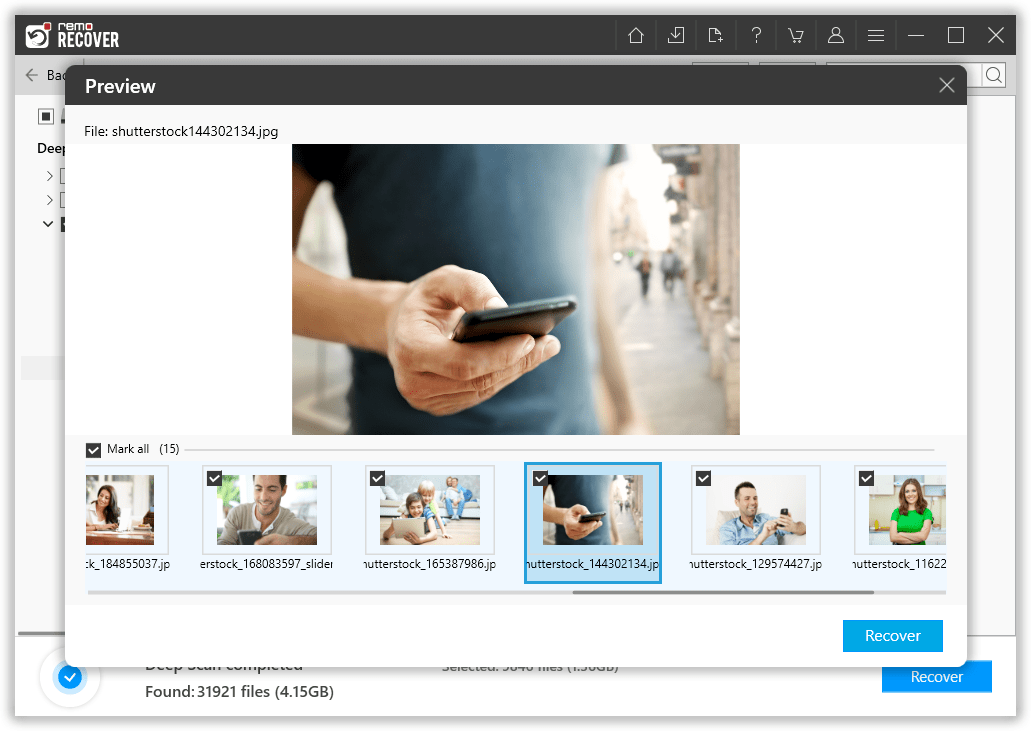
Step 4: You can double-click on any file to Preview the recovered files such as documents, PPT, excel sheets, photos, videos etc.
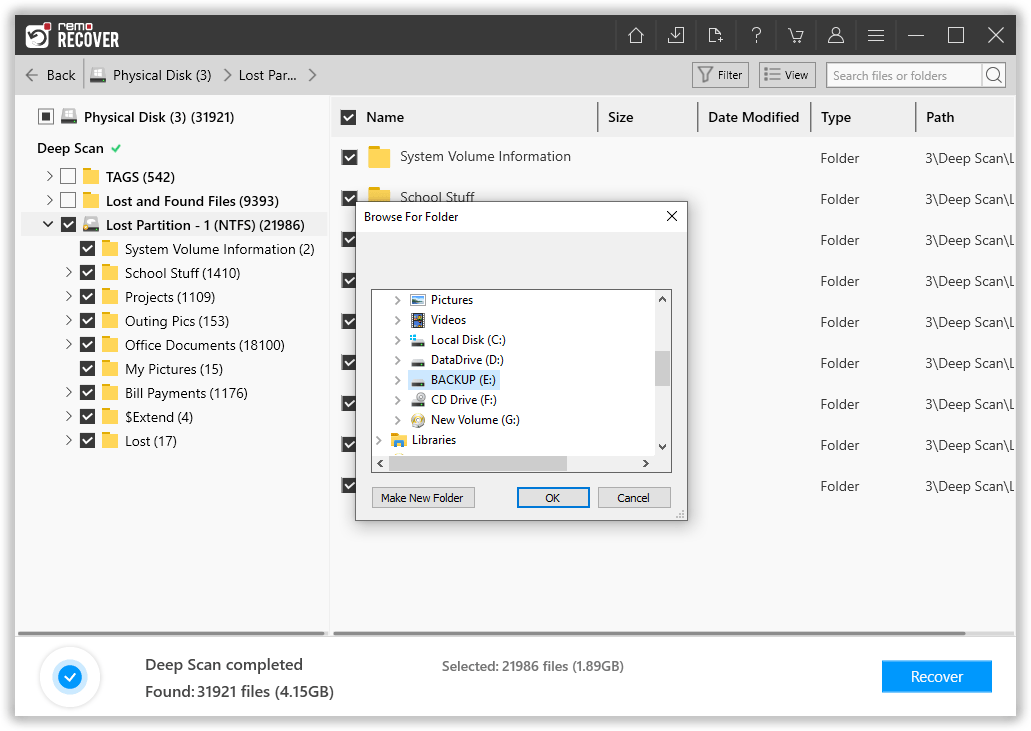
Step 5: If you are satisfied with the recovery result select the files you want to restore and click on the Recover button to save the files in your preferred location.
Note: The recovery process remains the same whether you are attempting to recover data from a formatted SSD or a formatted USB drive.
Recovering Files Made Easy With Remo Recover
Manually Retrieving the files and folder after formatting the drive is impossible. However, by making use of an efficient file recovery software, your data recovery task can be accomplished easily.
You can safely recover any deleted files after formatting without any corruption. The deep scan engine of the tool can bypass the new file system and search your hard drive sector by sector to recover the data. This tool can come in handy even if you have quick formatted the drive or formatted the drive while installing a new operating system.
The tool is also capable of recovering drives that are formatted with NTFS, exFAT, FAT32, HFS, HFS+, APFS and other file systems. This software is also available on both macOS and Windows operating system platforms.
- Taking a backup is the first and foremost thing to be done before formatting.
- In case you are formatting a portable drive such as SD card or external hard drive, try formatting the drive with exFAT file system. Because, this file system is compatible with multiple operating systems. Thereby, you can avoid formatting the drive for compatibility reasons.
- Avoid trying to format the storage drive to fix any performance-related issues. You can rather try fixing the problem using various troubleshooting methods like CHKDSK, SFC Scan etc
- If you have no other option but to format the drive, make sure that you opt for quick formatting rather than full formatting. Because by fully formatting the drive, each and every sector of the drive will be completely reorganized with the new file system. If in case you have lost data, recovering data after lower-level formatting can still be done.
- One of the limitations of fully formatting the drive multiple times is that your hard disk may deteriorate or wear out. This can result in bad sectors on your hard drive. But the good thing is Remo Recover can help you with formatted external hard drive recovery as well.
Interesting Read: Find out how to recover deleted folder from flash drive
Conclusion
As you know that formatting any drive will erase all the data from the drive, you need to make sure you take a backup before performing the format. You should always consider formatting as the last option, because repeatedly formatting the drive might wear out the drive a lot faster. But if you have formatted the drive without taking any backup, stop using the drive immediately and use the Remo Hard Drive recovery tool to recover the data.