Dynamic disks are hard drive configurations that provide advanced functionalities like disk mirroring, parity, and striping, etc. One can easily apply dynamic disk configurations on any hard drive type like IDE and SATA hard drives. Actually, these dynamic disks are very flexible to use. On these dynamic disks, one can create various types of volumes like Spanned Volumes, Mirrored Volumes, Stripped Volumes, RAID 5 volumes, and many more.
In spite of these advantages, dynamic disks do have some limitations. Windows allows you to install the operating system only on a basic disk i.e. a primary disk. Moreover, most dynamic disk users have encountered dynamic disk invalid errors and many such errors while using these dynamic disks. Hence due to these reasons, you might want to convert the dynamic disk to a basic disk. But what is the best way to convert dynamic disk to basic disk? Below are the steps that help you in performing this conversion in an effective manner:
Caution: Take a complete backup of all the data in the Volumes and store it on any external drive safely.
1. Convert using Disk Management
- Search for Disk management on the Windows search bar and open Create and format hard drive partitions.
- Select the dynamic volume on Disk Management
- Select all the volumes that are included in the dynamic and you wish to covert, and then right-click on them.
- You will now get a context menu with a list of some options among them select the Delete option
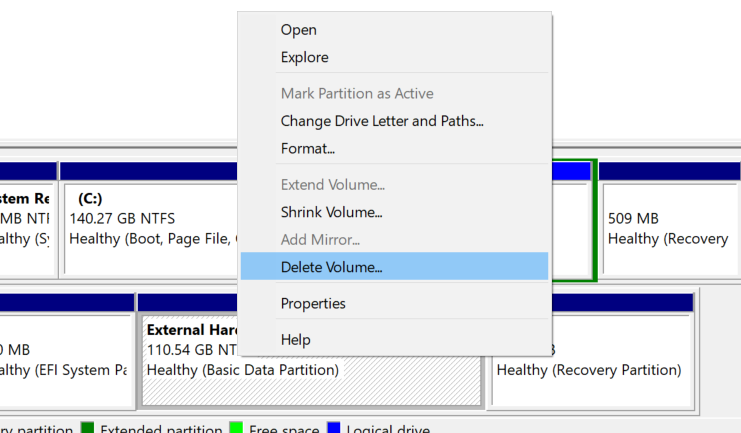
- Once all the volumes are deleted just right-click on the disk and select the Convert to basic disk option.
2. Convert a Dynamic Disk to Basic With Command Prompt
Follow these steps below to convert your dynamic disk to a basic disk using Command Prompt as an Administrator as you'd need access to make changes to disks.
- Type diskpart to start the disk partitioning utility.
- If you don't know the label of the disk then type list disk and click Enter.
- Type select disk (number) and replace the (number) in the command with the disk number you want to convert.
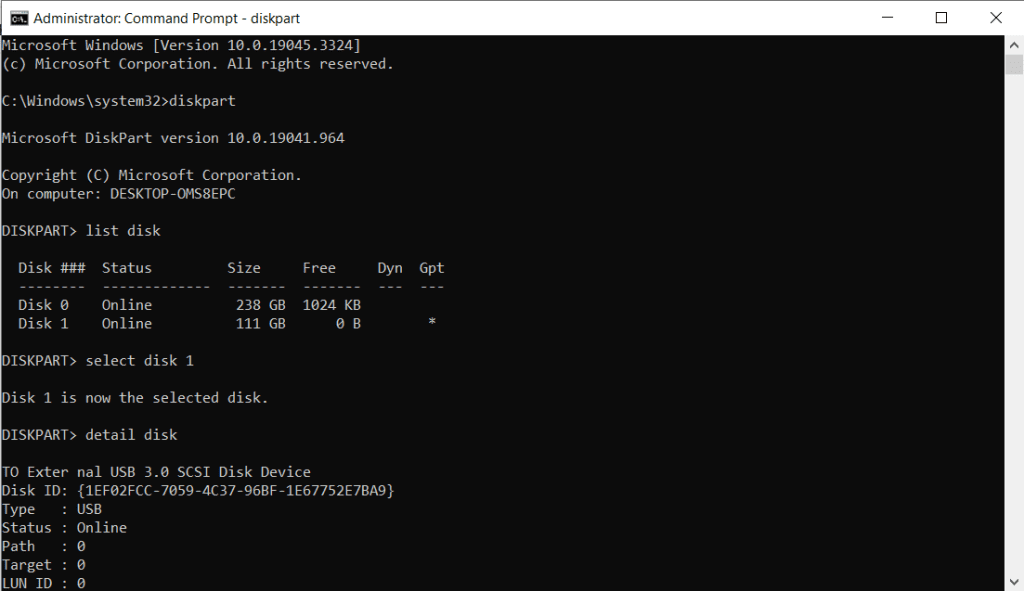
- Type detail disk to display the different volumes on the selected disk
- Now type select volume (number) and click on Enter and delete volume (number).
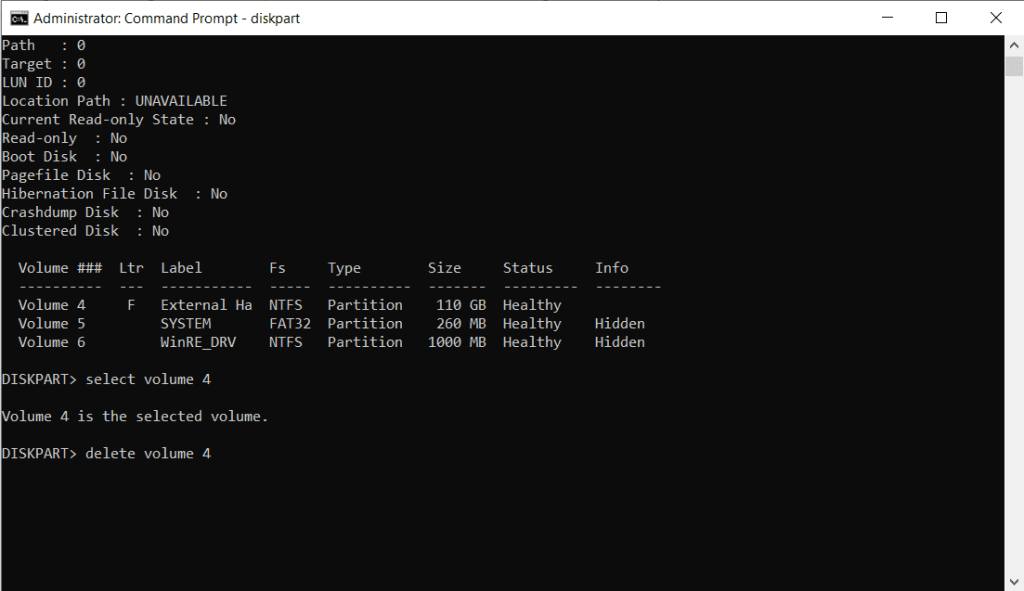
- Repeat this process on all the volumes on the selected disk.
- lastly, type select disk (number) and type convert basic
With this, the disk will now be converted into basic and will be set up for normal usage.
One important point, while selecting the volumes for deletion, be careful and make sure all your data from all the volumes is backed up. If not, with just one simple click your entire data will be lost! Since you are deleting the Volumes, if you select the wrong volume then all your data within that volume will be lost.
Don’t worry, in such cases, you can use the Remo Recover software which is the best Windows data recovery software in order to easily restore the deleted volume with all its data intact in just a matter of minutes. Nevertheless, it is recommended to have a backup of all the volumes.