
Many a time you want to create a bootable device for your new notebook, netbook, or laptop that has no CD/ DVD drive. Nowadays, most electronic devices come with compactness, which gives rise to a number of notebooks that are manufactured without a CD/ DVD drive but with an SD card slot.
In such devices, if you want to install or reformat the operating system, then you have to make use of either a flash drive or a memory card with a minimum storage capacity of 8 GB.
Note: Some of the SD cards or SDHC cards come with high storage capacities and are compatible with almost all the relevant devices. But many devices are only compatible with the SD card for booting.
In case, if you want to make a bootable SD card, SDHC, or USB drive for Windows or Mac operating systems. Then here is a complete guide for you!
Quick Alert:
While booting the SD card, double-check the steps you are performing and the command you are executing. This is because any small mistake can corrupt your SD / SDHC card file system. Sometimes, fixing the corrupt SD card can be easy, but not always.
During the booting process, if your SD card's file system becomes corrupted, then you will encounter a data loss scenario. There are chances that your card will become useless permanently. Hence, handle your card carefully. If you happen to lose data from SD card, use Remo Recover. It is one of the best tools to recover data from SD card.
How to make a Bootable SD card/ SDHC for Mac?
Follow the simple steps to create a bootable SD card/ SDHC card or USB drive for your Mac OS with the help of the terminal. This method of creating a bootable SD card for Mac doesn’t need any external sources.
Step 1: Connect the SD/SDHC memory card to the computer.
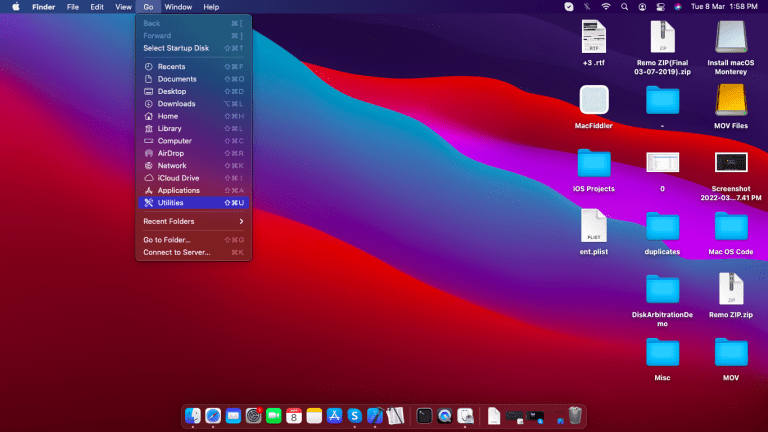
Step 2: Go to Utility – you can call Utility with the help of the Finder option of the Launchpad on your Mac.
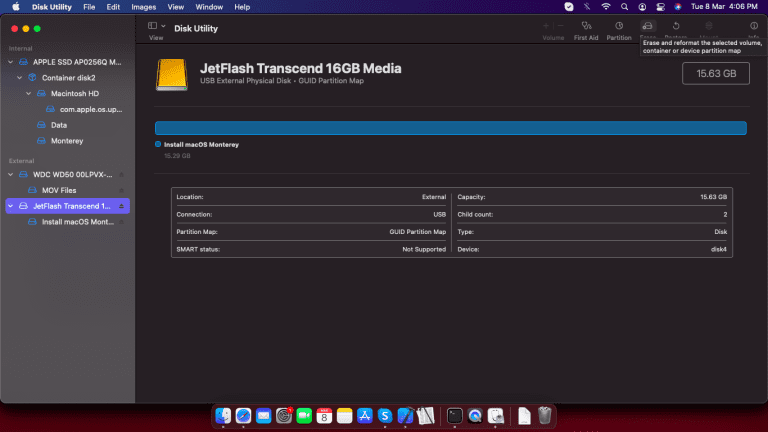
Step 3: Open Disk Utility, select the SD card and click Erase.
Step 4: In Format, select MSDOS FAT from the dropdown. Enter a name in the ‘Name’ field. This is optional for the user.
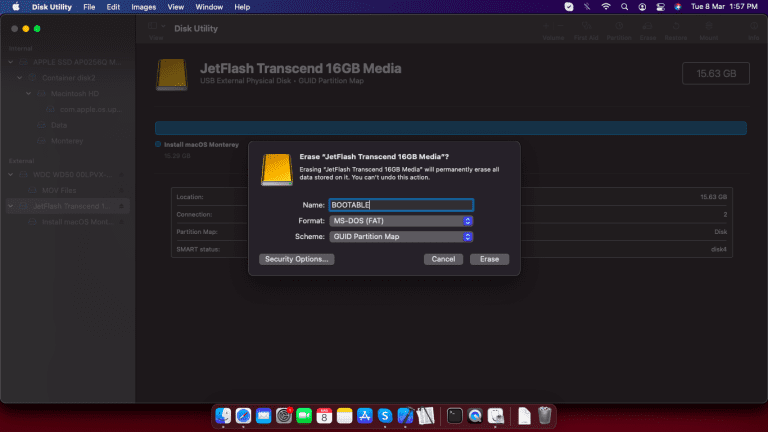
Step 5: Click Erase.
Step 6: Download a macOS installer that is compatible with your Mac
Step 7: Locate the app in the Application folder and right-click on it, select Show Package Content.
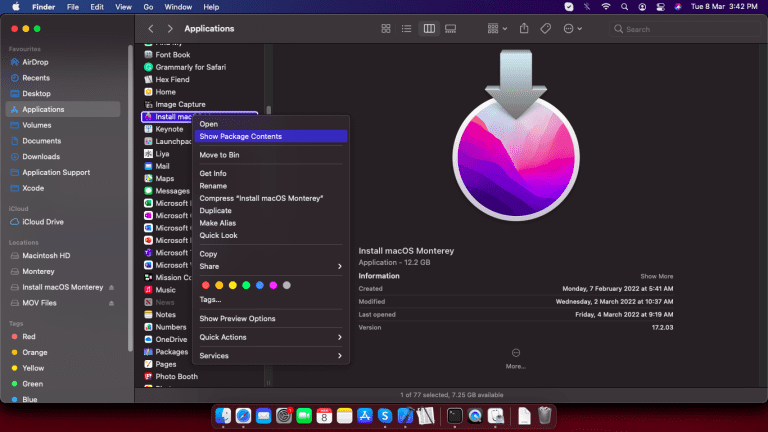
Step 8: Go to the location as shown below.
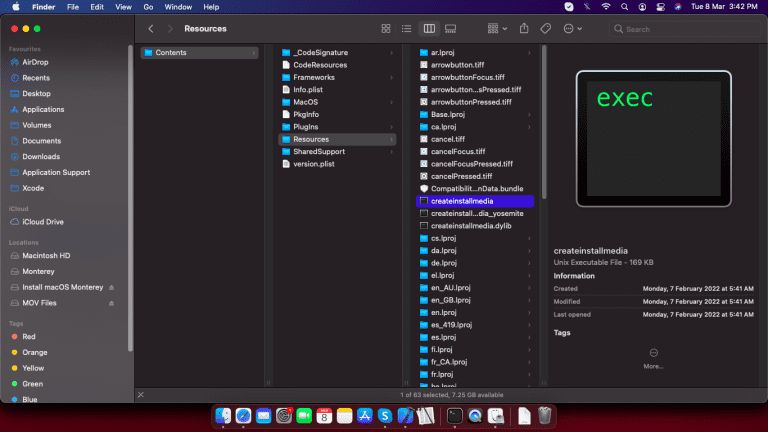
Step 9: Go to the terminal and type “sudo “, drag the “createInstallmedia” from finder, and drop it in the terminal.
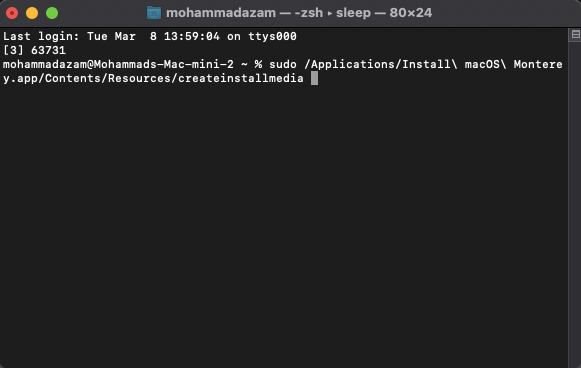
Step 10: Now add “--volume ” and then drag and drop the SD card from the finder in which you want to perform the bootable operation. The command, in the end, will be as follows.
“sudo /Applications/Install\ macOS\ Catalina.app/Contents/Resources/createinstallmedia --volume /Volumes/MyVolume”
Step 11: Press Enter and wait for it to complete.
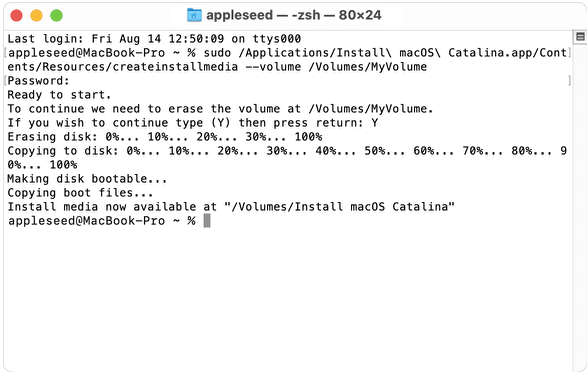
Once you perform the above steps, the command starts executing and then, makes the SD card bootable for Mac operating system.
How to make an SD card or USB drive Bootable for Windows?
The steps to make a bootable SD/ SDHC card on Windows 10 or its previous versions comprise similar steps. This involves the complete formatting of the SD card and then uploading the OS files to make a bootable SD card or SDHC card. Follow the below steps to make a bootable SD card or USB flash drive for Windows operating system.
Step 1: Connect the SD card or USB drive to your computer – make sure the SD card is empty and you do not have any valuable data on it.
Step 2: Go to the Start menu and type cmd and hit Enter, Click on Run as Administrator.
Step 3: Go to diskpart – To do that, go to the Start menu and type diskpart, and press Enter.
Step 4: In the new window, type; list disk – the window should be system32/diskpart.
Step 5: From the list of the disks that your computer has, look for your SD/SDHC card or USB. You can refer to the memory space of the disks to identify your SD card.
- Type; select disk X
- Note: X is the name of the disk you want to use i.e. the SD card.
- Type; Clean
- Type; Create Partition Primary
- Type; Active
- Type; Format Fs= NTFS Quick
- Type; Assign
- Type; Exit
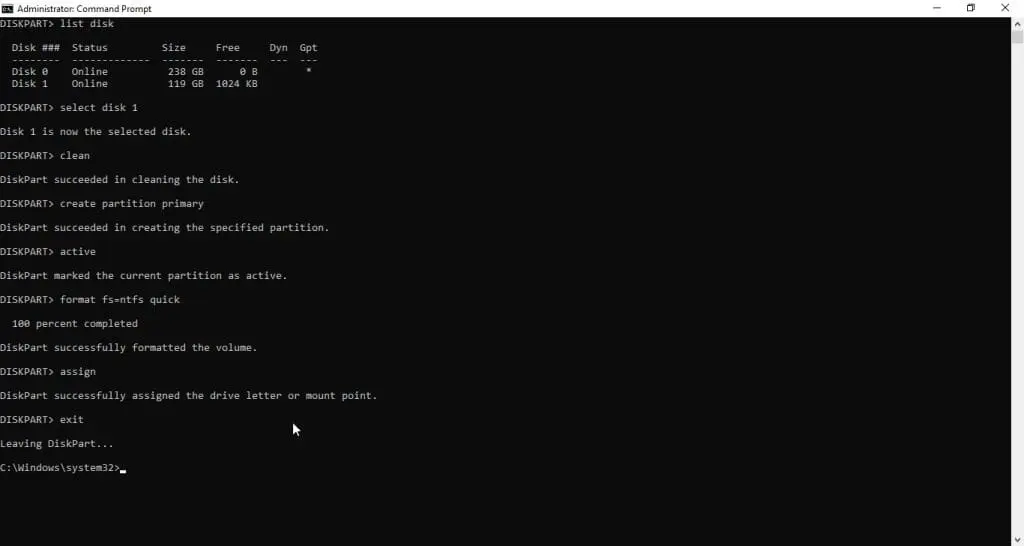
Step 6: Now, mount your ISO file of Windows – Right-click on the image and select Mount.
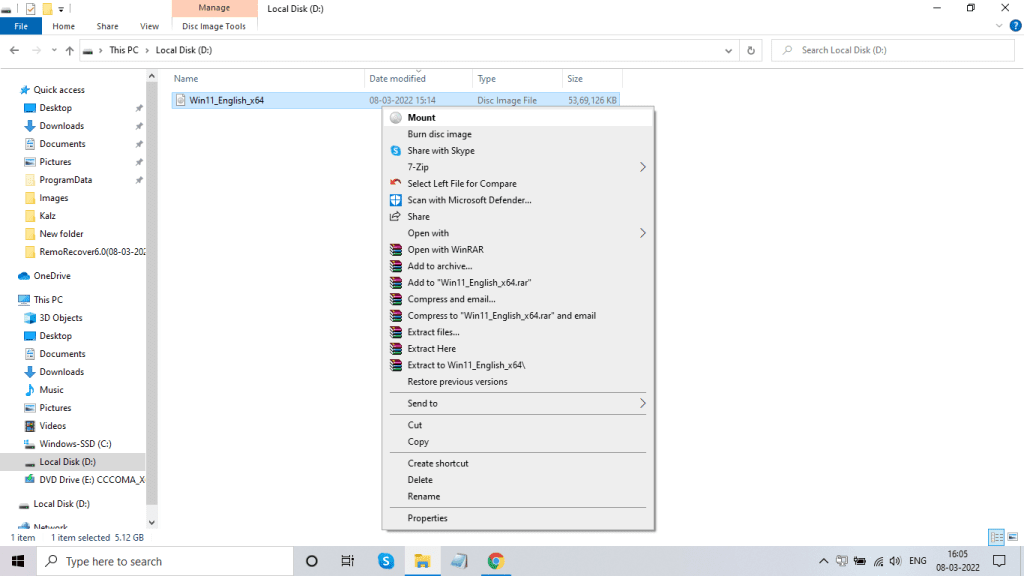
Step 7: Run the following commands:
- G: CD BOOT – G is the iso file drive letter.
- BOOTSECT.EXE/NT 60 F: – F is the SD card or USB drive letter.
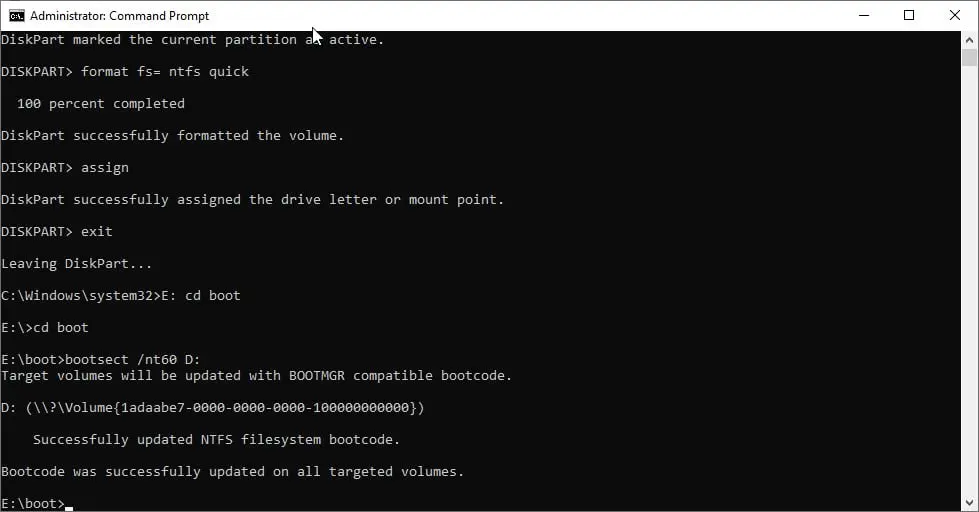
Step 8: Copy all the files from the ISO image to the memory card.
Step 9: Your SD/SDHC card is now in bootable mode. You can restart your computer and test the bootable SD/ SDHC card.
Note: Scroll down below if you want to learn the difference between SDHC and SDXC.
How to Recover Lost or Deleted Files from any Bootable SD card, SDHC card, or USB Drive?
Utilize Remo SD card Recovery software (Windows/ Mac) to easily recover data from a bootable, formatted, or corrupted memory card with ease. This tool works with a user-friendly interface to safely restore more than 500 file formats like photos, videos, raw images, documents, and audio files from various external storage devices like USB, external hard drives, SD cards, SDHC cards, and many more. This tool is compatible with all the latest versions of Windows and Mac operating systems, including Windows 11, 10, and Mac OS Ventura, Monterey, Big Sur, and Catalina.
Steps to restore data from a Bootable SD card
Download and Install Remo Recover on your computer to start recovering data from SD Card on Windows 10 or 11, and follow the steps mentioned below:
Step 1: Launch the tool. Connect your SD card. Select your bootable storage device from where you want to recover data. Hit the Scan button to start the scanning process.
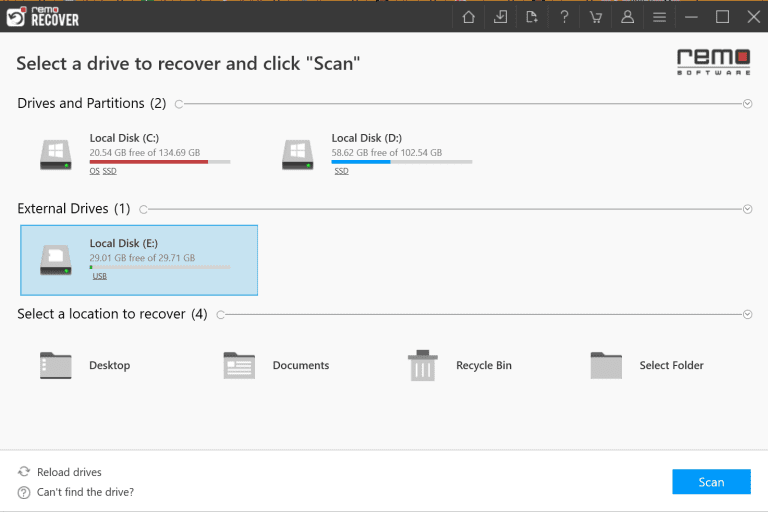
Step 2: Once the tool starts the scanning process, make use of Dynamic Recovery View to have a quick look at the recovered files as and when the scan progresses.
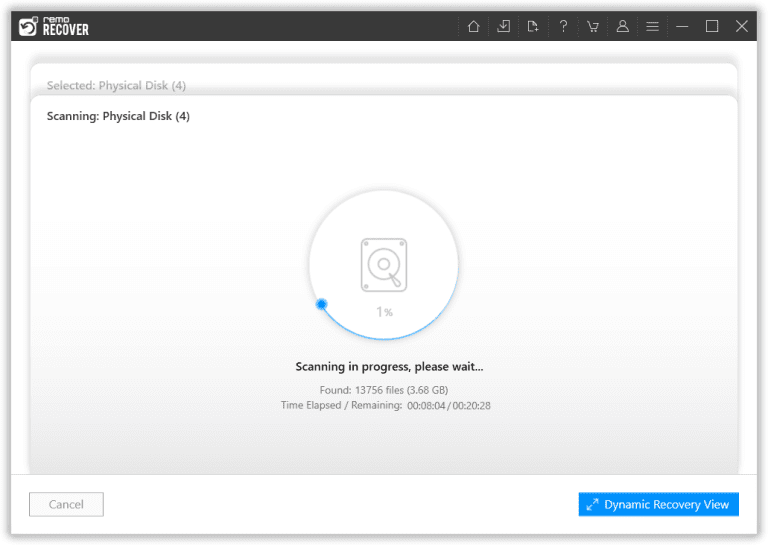
Step 3: When the scan is completed the tool will display a comprehensive list of recovered files.
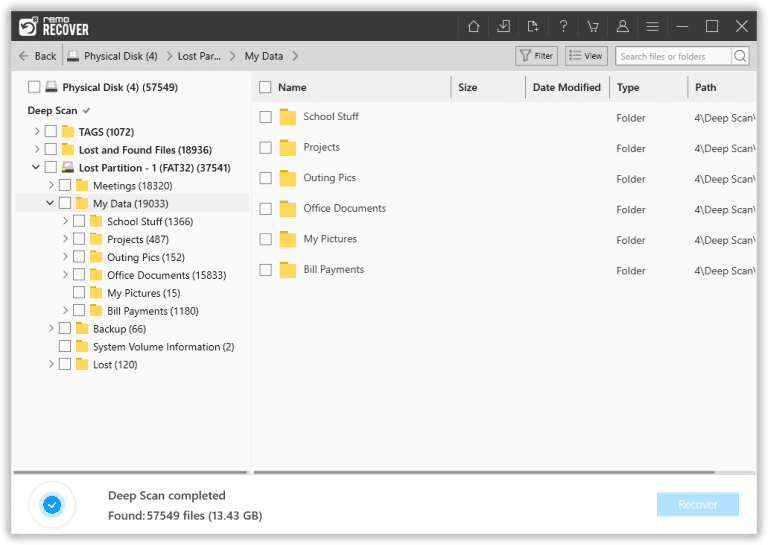
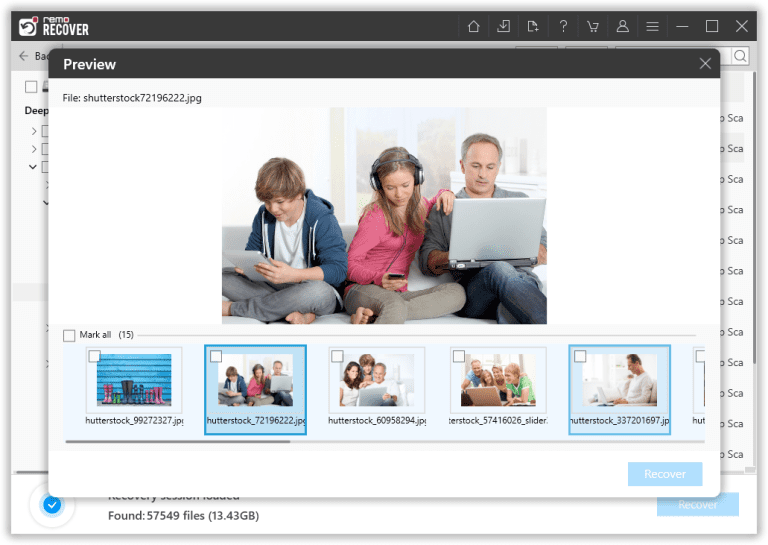
Step 4: Preview the recovered files by double-clicking on them.
Step 5: Select the files that you want to recover. Click on the Recover button. Decide on a location where you want to save the recovered files, and click on the OK button.
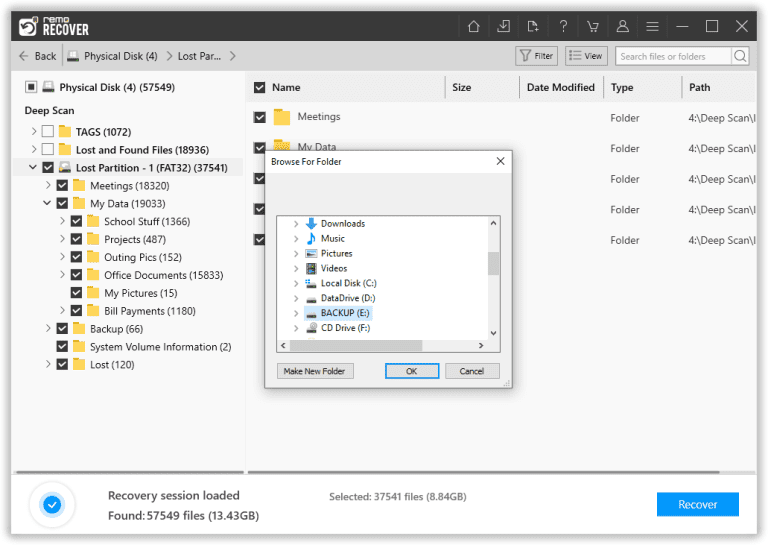
Step 6: Voila, the selected files have been successfully saved.

