As the number of cyber security threats is on the rise, it’s high time that we take security measures bit more seriously. Whether it’s personal or enterprise level, nobody is safe from cyber theft. One of the methods to safeguard is data encryption. To save your emails from snooping eyes, you need to encrypt/encode them. In this article, we’ll talk about what encryption is and how to encrypt your emails in MS Outlook and other personal accounts as well.
What Encryption of Emails Mean?
Encryption is a method of transforming your email info or data into codes that cannot be opened by unapproved people. To make it even simpler to understand, the best metaphor of encryption is that of a lock and key technique. To open a lock, you need a key similarly, to open an encrypted data you need an encryption key. It makes sense if we use the same mechanism for messaging as well. let us learn how to send encrypted emails to different email client servers.
Encrypt Emails in MS Outlook
Microsoft Outlook offers an inbuilt security feature. While writing an email, go to ‘File’ then ‘Properties’ and then click ‘Security Settings’ and check the box saying ‘Encrypt message contents and attachments’ and finally click OK. After you finish composing your email, click Send as usual.

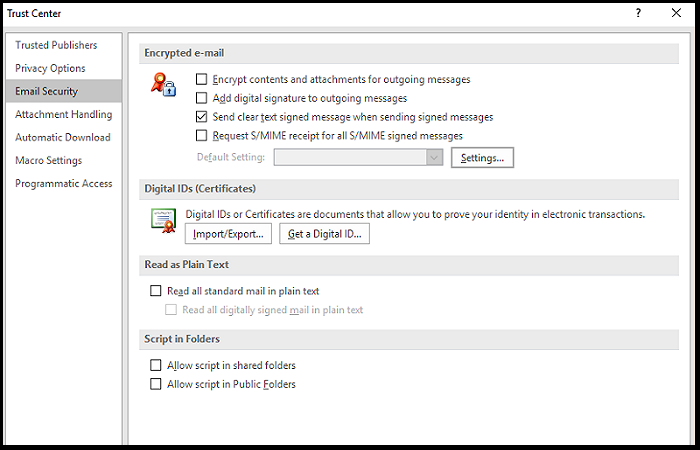
If you want all your outgoing emails to be encrypted, click on the ‘File’ tab then choose ‘Options’ in that select ‘Trust Center’ and then ‘Trust Center Settings’. Now to make every email message encrypted, click on ‘Email Security’ once the window opens. Now, check the box which reads as ‘Encrypt contents and attachments for outgoing messages’. You can even choose a specific Digital ID by heading over to Settings in the same window.
The recipient of the email should have matching Digital ID to access the emails. Else, they’ll see this notice:
“This item cannot be displayed in the Reading Pane. Open the item to read its contents”.
In spite of it, if they try to open they’ll see the below message:
"Sorry, we’re having trouble opening this item. This could be temporary, but if you see it again you might want to restart Outlook. Your Digital ID name cannot be found by the underlying security system".
Encrypt Emails Using Mailvelope
Mailvelope is a browser extension available for both Firefox and Chrome. You can even use it on Chromebook and Linux as well. What's more, it works both on Mac and Windows too. This is a very handy tool as it encrypts any email without the need to install different tool for a different email client.
To get started, download the app from Chrome or Firefox browser extension. After downloading, click the Mailvelope padlock.
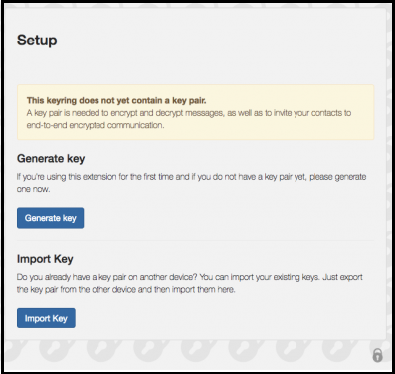
Now, you need to generate two sets of keys, for this, you have to click ‘Options’. Fill up the form by entering your details and submit. After that, your keys will be generated. Now, add that key on the ‘Keyring’ and use s2018 RSA encryption and higher. To set it higher, click Advanced and fill in your details and submit. Your keys will be created at this stage.
Once this is done, you have to download the keys and send to the recipients whom you want to give access to the encrypted emails. Safeguarding the keys is very crucial here, without which, the whole idea of encryption is a waste.
How to Compose Encrypted Emails
When it comes to writing an email, you and your recipients should have exchanged your public keys and also you have to get each other key by choosing Import Key. To get the key, you have to enter your recipient's public key in the small text box and press Import button.
Now, open your personal email and start writing as you do normally. While typing you’ll see a small logo on the right side. When you click on it, it will redirect to an encrypted messaging window. It also makes certain that all completed emails get saved in the drafts on your standard email client server.
If you receive an encrypted email just in case, hover the mouse pointer on the message and an icon of an envelope will appear. Enter the password when prompted and you are ready to go.
Conclusion:
Now you may securely share your confidential documents over the mail without the fear of being misused. While fiddling with your MS Outlook, in case you deleted or lost some important emails or other attributes, or your PST got corrupted remember that with the help of Remo Outlook repair tool you can easily fix the issue and retrieve all your data.