Adobe Photoshop is highly useful to edit and enhance images that are captured across various devices. Due to its high utility, the tool uses more resources from the computer such as memory (RAM) and storage. If you are working on a project, you might have come across an error stating” Could not initialize Photoshop because the scratch disks are full”. Read the complete article to know more about the error and the various ways to fix scratch disk error on Photoshop.
How do I fix this error in Photoshop cc 2019 which states" could not place because the scratch disks are full." I have done what is supposed to be done yet, this error keeps on popping up. My c drive is not yet full. Please help?
-User Query from Quora
Yes, you can try to fix the issue by simply attempting to end any unwanted background applications that might be active. This is not the only solution to fix this issue, there is more to it. In this article we will help you fix the issue i.e., “Scratch Disks are full”. Before we head to fix the issue let us understand what is a Scratch Disk?
What is a Scratch Disk?
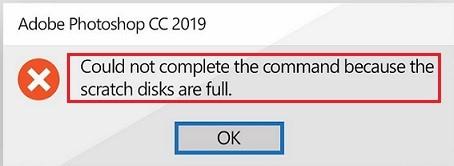
Scratch Disk is storage space on a hard disk that is used to store temporary files. It is a virtual memory used by Photoshop when there is insufficient memory space to run its operations. When the hard disk space is used up by the system, the amount of virtual memory needed by Photoshop reduces. Therefore, Photoshop returns an error message stating,” Could not complete the command because the scratch disks are full.”
How can you Set your Scratch Disk Preferences?
You can set the Scratch disk preference on your Computer.
Go to Photoshop go to Preferences from Edit and select the Scratch Disk.
Now you can Enable or Disable based on your preferences in the check box and select the OK.
Quick Tip: When using Photoshop, kindly look into the specifications for the smooth use of the application.
Photoshop System Requirements:
- For Photoshop desktop, there should be 6 GB of free space on a scratch disk. The available space that Photoshop considers in a scratch disk is the 6 GB deducted from the disk's existing free capacity, although this is the absolute minimum amount of space that Photoshop seeks to maintain free. Therefore, if your scratch disk has 10 GB of free space, Photoshop will only consider 4 GB of that space as available, which may or may not be sufficient for the current operation.
- You need at least 10 GB of scratch disk space for Photoshop (with default choices, brushes, patterns, etc.) if you only make minor changes. While working with Photoshop, it is advised that your OS hard drive has at least 20 GB of free space. Depending on the file format you're using, more free space might be needed.
- The size of the original file may need to be multiplied by the number of historical states if you make significant modifications to dense pixel layers (for example, by applying several filters to intricate background images or making numerous changes to sizable smart objects).
Follow the below table to find the other System Requirements for avoiding the error ”could not initialize photoshop because the scratch disks are full”.
1) For Windows:
| System Requirements for Photoshop on Windows | Minimal Requirements | Recommended Requirements |
| Processor | 2 GHz or faster multicore Intel or AMD processor with 64-bit capability and SSE 4.2 or later | 2 GHz or faster multicore Intel or AMD processor with 64-bit capability and SSE 4.2 or later |
| Operating System | preferably Windows 10 64-bit (version 20H2); Versions of LTSC are not supported. | preferably Windows 10 64-bit (version 20H2); Versions of LTSC are not supported. |
| RAM | 8GB | 16GB |
| Graphic Card | - GPU that supports DirectX12 - GPU memory of 1.5 GB | - Processor that supports DirectX12 - 4 GB of GPU memory |
| Hard Disk Space | 20 GB | 50 GB |
1) For macOS:
| System Requirements for Photoshop on Windows | Minimal Requirements | Recommended Requirements |
| Processor | 2 GHz or higher multicore Intel processor with SSE 4.2 or later and 64-bit support | 2 GHz or higher multicore Intel processor with SSE 4.2 or later and 64-bit support |
| Operating System | macOS Big Sur (11.0) or newer is required. | macOS Big Sur (version 11) or newer. |
| RAM | 8GB | 16GB |
| Graphic Card | GPU memory of 1.5 GB | GPU memory of 4 GB |
| Hard Disk Space | 20 GB | 50 GB |
How Do I Clear the Scratch Disk in Photoshop?
What are the Reasons for Photo Scratch Disk Error?
The Photoshop scratch disk refers to an issue on your hard disk. The following reasons could majorly impact the Photoshop Scratch Disk Error.
- Poor RAM speed
- Insufficient storage space
- Abrupt shutting down of Photoshop while editing an image or while using it
- Virus intrusion or malfunctioning of Photoshop applications may also lead to this error in rare cases.
Nevertheless, if you have encountered the above-mentioned scenario and are wondering how to repair the Photoshop Scratch Disk error, the following section is for you. In the below section, you have multiple solutions to solve the Photoshop Scratch Disk error effortlessly.
Free the Available Disk Space:
When Photoshop shows an error message that the scratch disk is full, one easy method to clear a scratch disk is by deleting some unused files on the drive where Photoshop is installed. This will ensure that the application has sufficient virtual memory space available to run the program.
Clear Photoshop Cache:
Clearing Photoshop's cookies is another choice. All of the data Photoshop has collected about your document—layers, routes, etc.—is kept here. To clear the Photoshop cache, you can click on Edit>Purge>All to empty the Photoshop storage. Before doing this, you should save all of your files because you won't be able to undo the changes after purging.
Increase the Memory Limit on Photoshop:

The computer usually limits the amount of RAM used by the Photoshop application. However, by increasing the memory limit, Photoshop will have enough space to work with.
- Open Photoshop application
- Click on Edit and navigate to Preferences > Performance
- In the performance, the window adjusts the memory usage slider to 80%
Note: There can be scenarios where Photoshop files are lost due to accidental deletion or unsaved files goes missing due to application crash. In case if you have lost any Photoshop files in similar fashion, you can refer this article on how to recover deleted or unsaved Photoshop files.
Clear Values Of Photoshop Crop Tool:
When cropping an image in Adobe Photoshop, if you get the scratch disk message, it's probably because the crop tool's internal unit values are off. Clear the settings in the Options section to resolve this problem.
Change the Location of the Scratch Disk:
If you are unable to clear storage space on the drive where the scratch disk is present, you can relocate it to a different storage drive. By doing so, you will be able to give more virtual space for the application to run the programs.
- As you launch Photoshop, click on CTRL + Alt simultaneously
- In the Scratch Disk Preference, specify the scratch disk that has sufficient space.
- Click on OK to and continue using the Photoshop application.
Erase Temporary Files:
At times you are unable to open PSD files on Photoshop because the scratch disk is full. The usable virtual memory space for Photoshop can be increased by deleting the temporary files on the drive. Here is how you can do it.
- Press the Windows + R key simultaneously
- Type %temp% and click OK
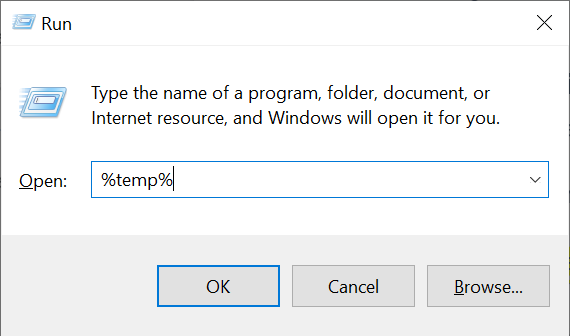
- In the Temp folder, select all the files and press the Shift + Delete key
- Click on Skip if you are unable to delete some files
After clearing the temporary files, Photoshop will have enough space to open and use the PSD file.
Create Separate Disk Partition:
You can create separate disk space for your Scratch disk if the drive has only one partition.
- Click on the Start menu and type Disk Management in the search box and click on the result
- In Disk Management, click on the C drive and select Shrink Volume.
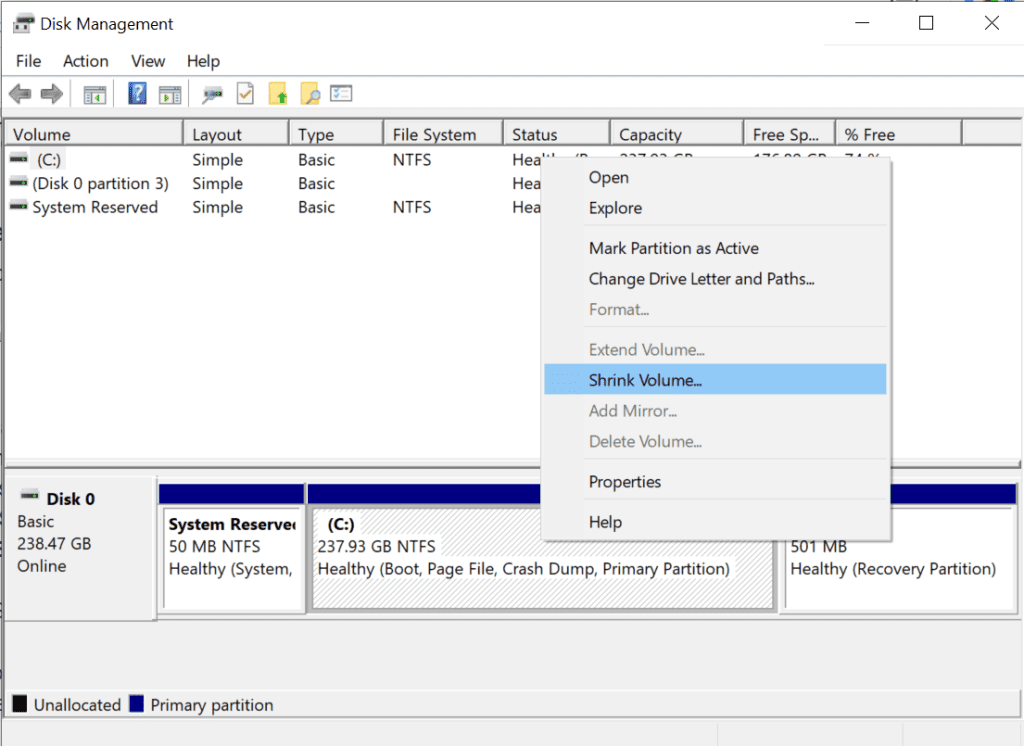
- From the Disk Management Window, right-click on the unallocated space and select New Simple Volume
- In the New Simple Volume wizard, assign a drive letter to the new unallocated space and click on Next
- Select NTFS as a file system, set the allocation unit size as default, and click on Next.
- Next, click on Finish to create the new partition
- After the creation of the partition, start Photoshop and press Control + Alt
- Now, select the newly created partition as your Scratch Disk
How to Fix ‘Could Not Initialize Photoshop Because the Scratch Disks are Full’ Error on Mac?
Choose suitable drives for the Scratch disk
Photoshop utilizes your internal OS device by default as its scratch disk. Choose the quickest drive with the most space as your scratch disk if you have more than one drive or partition (s). A "scratch disk full" error can also be fixed by choosing additional drives to serve as a scratch disk.
When you are launching the Photoshop program, hold down the Cmd and Option keys on a Mac and choose a fresh scratch disk for your Mac computer.
Maximize the Area that Photoshop Occupies
- Disable Automatically Save Recovery Information: By turning off the "Automatically Save Recovery Information" option, you can decrease the size of Photoshop's temporary file (scratch) at the cost of losing auto-recovery:
To do so, follow the steps: Go to Photoshop and then navigate to the Preferences and select Automatically Save Recovery Information from the File Handling option.
- Minimise History States: The maximum amount of history states that Photoshop can save is 1,000; the default is 50. Go to the Performance preference dialogue to lower that figure. Set the number of History States to a lesser number in the History & Cache section.
Reset the Photoshop Settings
Photoshop's preference file may occasionally become corrupt during system or Photoshop crashes, which may affect how Photoshop handles scratch disks. Changing the scratch disk settings after resetting Photoshop's preferences may help fix "scratch disk full" errors.
If you still come across the Photoshop error and if the error is persistently popping up even after trying all the above-listed methods, then the probable reason would be due to the corruption of the Photoshop file. In such cases, you will need a reliable PSD Repair tool to fix the severely corrupted PSD files.
Remo PSD repair tool is one such application which can effortlessly fix the photoshop scratch disk error and corruption of an file without any hassle. The tool is integrated with advanced repair algorithms to repair damaged or corrupted PSD files effortlessly. Download now and fix the corruption on your Photoshop.
Conclusion
Scratch disk error is one of the commonly occurring problems while using a Photoshop application. Such situations can be avoided in the future by regularly deleting the temporary folders in the dive. This will ensure that Photoshop will have enough space to run its programs utilizing the scratch disk. However, if you still come across a scratch disk error, the above-mentioned steps will help you troubleshoot the issue.