What is an IDM file?
Internet Download Manager is a tool that helps manage and schedule downloading files like images, videos, or any files from the internet. This tool can help you resume or recover paused downloads due to issues like network interruptions, power outages, and many more. However, sometimes you experience issues with the Internet download manager where you will not find the downloaded files, and you will see errors like the one mentioned below.

While trying to access a file from IDM (Internet Download Manager), you might have encountered this error message saying, “The file has been moved” error. Even after trying to find and restore the file on your PC, you failed to restore the moved file from IDM. Moreover, you also might not know what caused this. Well! no worries, it sometimes happens without any specific reason.
IDM says, "The file has been moved" How can I find my downloaded file that has been moved?
Fortunately, you can recover the downloaded files moved from or by IDM. In this section, we have listed five techniques to help you move your file back from IDM. Regardless of the reason, you can use manual methods or professional tools like the Remo File Recovery Tool to easily restore a file that is moved from Internet Download Manager from all versions of Windows.
- What is an IDM file?
- IDM says, "The file has been moved" How can I find my downloaded file that has been moved?
- Method 1: Find the Downloaded Files in Your Computer
- Method 2: Search for the Downloaded Files in Other Locations
- Method 3: Restore Incomplete Downloaded Files From Temporary Directory by Internet Download Manager
- Method 4: Recover Internet Download Manager Deleted Files From Windows Recycle Bin
- Method 5: Recover Deleted or Moved IDM Files Using a Professional File Recovery Tool
- Steps To Recover Files Moved From Internet Download Manager or IDM Using Remo File Recovery Software
Method 1: Find the Downloaded Files in Your Computer
All downloaded files will be saved in your Windows system's Downloads folder by default.
Check if the completely downloaded files reside in your system's Downloads folder.
- Navigate to the Downloads folder, and try to find the files.
If you have not found those files, you might have changed the location where you want to save the Downloaded files, or you might have also deleted the files residing in the Downloads folder.
You can follow this article to learn how to recover deleted files from the Downloads folder.
Method 2: Search for the Downloaded Files in Other Locations
Internet Download Manager lets you change the location of the Downloaded files; as mentioned earlier, you might have changed the default location of the downloaded files, after which any files you downloaded from the Internet were saved in another location rather than the Downloads folder.
Follow the steps to check the location where your downloaded files using Internet Download Manager are saved.
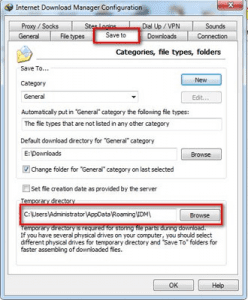
- Open Internet Download Manager on your PC; from the top options menu, click on the Downloads, followed by clicking on the Options menu.
- In the Configuration windows, click on the Save to tab.
- Now that you know the location where your files are getting saved.
- Navigate to the folder or the location and try to find the downloaded files.
Method 3: Restore Incomplete Downloaded Files From Temporary Directory by Internet Download Manager
IDM is a tool that helps to download images, music, video, link, etc., from the Internet. It has a very simple user graphic interface and increases the downloading speed multiple times compared to a normal download. But you might face issues with this application, like accidental deletion of files, program crashes, etc, that can move your files. Follow the below-mentioned steps to restore the files from IDM that were moved manually.
- Open Internet Download Manager on your PC.
- Click on Downloads. Navigate to Options > Save to > Temporary directory.
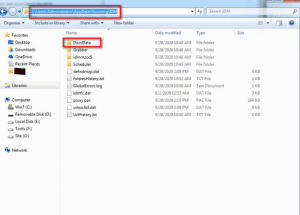
- Copy the directory address, paste it to the windows explorer address, and hit Enter.
- Now, look for the "DwnlData" folder. Double-click on it and then open the Administrator folder.
- And then, open each file using "open with" until you find the required file.
- After finding the required file, navigate to Menubar > Tools > View.
- Deselect the "uncheck and hide extensions for known file types."
- Again go back to your file and RENAME the file. This step ensures that your file will not be moved again.
Hopefully, this method will help you in recovering files from IDM. But what if your file is completely deleted from the system? This can happen when you remove files from the IDM list and select deleting completely downloaded files from your hard disk in the prompt.
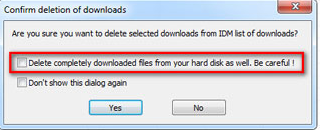
If you have selected this option earlier, the source files will be erased, and manual restoration of files from IDM will be impossible.
Method 4: Recover Internet Download Manager Deleted Files From Windows Recycle Bin
The downloaded files that were deleted by accident or IDM might end up in the Bin folder of your Windows system.
Do check your Recycle Bin, Go to the Bin folder, and try to locate the downloaded files. If you have found those files, select the files you want to pull back, right-click, and click on the Restore option from the options menu.
If this manual method doesn’t help you move the required IDM file, or you have deleted files from the Bin folder, you must use a professional downloads file recovery tool.
Method 5: Recover Deleted or Moved IDM Files Using a Professional File Recovery Tool
Remo File Recovery Tool is one of the best data recovery tools currently available in the market.
The tool’s powerful drive scanning algorithms are built to identify and recover over 500 file types, including Images, Videos, Audio files, PDFs, and Documents. The tool is thoughtfully built to be solution-oriented rather than situation-oriented, irrespective of how and why you have lost your downloaded files. With Remo recovering those files becomes child’s play!!!
Download the tool and start recovering the files moved from Internet Download Manager.
Steps To Recover Files Moved From Internet Download Manager or IDM Using Remo File Recovery Software
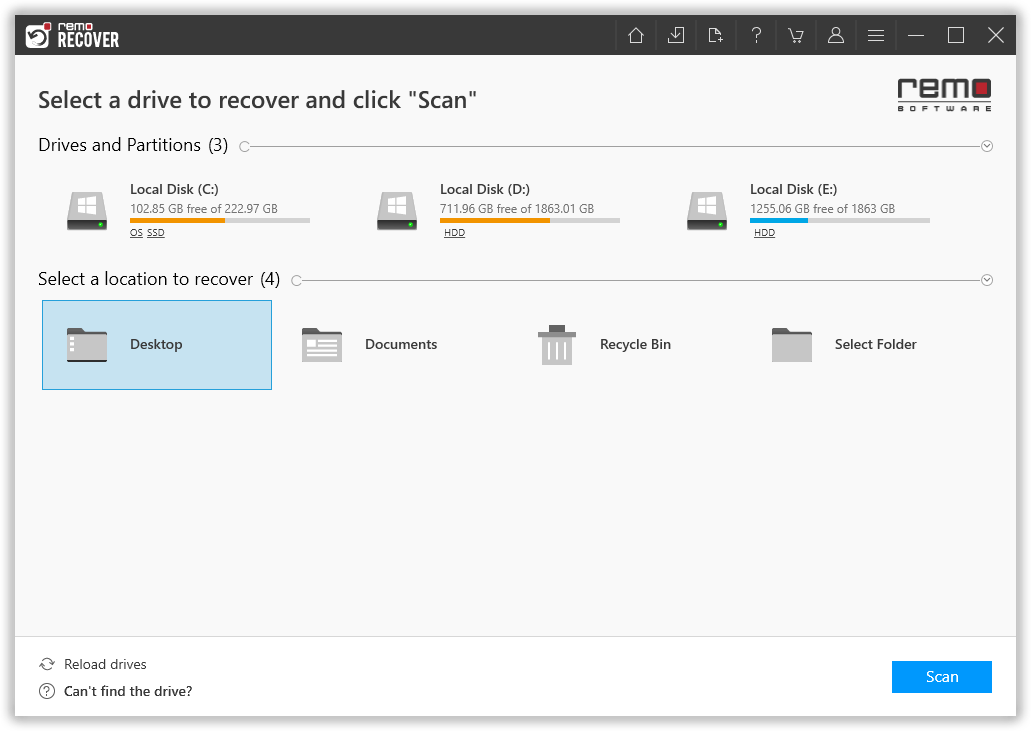
- Download and install the Remo File Recovery Software and start the IDM moved file recovery process.
- Select the deleted IDM files' location or drive and click the Scan button.
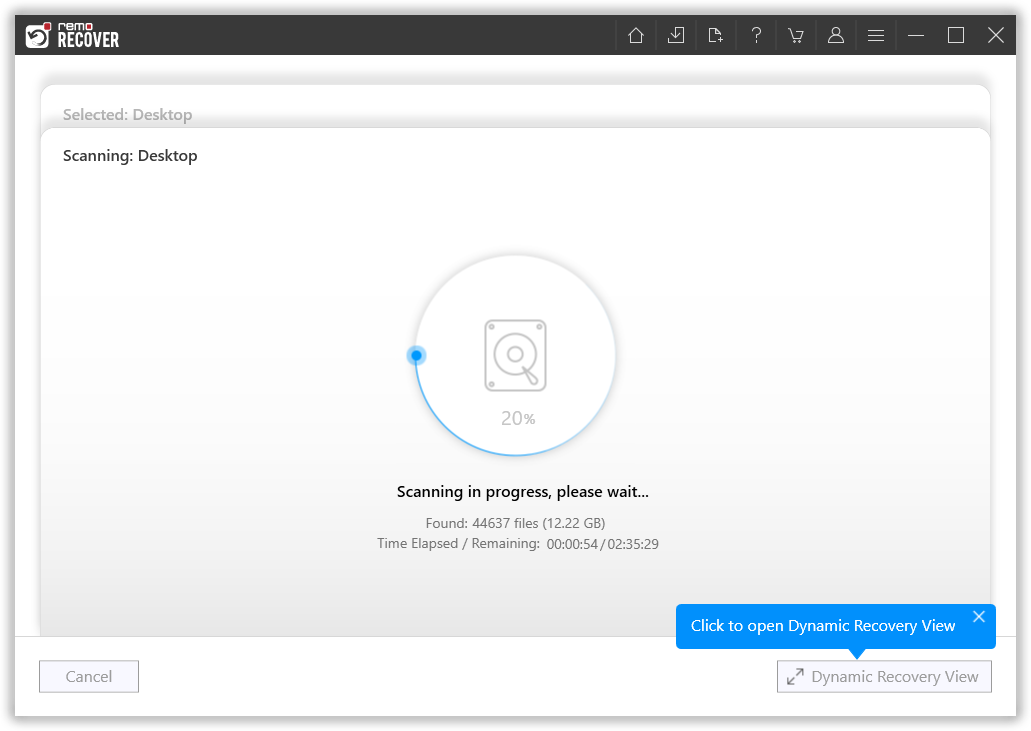
- The tool will automatically run Quick Scan; once the scan is complete, it will run the Deep Scan, which dives deeper to scan the drive sector by sector. (You can simultaneously recover with the Dynamic Recovery View option while the scan runs).
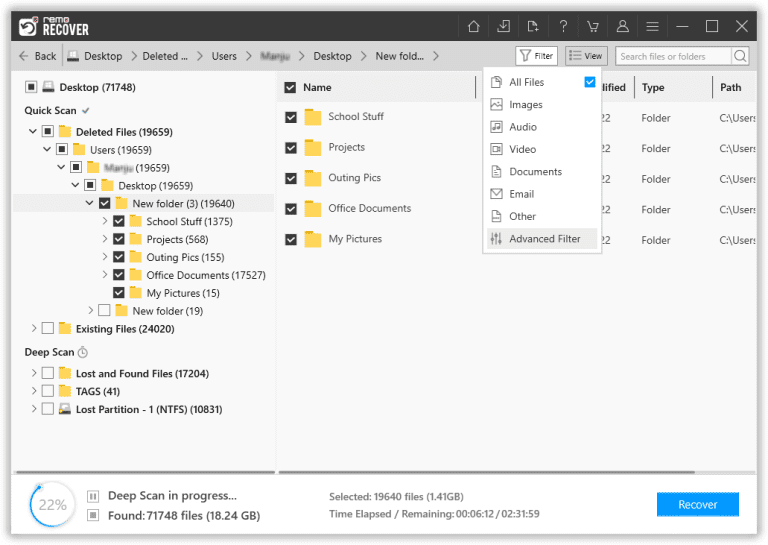
- The tool will display the recovered files on your screen; you can use the Advanced Filter option to sort out the IDM files easily.
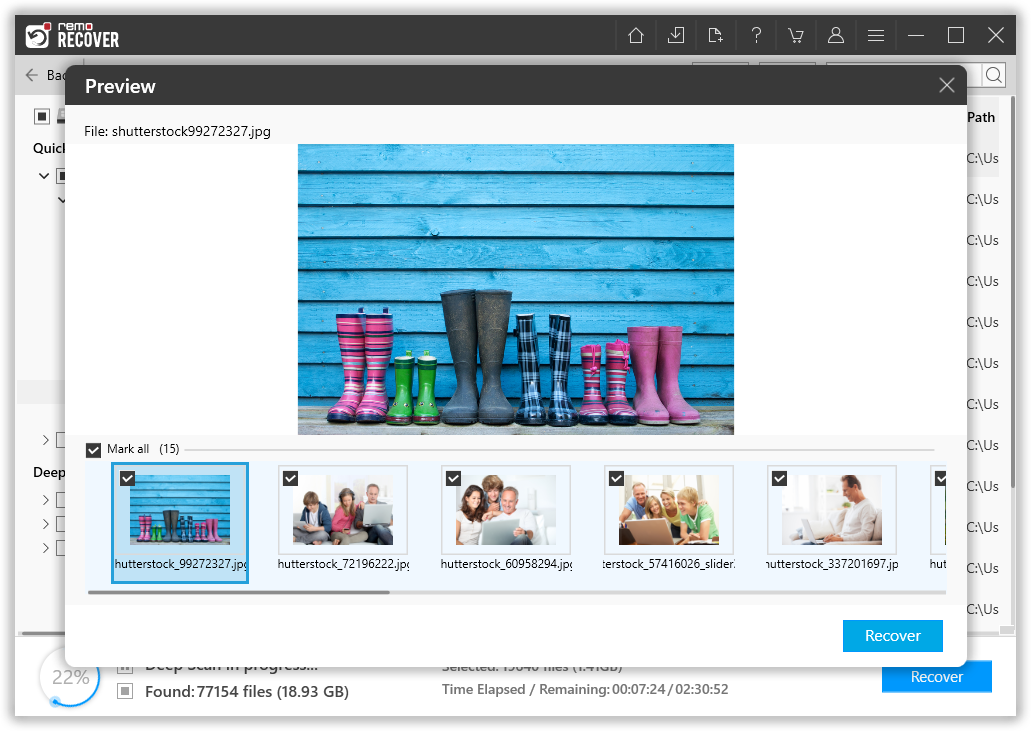
- After the scan is completed, you can Preview all the listed files from the selected location.
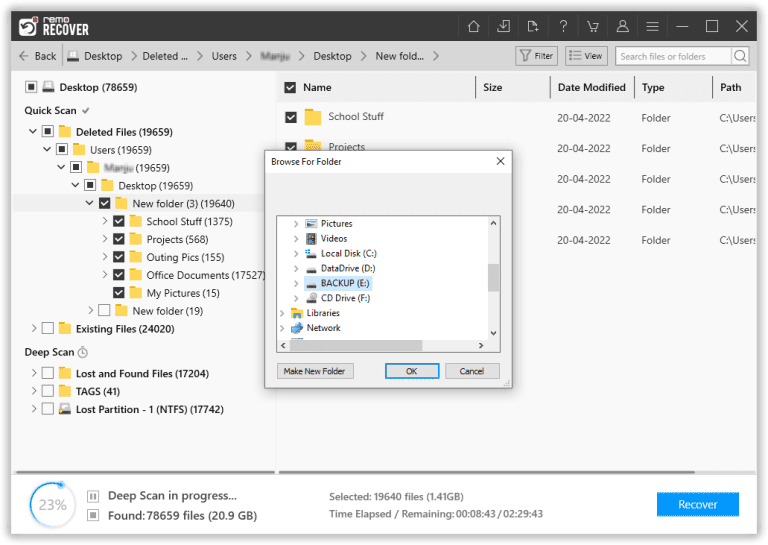
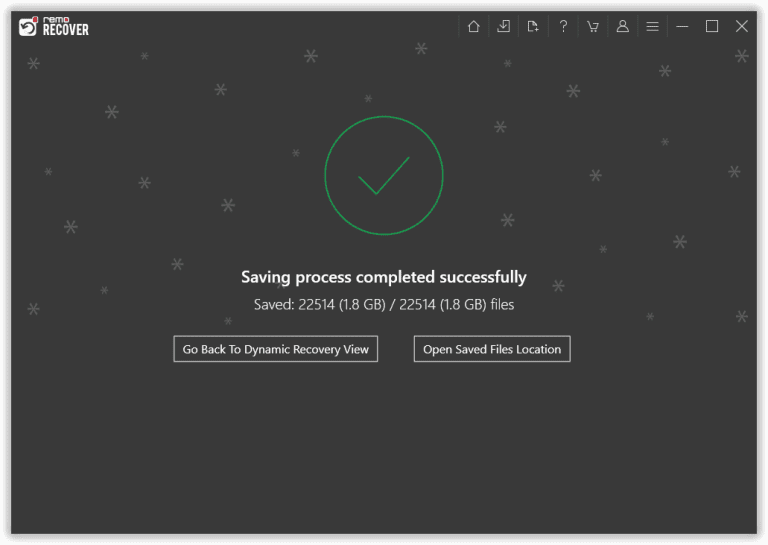
- Select the deleted or lost IDM folder or files you want to recover from the drive and click Recover. Browse for a location to save the recovered data.
Remo will restore the files moved from the IDM to your desired location. You can view and use the downloaded files after completing the data restoration process.
Conclusion
Internet Download Manager is undoubtedly one of the world's best and most widely used Download Manager, with more than 60 million monthly active users (Based on various reports).
One of the most common issues with the tool is, at times, IDM moves the downloaded files. Leaving the users furiously searching “How to recover Files Moved from IDM?”. With this article, we have tried to answer that question. To sum it up, the solutions mentioned in this article include. Finding the files in the Downloads folder, finding the files in other locations you might have saved as a new location to store the downloaded files; we have also explained how to find and restore the fragments of incompletely downloaded files. The Recycle Bin or specialized tools like Remo File Recovery Software would surely help if these solutions were useless.