Are you wondering how to fix a corrupted recycle bin? Usually, when a Recycle bin is corrupted, you encounter the error message “The recycle bin on C: is corrupted. Do you want to empty the recycle bin?".
If you come across a situation like this, it is important for you to understand that you will not be able to empty the Recycle Bin or erase any particular file completely.
Even if you are attempting to restore the temporarily deleted files from the bin, the error makes it impossible for the temporarily deleted files to be recovered.
This error will show up to indicate that the Recycle Bin is corrupted whenever you try to access the Recycle bin. Fortunately, this article will help you understand how to fix a corrupted recycle bin in Windows 10, 8, or any other version.
If the case, you delete or lose some of your C Drive files, then go through this article to recover C Drive files from any version of Windows OS.
- What Triggers Windows Recycle Bin Corruption Issue?
- How to Repair a Corrupted Recycle Bin?
- Method 1. Run Windows Defender To Repair the Corrupted Recycle Bin on Windows 10
- Method 2: Reinstall the Recycle Bin to Fix Corrupt Recycle Bin
- Method 3: Reset The Corrupt Recycle Bin Using Command Prompt
- Method 4. Restore the system to a Previous Working Point
- Method 5. Use CHKDSK to Repair Minor Issues in the Recycle Bin
- How to Recover Files From The Corrupted Recycle Bin on Windows 11/10/8/7?
What Triggers Windows Recycle Bin Corruption Issue?
Recycle Bin corruption can happen in various ways; below-mentioned are a few of the causes.
- DLL system error or corruption in the system files: Dynamic link library is a necessary component of a particular program or application. This library consists of files that are necessary for the basic functioning of any program. Without the respective .dll files, even Recycle Bin cannot run properly.
- Incompatible BIOS: BIOS updates are mandatory for the smooth operation of any system; if you have an incompatible BIOS, it can result in the corruption of the Recycle bin.
- Outdated drivers: Improperly configured, damaged, or outdated drivers can result in the corruption of the Recycle bin.
In the section below, let us understand the hassle-free methods how to fix corrupted recycle bins. In case you accidentally delete or lose files from the Bin folder, then you can try some of the solutions mentioned in this article to recover files deleted from the Recycle Bin.
How to Repair a Corrupted Recycle Bin?
The below section has two methods that will help you fix the corrupted recycle bin
Method 1. Run Windows Defender To Repair the Corrupted Recycle Bin on Windows 10
Data corruption is frequently caused by malware and other types of viruses, so it's a good idea to search your computer for malware to make sure it hasn't already been infected before implementing any other solutions.
Launching Windows Defender to search for malware is simple if you're running Windows 10:
- Step 1: Do a "Windows security" search in the Start menu.
- Step 2: Choose the relevant choice.
- Step 3: Click Scan settings after selecting Virus & Threat Protection.
- Step 4: Select Full Scan, then hit the Scan button.
Method 2: Reinstall the Recycle Bin to Fix Corrupt Recycle Bin
- 1. Open Control Panel, Go to the file explorer option.
- 2. Click on the View Tab option.
- 3. Uncheck system-protected operating files and Open each drive/partition.
- 4. You will see bin and recycle.bin (permissions).
- 5. Delete permissions on each drive.
- 6. Restart the computer and Right-click on Desktop.
- 7. Choose the Personalize option and Click on Themes.
- 8. Select Desktop Icon settings from Related Settings.
- 9. Select the checkbox Recycle Bin.
- Click on Apply button and then tap OK.
Method 3: Reset The Corrupt Recycle Bin Using Command Prompt
- Open Command Prompt; you can right-click the Start menu and then choose Command Prompt (Admin).
- Type rd /s /q C: \$Recycle.bin and press Enter.
Note: Replace the letter “C” with your primary partition letters accordingly and restart the computer.
In case the above method fails to fix the corrupted recycle bin, then follow the methodology mentioned below to fix the corrupted Recycle bin.
Note: You can go through this article to find out what is Command Prompt and what more can you do using the Command Prompt.
Method 4. Restore the system to a Previous Working Point
System Restore Points offer a practical method for returning a machine to its previous state. When a serious issue arises following the installation of a flawed driver, the unsuccessful installation of OS updates, or the erroneous modification of system settings, to name a few examples, this capability is quite helpful.
Restore your Windows 11/10/8/7 PC from a System Restore Point using the steps mentioned below:
- Search "make a restore point" in the Start menu.
- Select the relevant choice.
- In the System Properties window, click the System Restore button.
- Select your restore point, then click the Next button a second time.
- Click on the Finish button to confirm your restore point.
Method 5. Use CHKDSK to Repair Minor Issues in the Recycle Bin
Check Disk can be used to find, detect, and fix any minor issues with the internal and external storage devices.
Here’s how you can use the chkdsk command to repair the corrupted Recycle Bin.
- Select Windows PowerShell by pressing Win + X. (Admin).
- Type the following command and press Enter: chkdsk X: /R (be sure to substitute X with the letter designated to the corrupted drive).
- Restart your computer after CHKDSK has been completed.
After fixing the troubleshooting issues in the Recycle Bin, you will be able to access it effortlessly. But during the process of repairing the corrupted Recycle Bin, the deleted data residing on the bin might be permanently erased, including your accidentally deleted files.
How to Recover Files From The Corrupted Recycle Bin on Windows 11/10/8/7?
Remo Recover is a best-in-class file recovery software that can recover lost or deleted data from the Recycle Bin effortlessly. The tool is programmed with advanced scanning algorithms that can easily retrieve data of any file format from the Recycle Bin. By following the simple steps in the section below, you can restore the required files effortlessly.
Steps to Recover Files from Corrupted Recycle Bin
- Download and install and install Remo Recover 6.0
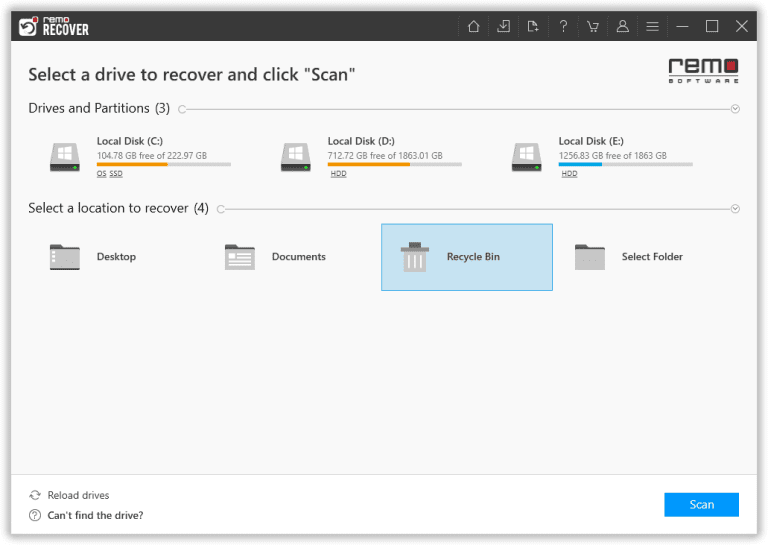
- Choose the preferred location recovery – Recycle Bin from which you want to recover data and click on the Scan button.
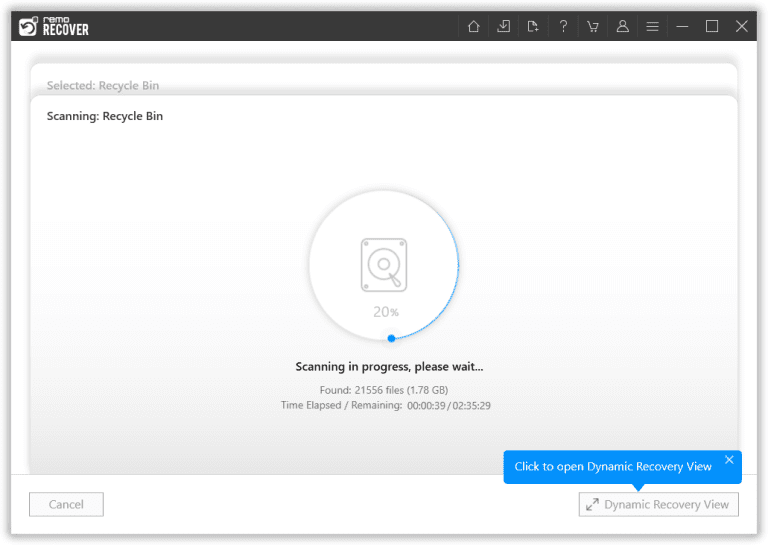
- The tool will automatically initiate Quick Scan. Once the Quick Scan is completed, the tool runs Deep Scan, where it restores data sector by sector. Open the Dynamic Recovery View to easily recover the files simultaneously while the Deep Scan is running.
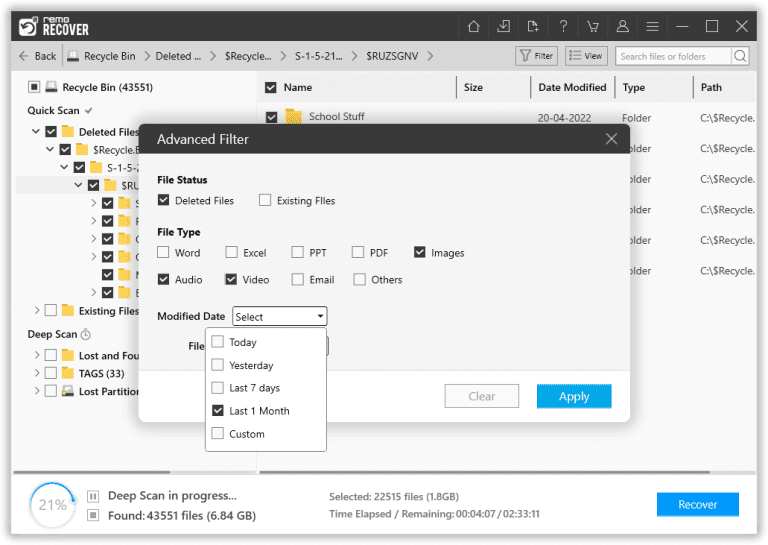
- You can also search for the specific file format in the search bar with the Advanced Filter option.
- After the Recycle Bin is scanned, the recovered data will be presented to you, which can be Previewed.

- Choose the files from the recycle bin, and click on the Recover button. Browse for a location to save the recovered data.