Your computer screen may return a bluescreen error, the operating system may take a long time to boot, the system is too slow in displaying files, or applications that you are trying to access, or you are getting error messages, etc.
These are all the signs that a system might crash or the hard drive is about to die. So it is advised to have a backup of important files especially when you start experiencing such situations.
But system crashes are known to be abrupt and disastrous. If you happen to encounter a disastrous situation where your operating system has crashed, the data residing on the disk becomes completely inaccessible or lost.
It might keep you wondering about a way to recover files from crashed Windows 7, 8, 10, 11, or any other Windows version you’re using
Fortunately, this article guides you with simple methods to handle the drive data recovery from a crashed computer effortlessly. But let us first understand the reasons for the system crash;
Table Of Contents
- What are the causes of an Operating System Crash?
- How to Recover Data from Crashed Windows System
- Steps to Recover Data from Crashed Windows Using Remo Recover
- How to avoid System Crash in the Future
What are the causes of an Operating System Crash?
- Hardware driver conflict
- Corrupt Windows registry
- Physical damage
- Overheating of the system
- Application malfunction
- Corrupted BIOS
- Virus or malware
- Issues related to motherboard or memory
How to Recover Data from Crashed Windows System?
The possibility of data recovery after a system crash depends upon the cause of data loss. If you have lost unsaved data while working on a file and document, you can try to find the files, if the application has an autosave function. If old or existing files or folders have disappeared after a Windows crash you will need a reliable data recovery tool.
Once the operating system crashes and turns inaccessible, you can try to boot the system using safe mode. However, through safe mode and system restore you will only be able to boot the operating system and restore Windows files and settings. Let us know how you can boot Windows in Safe Mode…
Boot the Crashed Windows Computer using Safe Mode:
In the case of a system crash, follow the below methods to boot the operating system.
Method 1: Run safe mode
Safe mode is a diagnostic mode in Windows-based computers. When in Safe Mode the Windows OS loads with default drivers and applications only. This takes care of system crashes that happen due to corruption, driver errors, or malware infection.
- Start your computer, and press the F8 key repeatedly before showing the Windows logo.
- Under the Advanced Boot Options window, select Safe Mode.
- Shut down and restart the computer, then see if the problem is solved.
Note: The function key in this case "F8" can vary depending on the computer manufacturer.
Method 2: Perform System Restore in Safe Mode
System restore can recover your computer to an early date, including Windows files and settings. If your computer crash is due to registry errors, driver conflicts, or OS errors, you can try to perform a system restore in safe mode.
- Start your computer in Safe Mode.
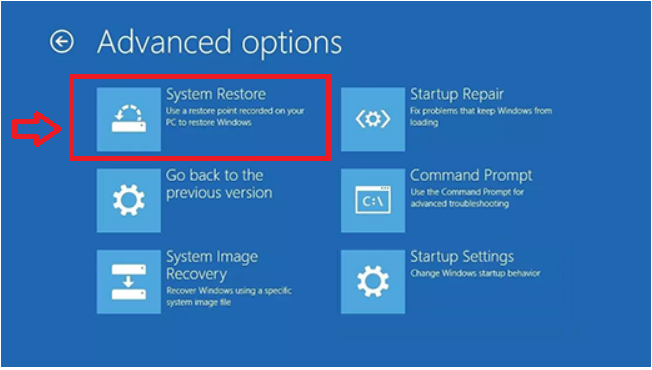
- Summon the system restore Window. You can click Start menu > All Programs > Accessories > System Tools > System Restore.

- Choose a restore point and click Next. In this window, you should check the recommended restore date. But if the restore point is not working as expected, you can still choose a different restore point/date.
- Confirm the settings are correct and click Finish.
Note: The method mentioned can only be implemented only if you are able to boot your operating system with safe mode. If the above methodologies do not work out for you, don’t panic. Follow the steps mentioned below to retrieve lost data after a computer crash.
Method 3: Recover Data from Crashed Windows using a Data Recovery Tool
Remo Recover is a reliable File recovery tool that can restore lost data from the system after a crash effortlessly. This tool can easily recover your data from crashed windows. Remo Recover works effortlessly on all versions of Windows such as Windows 7, 8, 9, 10, 11, etc.
"I reached out to Remo Support to assist with recovering deleted files. I have nothing but good words to express the level of support. Matt, Tim and Nick, and others that assisted always followed up with me to ensure I was making progress. Remo provides some of the best support I have received and I will continue to recommend Remo Recovery in the future."-Bobby Moffett September 15, 2022
Source: Trustpilot
Remo Recover tool recovers data from various storage mediums such as flash memory cards, external USB drives, hard disks, etc. Files from FAT16, FAT32, NTFS, exFAT, and many more file systems can be recovered in a short time.
Steps to Recover Data from a Crashed Windows using Remo Recover:
To recover files after a system crash, you need a USB cable, a storage device like a USB flash drive or CD/DVD, and a working computer.
- Download Remo Recover software and install it on your system.
- Remove your drive from crashed Windows to recover data from it and connect it to a working computer via a USB cable. If you can access the content on the hard drive, you should copy it to your USB flash hard drive. If not, you can employ data recovery software.
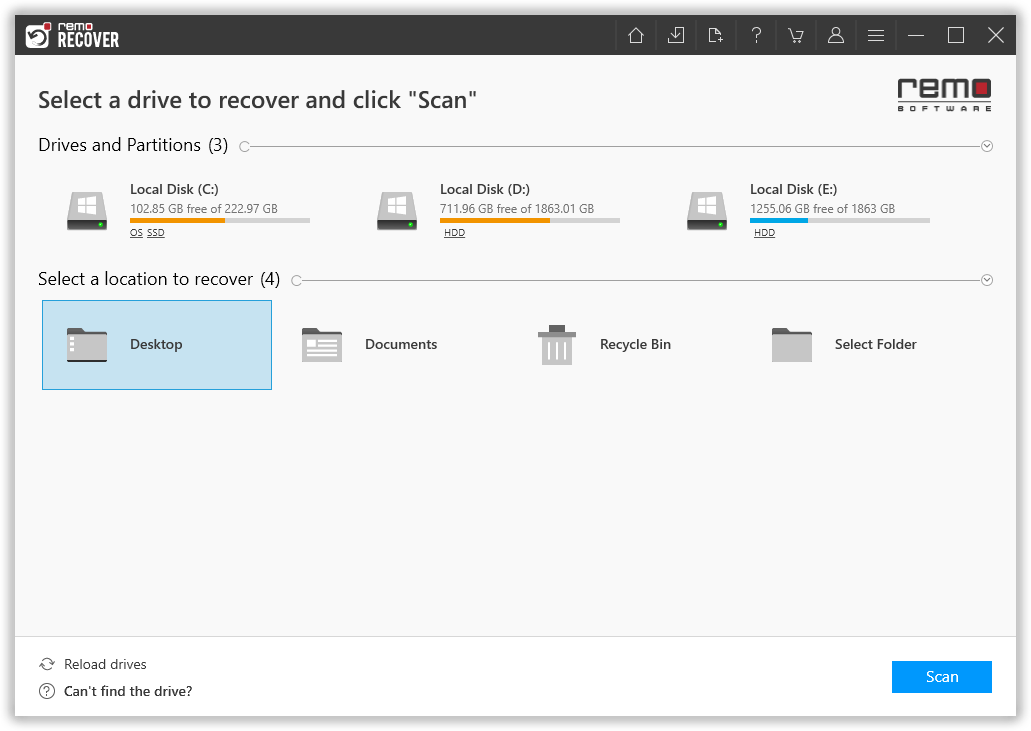
- Next, select the drive from which you want to recover data and click on the Scan button to start the scanning process.
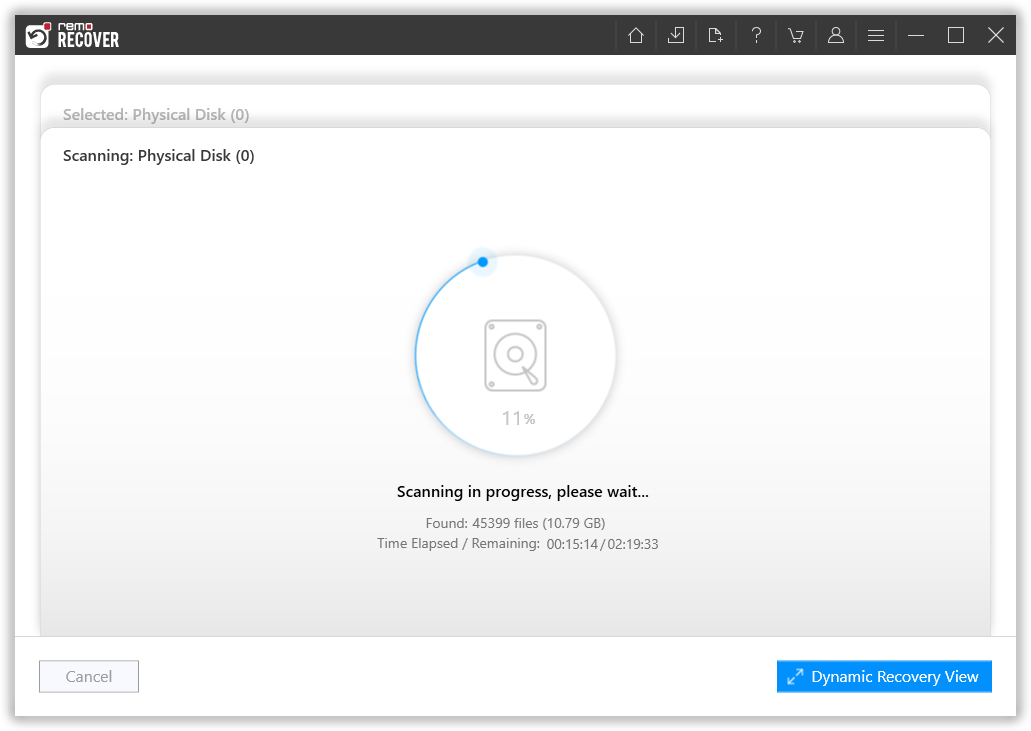
- Once the scan starts you can click on the Dynamic Recovery View to recover the lost file during the scanning process itself.
- After the scanning process, you can see your lost data under the Lost and Found folder or Lost Partition folder.
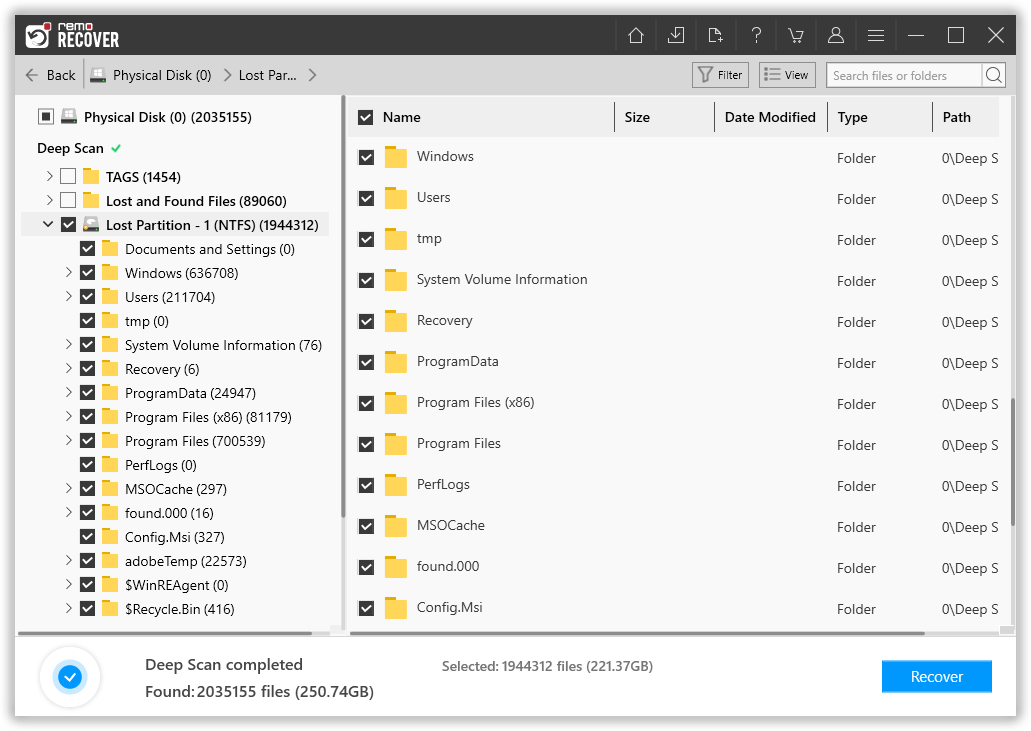
- You can double-click on any file to Preview the recovered files such as documents, PPTs, excel sheets, photos, videos, etc.

- If you are satisfied with the recovery session select the files you want to restore and click on the Save button and save the file to your preferred location.

Note: If you upgraded your system to Windows 11 and lost data during the upgrade and Remo Recover can also help you recover data lost after a new OS installation.
How to Avoid System Crash in the Future:
- Do not run too many applications at a time. Close the program that you are not currently using.
- Always check for the available disk space. Try not to overload it.
- Keep your antivirus updated, in order to filter out new viruses entering the internet.
- Upgrade your operating system along with the drivers.
- Try to keep your system clean and dust-free.
Bonus tip: In case you have lost files from your system because of an unexpected shutdown, do not worry. Here is more information on how to recover the deleted file after the sudden shutdown of the computer.
Frequently Asked Questions
Yes, there are several ways to recover data after a system crash. however, it is advisable to reach out for options that are not limited by the Operating system such as professional data recovery software or data recovery services.
A system crash could result in varied amounts of data loss or data corruption. you could also be forced to deal with a frozen or unresponsive screen.
the most common reasons for a system crash are a sudden loss of power supply, overheating of vital CPU components, poorly connected hardware, and physical damage.