I was running out of storage space on my Mac. I decided to see what files are consuming space, apart from files and folders that Mac users like you and me save on the system. Apple intentionally hides certain files and folders that are responsible for your Mac system's smooth functioning. These hidden files and folders take up much of your Disk space.
I wanted to get rid of any file that is hidden but is of no use. Similarly, other Mac users might want to view the hidden files for any other reason, such as Troubleshooting certain problems, Accessing system files, clearing up unwanted data to boost space on Mac, editing or modifying system configuration files, etc. This article will teach you how to find hidden files on Mac and discover why Mac hides some important files and folders. I will also discuss how to recover hidden files and folders that were deleted and lost.
Table of Contents:
- Why Are Some Files Hidden on a Mac?
- How to Show Hidden Files on Mac?
- How To Recover Hidden Files and Folders on Mac?
Why Are Some Files Hidden on a Mac?
Some of the files and folders that Apple hides from the users are as follows:
- .DS_Store: This file stores Finder preferences for each folder, such as the view mode and window position.
- .Spotlight-V100: This file contains Spotlight metadata for the folder and its contents.
- .fseventsd: This file stores information about file and folder changes, which Spotlight and other system features use.
- .Trashes: This folder contains recently deleted files.
- .TemporaryItems: This folder contains temporary files created by apps and the system.
- .localized: This folder contains localized versions of app and system files.
- .hidden: This file contains a list of all the hidden files and folders on the system.
- .AppleDouble: This folder contains duplicate copies of files with certain extensions, such as .jpg and .png. These duplicates are used by some older apps and systems that don't support the newer metadata formats.
These files are purposefully kept hidden from the user because actions such as accidental deletion, accidental damage, modification, or editing of these files can cause severe performance issues and trigger major errors.
How to Show Hidden Files on Mac?
I have tried methods like Terminal, finder, third-party File Managers, and Keyboard Shortcut. These methods can help you view hidden Mac files. But you need to be extremely diligent while handling those files since any edits or changes made to these files can adversely impact the performance or working of your system.
If you still want to proceed. Then, the following solutions can show hidden files on Mac OS.
Method 1: Keyboard Shortcut (Command + . + Shift) Keys
If you use any macOS version such as Sierra, High Sierra, Mojave, Catalina, Big Sur, or any newer versions like Monterey, Ventura, or the latest Sonoma. Apple has developed shortcut keys to help Mac users see hidden files on macOS.
- Just navigate to the folder where you feel the hidden files are saved.
- Then, you must simultaneously hit Command key + . Key + Shift Key on Mac to display hidden files.
The files, folders, and directories hidden on Mac will now be displayed on your screen. Now, you can view those files and make any appropriate decision on how you want to handle those files.
If you feel those files are unnecessary, you can delete them.
To unhide those files, use the same keyboard shortcut (command shift period keys) again.
Method 2: Use Finder on Mac to Reveal Hidden Files
The Finder is the default file manager in macOS, used to browse, organize, and manage files and folders on your Mac system.
How To Show Hidden Files in Finder?
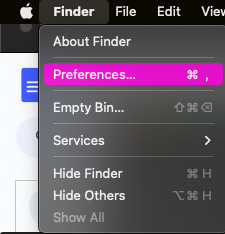
- Launch Finder, click Finder in the menu bar, and select Preferences.
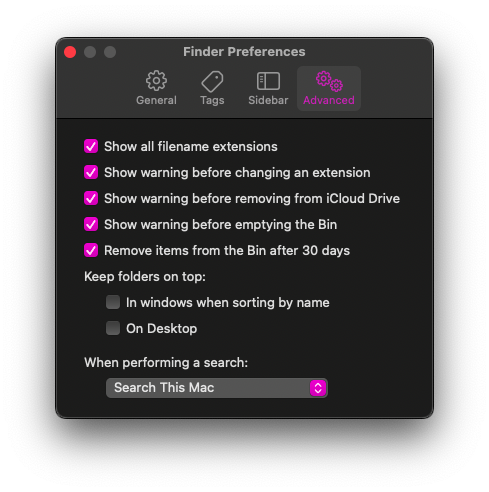
- Click on the Advanced option, and check the box next to Show all filename extensions or Show all filesystem objects.
All of your hidden files, folders, and directories will be shown in the Finder windows of your Mac screen.
If you want to hide the files again, uncheck the box, and you are good to go.
Method 3: Show Mac Hidden Files Using Terminal
Mac Terminal is a command-line interface that allows Mac users to interact with the OS through text commands.
Fortunately, Mac allows its users to view hidden files on Mac.
How To See Hidden Files in macOS Using Terminal?
- Click on the Spotlight and type in Terminal in the search bar. Click on the Terminal utility to open Terminal windows.
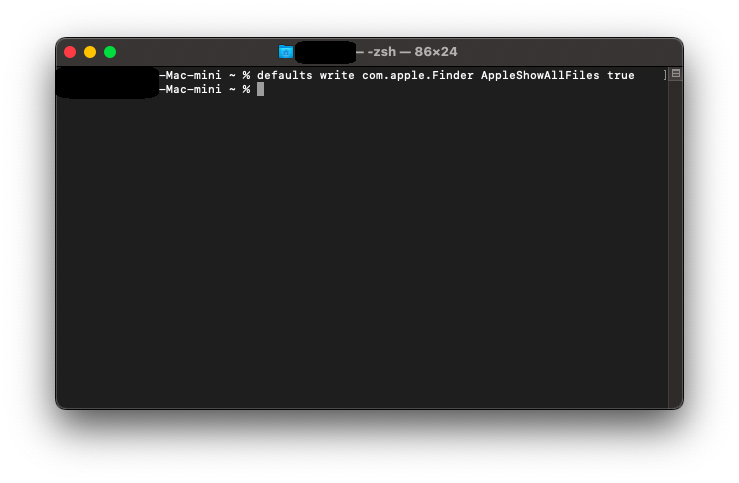
- Once you are on the Terminal screen. Type the following command:
% defaults write com.apple.Finder AppleShowAllFiles true
Or if the above command did not work for you, try $ defaults write com.apple.Finder AppleShowAllFiles true command.
This command will tell the Mac Finder to display all hidden or unhidden files, folders, and directories on your Mac.
Now that you have seen the hidden Mac files, folders, and directories.
- Hit the Enter button, type in $ Killall Finder in the Terminal, and hit the Enter key again.
This command will restart the Finder, and the changes will get reset.
You can also use the Terminal Utility to Hide some of your Files. Here’s how you can do it.
- Click on the Spotlight and type in Terminal in the search bar. Click on the Terminal utility.
- Once you are on the Terminal screen. Type the following command:
$ defaults write com.apple.Finder AppleShowAllFiles false.
- Hit the Enter button, type in $ Killall Finder in the Terminal, and hit the Enter key again.
Method 4: Show Hidden Files in macOS Using File Manager or Third-party tools
A file manager is a software application that allows you to browse, organize, and manage files and folders on your Mac system. Along with the ability to create, copy, move, delete, and rename, these applications can also help users hide and unhide files, folders, and other Mac directories.
Commander One, Forklift, and Funter are some of the best Mac File Manager available online.
After following the above-mentioned methods, you were able to view the hidden folders and files.
If you have accidentally deleted, lost, or misplaced some of the hidden files from your Mac system. Then, worry not; the following section discusses a specialized tool that can help you recover files deleted from Mac as well as retrieve missing hidden Mac data.
How To Recover Hidden Files and Folders on Mac?
Remo Mac File Recovery Software is a Heavy-duty tool that is expertly designed for all your Mac data recovery needs. Built with deep scanning algorithms designed to help you recover any file that is saved locally on any Mac Machine running on any Operating System.
Download the tool and get back your lost hidden files and folder with just 6 easy clicks.
Steps To Recover Hidden Mac Files and Folders Using Remo
1: Launch the Remo Mac File Recovery Tool after downloading, installing, and setting it up on your Macbook or iMac system.
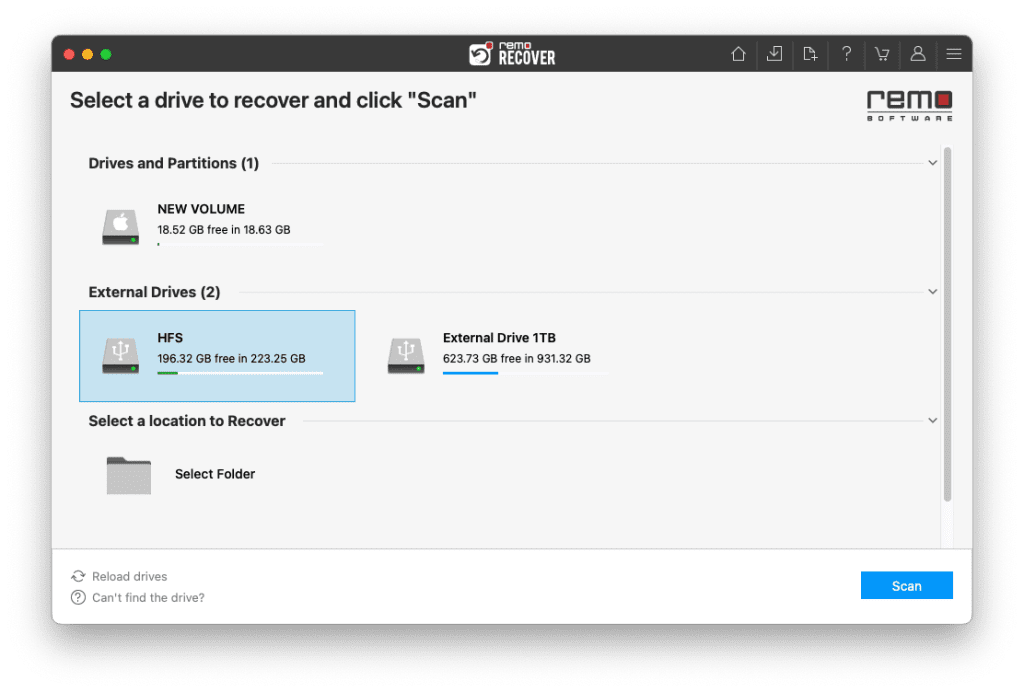
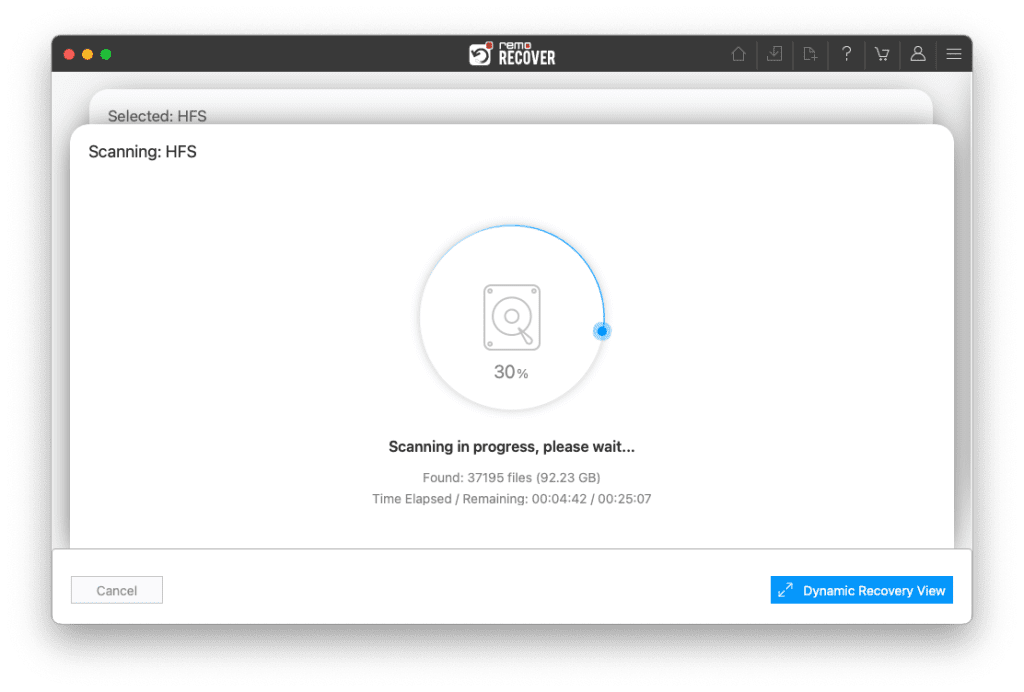
2: Select the Drive or the location where you want to recover the hidden files and folders that were accidentally deleted, lost, or missing from their default location. Click on the Scan button to start the drive scanning process.
3: Once the tool starts scanning the selected location, you can use the Dynamic Recovery View option to view the hidden file recovery process on Mac.
4: A list of all the recovered files, folders, and directories that were deleted, lost, or missing from the Mac system will be displayed on your screen.
5: Double-click on the recovered files to Preview them for free.

6: Select all the files, folders, directories, and other data you want to restore. Click on the Recover button; you will be prompted to select a location where you want to save the selected data.
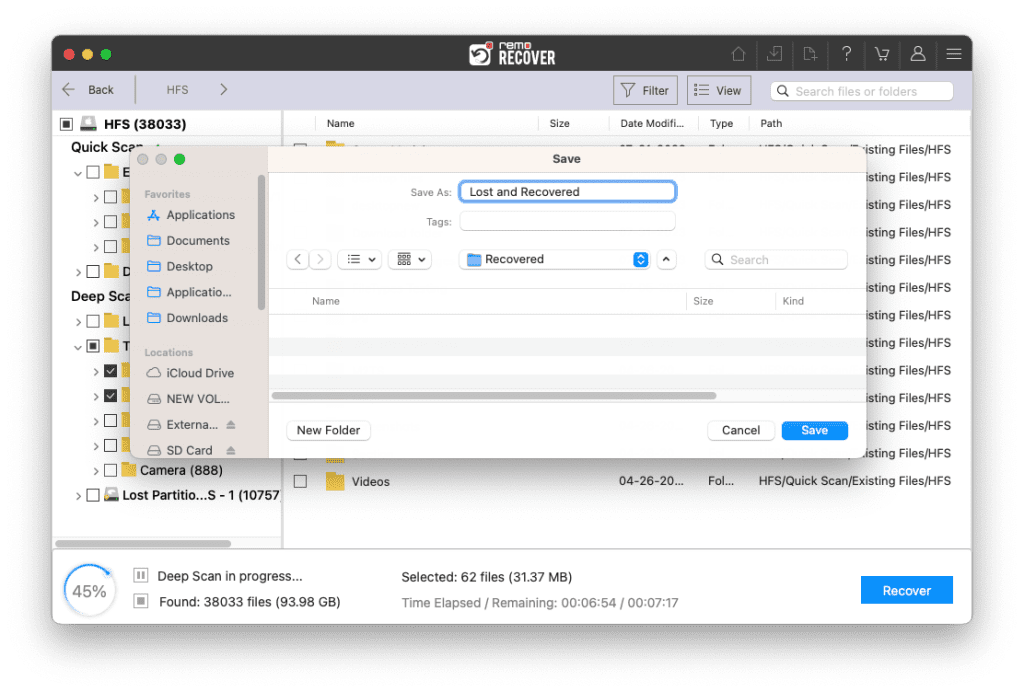
Remo will start the hidden Mac data restoration process.
Conclusion
Here, we end our article on how to show invisible files on a Mac. we have explored all the possible ways on macOS to view hidden files. Solutions like Keyboard shortcuts (Command Shift period keys), Terminal, Finder, and other specialized Mac File Managers can help any Mac user.
Refer to this article to find out how to set defaults in Mac.