Whenever you click a photo using a DSLR, the camera takes in the data that has been captured and then processes it. This file is called a JPEG (Joint Photographic Experts Group). This format poses major uses for both beginners and professional photographers. There is another option called RAW in every camera. Each camera has its own way of treating the data that it receives from the image sensor after clicking a picture and creates its own file to store it. These files are called RAW images. These RAW formats are different for each camera e.g. CRW/CR2 for Canon, NEF for Nikon etc.
Why would you want to use a JPEG file?
JPEG photos are the files that are caught and processed by the camera. When a picture is captured, the camera fills in edits such as sharpness, contrast, and saturation etc. making it look even better. These photos are compressed to a greater extent, impacting the quality of the photo. Since these files are compressed, they take up exceptionally less storage space. One major advantage of a JPEG file is that it can be easily shared on the spot. This is what makes it so feasible to use. When JPEG images are captured and stored in a camera memory card, there are chances of losing data from the memory card during file transfer. In such cases, you can recover lost data from your memory card using data recovery software.
Why would you want to use a RAW file?
On the other hand, a RAW file is a picture that is captured and stored unaltered. They are not edited. You have to process these files to make them look better. Since they are in their uncooked version, these files contain a lot of components that make up a RAW file. None of them is discarded such as in the case of a JPEG file. They hold all the color data, highlight and shadow detail. Hence they are huge files, nearly 3 times larger than a JPEG file which makes it hard to share these files. They are non-shareable.
What is shooting in RAW + JPEG mode?
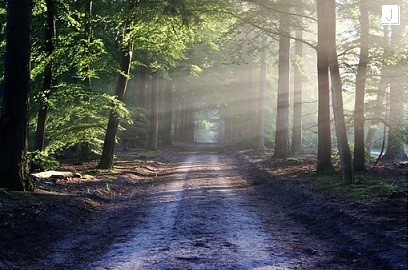
There is an option in every camera that allows you to shoot pictures in the RAW + JPEG mode. The photos shot in this mode will have the letter J in a box with a shadow behind it on the top right corner of the image as seen in the below image. This symbol is used to identify them as being shot in the RAW + JPEG mode. When you click a picture in this mode, it is captured in both RAW and JPEG format and they are sandwiched to form one single image. They overlap each other.
Steps to split a RAW + JPEG file:
Very often, it so happens that you would want to separate this RAW + JPEG combination while working on it. It is possible using Adobe’s very own Lightroom. Lightroom lets you import the RAW file and sees the attached JPEG file as a normal data file. You can separate these files by making changes in the preference settings. In case you find pictures missing after your import is complete, try to recover lost photos.
Here is how you change preference settings:
- (A) For new photos to be imported
- In the General section under Preferences, check the option that says Treat JPEG files next to raw files as separate photos.
- Close the Preferences.
Both the RAW and the JPEG files are treated as independent files and you can view and work on them separately.
- (B) For already imported photos
For already imported photos for which the Treat JPEG files next to raw files as separate photos was not enabled, Lightroom gives you an option to synchronize the same for the imported pictures. Follow the below steps:- In the General section under Preferences, check the option that says Treat JPEG files next to raw files as separate photos.
- Go to the folder that has all the RAW photos for which you want to import respective JPEGs.
- Right-click on the folder and select Synchronize folder.
- A dialog box will open asking if you want to Import new photos.
- Check it and click OK to import the respective JPEGs.
- In the general tab of preferences, select the Current/Previous import collection during the import.
Learn how to use Lightroom 6 by going through this article.
Advantages of shooting in RAW + JPEG mode
JPEG and RAW images have their own pros and cons. But they definitely complement each other in every way possible when they are shot in the RAW + JPEG mode. Imagine using the advantages of both these formats at once. i.e. preserve all the color data, highlight, richness in the details, and make them shareable at the same time? It’s a win-win if you look at the pros combined. Hence, most people shoot pictures in the RAW + JPEG mode.
Conclusion
Most photographers shoot in the RAW + JPEG mode as a license to keep the JPEGs and work on the RAWs. You can also delete the JPEGs after the separation if you think your edited RAWs look better than the JPEGs to save space on your drive. You will be saving a lot of space as the RAWs themselves would be taking up 70% more than the JPEGs.
However, if you wish to get the deleted JPEGs back, here is how you can recover deleted photos from SD card or hard drive. It is safe to recover deleted/lost pictures using proficient photo recovery software because you are dealing with images of superior quality. You can prevent any harm to your pictures without compromising on the quality.

