Internet Message Access Protocol (IMAP), is an alternative for POP3, which is an email protocol that is used to access email on the Outlook mail server. It is a convenient protocol framework for retrieving messages. As we all know Outlook is a feasible email management tool which keeps coming up with constant updates over the years. Outlook 2013, 2016 and 2019 vary from the prior versions.
In Outlook 2010, Calendar and Contact items were stored in separate PST files from the mail items. Whereas, Outlook 2013, 2016 and 2019 are included in a single OST file. So let us first understand why it is important for us to enable IMAP and how to do it.
Why is it important to enable IMAP on Outlook?
IMAP allows the user to access their Outlook from anywhere, any point in time and from any device. It makes the email accessibility convenience for the user. IMAP allows the user to view messages in read-only mode. It is not necessary for the user to download any mail to view it. As a result, you can check your email from different devices, anywhere in the world: your phone, a computer, a friend's computer.
Attachments in the IMAP are only downloaded when you click on it, the auto-download feature is disabled in IMAP. Also, by this, you will be able to check your messages a lot quicker than in POP3.
How to enable IMAP in Outlook?
In the below section let us understand how to enable IMAP on Outlook 2013, 2016 and 2019. These simple steps will help you configure IMAP on Outlook effortlessly.
Before proceeding it is better to change the OST file to PST using an OST converter tool and backup
- Click File → Info → Add account.
The Outlook wizard for setting up a new account will open. - Enter an email address to add your account.
- Click Advanced options and check the box for Let me set up my account manually.
- Click Connect.
- Choose the account type IMAP.
The dialog IMAP Account Settings will open up. - Use the following settings:
- Incoming mail: Server imap.mail.com with port 993 and check the option This server requires an encrypted connection (SSL/TLS)
- Outgoing mail: Server smtp.mail.com with port 587 and the encryption method STARTTLS
- Click Connect.
A login dialog will appear. - Enter your email-address and your password, check Save the password in your password list and click OK. Outlook 2013,2016, 2019
Moving the location of the IMAP OST file
As you all know, enabling IMAP will automatically create an OST file for the synchronization for the changes made offline. If you are willing to backup and move an OST file to another computer or profile, you will need to set up a right pathway in order to migrate the data.
Note: Some times you might encounter the Outlook sync errors click here to fix them.
Using ForceOSTPath is the easiest way to change the Outlook OST file location. In order to do this, you will need a ForceOST registry key, to move the location of the OST file you can refer to the link given above.
Since it is a complex task if you are not so tech-savvy, you may also end up corrupting the Outlook data file. Therefore, it is recommended to go with a reliable Outlook migration tool like Remo Outlook Backup and Migrate to simplify the backing and migration process of your OST file.
Are you wondering how to migrate an IMAP OST file to another computer or any desired location? Remo Outlook backup and migrate is a reliable backing and migrating tool capable of doing it within a matter of a few clicks.
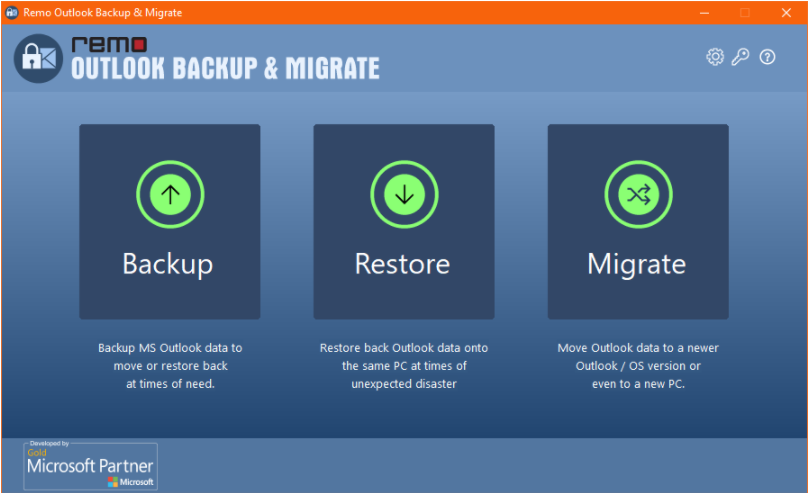
Remo Outlook Backup and Migrate
The software is a feasible tool migrating Outlook data from one PC to another or any other desired location. The application can be utilized to move your IMAP .ost file to your desired location effortlessly. The tool can move any outlook file to the desired location and also help you backup smaller traits like calendar, contacts etc.
In order to backup PST or OST file refer to the link backup Outlook data file effortlessly. Below section will explain the steps on how to migrate IMAP OST using Remo Outlook backup and migrate.
Steps on how to migrate IMAP OST file with Remo Outlook Backup and Migrate Tool
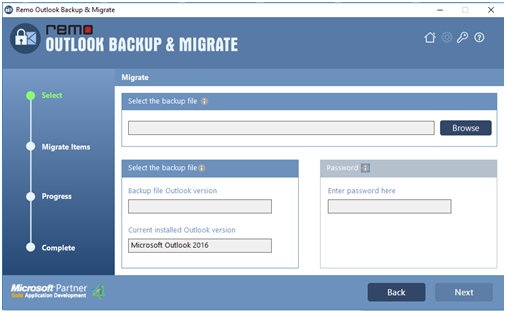
- Open Remo Backup and Migrate Software and click on Migrate.
- Select the backup file by clicking on Browse and click on Next
- In the next screen, select the Outlook items (IMAP .ost file) that you want to Migrate and click on Next
The Tool will start the Outlook Migration process. After completion of the process you can click on View Report to see the list of Outlook items Migrated.