Why Can’t I Access iPhone Photos Not Showing Up on Mac?
There can be several reasons why your iPhone photos are not showing up on your Mac:
iTunes not installed or outdated: You need to have the latest version of iTunes installed on your Mac to access your iPhone photos.
Cable issue: Make sure the cable you are using to connect your iPhone to your Mac is working properly and is not damaged.
System update required: Make sure both your iPhone and Mac have the latest updates installed.
iCloud Photos not enabled: If you're using iCloud Photos, make sure it's enabled on both your iPhone and Mac. Go to "Settings" > "iCloud" > "Photos" on your iPhone and make sure the "iCloud Photos" switch is turned on.
If none of these solutions work, try restarting both your iPhone and Mac and then trying again. If you continue to experience issues, you may need to contact Apple support for further assistance.
Methods to Fix Photos on iPhone not showing Up on Mac
Method 1 Check iCloud Photo Library
- Open the Photos app on your device.
- Click the "Albums" tab.
- To view the "Other Albums" section, scroll down.
- If you have a "Recently Deleted" album, check it out. If you do, you can recover the deleted photos as they are still saved in the album.
- Go to the "All Photos" section if your missing pictures are not in the "Recently Deleted" album.
- Check that your pictures are in the "All Photos" section. If they are not, your iCloud Photo Library may have removed them.
If your photos are still missing, you can try checking if they are present on other devices that are signed into the same iCloud account. If you are still unable to find your missing photos, you may need to contact Apple support for assistance.
Method 2 Restart iPhone and Mac
Restarting an iPhone or a Mac can be useful in resolving many technical issues such as freezing, slow performance, or a stuck application. It can also help in updating the operating system or installing new software. Here's how to restart an iPhone and a Mac:
iPhone:
- Press and hold the Sleep/Wake button until the "slide to power off" slider appears.
- Drag the slider to turn off your iPhone.
- After about 10 seconds, press and hold the Sleep/Wake button again until the Apple logo appears.
Mac:
- Choose Apple menu > Restart.
- Click the Restart button.
- Wait for your Mac to restart.
It's important to note that restarting your device does not erase any data. It simply shuts down the operating system and starts it up again, which can help resolve many technical issues.
Method 3 Check For Updates in the Software
Checking for updates in software is an important step in maintaining the security and performance of your devices. Here's how to check for updates on an iPhone and a Mac:
iPhone:
- Tap the "Settings" app on the home screen.
- Tap "General."
- Tap "Software Update."
- The iPhone will check for updates and let you know if there is a new version available.
Mac:
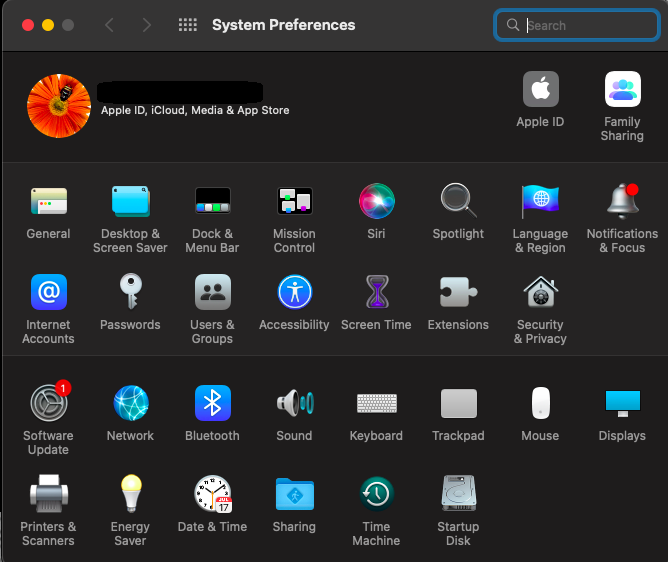
- Click on the Apple menu in the upper-left corner of the screen.
- Select "System Preferences."
- Click on the "Software Update" option.

- The Mac will check for updates and let you know if there is a new version available.
- It's recommended to regularly check for software updates to ensure that your devices are running the latest versions with the latest security and performance improvements.
If you have not upgraded to the latest macOS Ventura, You should definitely read this article
Method 4 Check Storage Space
To check your storage space on a Mac, follow these steps:
- Click the Apple menu in the top-left corner of the screen.
- Select "About This Mac."
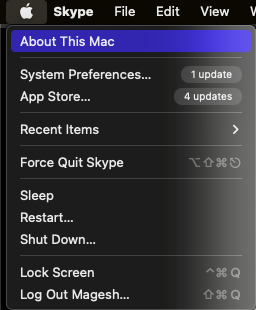
- In the window that opens, click the "Storage" tab.
- Click on Manage option, which is located in front of your Mac Volume.
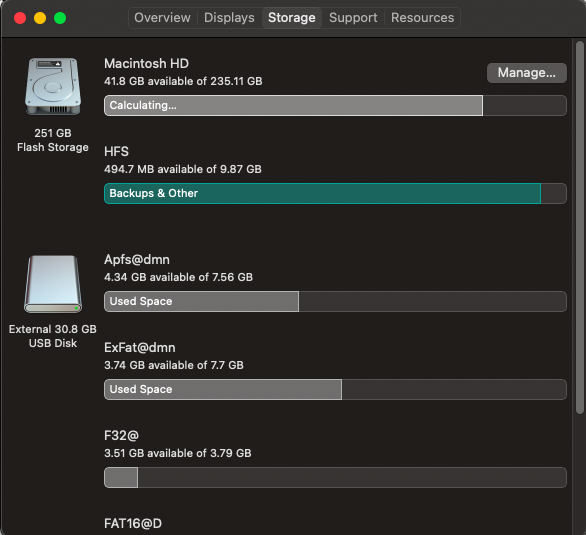
- You'll see a visual representation of the amount of storage space you have available, along with the amount of space being used by different types of files, such as apps, photos, music, and more. You can also click the "Manage" button to see a more detailed breakdown of your storage usage and options for optimizing your space.
Method 5 Transfer Files Using Cable
You can transfer files between two Macs using a cable by using either a FireWire or a Thunderbolt cable.
Here are the steps to transfer files using a FireWire cable:
- Connect the two Macs using a FireWire cable.
- Turn on both Macs.
- On the source, Mac, open the "System Preferences" and select "Sharing."
- Check the box next to "FireWire Sharing."
- On the destination, Mac, go to the "Finder" and select "Go" from the menu bar.
- Choose "Connect to Server" from the drop-down menu.
- In the Server Address field, type "afp://[source Mac's IP address]" and click "Connect."
- Enter your username and password for the source Mac and click "Connect."
- You should now be able to access the source Mac's hard drive and transfer files by dragging and dropping.
Here are the steps to transfer files using a Thunderbolt cable:
- Connect the two Macs using a Thunderbolt cable.
- Turn on both Macs.
- On the source, Mac, open the "System Preferences" and select "Sharing."

- Check the box next to "File Sharing."
- On the destination, Mac, go to the "Finder" and select "Go" from the menu bar.
- Choose "Connect to Server" from the drop-down menu.
- In the Server Address field, type "smb://[source Mac's IP address]" and click "Connect."
- Enter your username and password for the source Mac and click "Connect."
- You should now be able to access the source Mac's hard drive and transfer files by dragging and dropping.
Note that the above steps are for MacOS X 10.5 and later. For older versions of MacOS X, the steps may be slightly different.
Tips to Protect Your iPhone Photos
Here are some tips to protect your iPhone photos:
Backup regularly: The most important step to protect your photos is to back them up regularly. You can use Apple's iCloud service, or a third-party cloud storage solution such as Google Photos or Dropbox to keep your photos safe.
Use password protection: Enable password protection on your iPhone to prevent unauthorized photo access. You can also use Touch ID or Face ID for added security.
Avoid jailbreaking: Jailbreaking your iPhone can compromise its security and make it vulnerable to malware. It can also void your warranty, so it's best to avoid it.
Keep your software up to date: Keep your iPhone's software up to date to ensure that you have the latest security features and bug fixes.
Be cautious when sharing photos: Be careful when sharing photos on social media or through email, as they can be easily copied or used without your permission.
Use a protective case: A protective case can help protect your iPhone and your photos in case of accidental drops or damage.
Store your photos in multiple locations: Storing your photos in multiple locations, such as on your iPhone or in the cloud, can help ensure that you don't lose them in case of a device failure or other issues.
By following these tips, you can keep your iPhone photos safe and secure. However, if you ever lose photos or any other important data from your Mac we recommend you to use professional Mac data recovery software like Remo Recover
Conclusion
iPhones not showing up on Mac is a common issue that many users face. There are several reasons why this might happen, including outdated software, faulty cables or ports, and incorrect settings. To resolve this issue, users can try various troubleshooting steps, that are mentioned in this article.
If none of these solutions work, it may be necessary to seek professional help or contact Apple support for assistance. By taking the necessary steps to fix this problem, users can ensure that their iPhone is properly synced with their Mac, allowing them to transfer files and data seamlessly between the two devices.
Do let us know if you have any questions in the comment section below. Do not forget to share the word, if you like this article.
Frequently Asked Questions
Use Apple's Photos app to import your iPhone photos onto your Mac. Here are the steps to follow:
Connect your iPhone to your Mac using a Lightning to USB cable.
Open the Photos app on your Mac.
If this is the first time you've connected your iPhone to your Mac, you may be asked if you trust the device. Tap "Trust" on your iPhone to continue.
Once the Photos app recognizes your iPhone, click on the "Import" button in the window's upper-right corner.
The Photos app will display your iPhone photos and videos. Select the photos and videos that you want to import and click on the "Import Selected" button.
Your photos will now be imported into the Photos app on your Mac and you can view and manage them just like any other photos.
Software Issue: There may be a software bug or glitch that is preventing the photos from appearing in the camera roll. Try restarting your iPhone and see if that resolves the issue.
Storage Space: If your iPhone is running low on storage space, it could cause photos to disappear from the camera roll. Check your iPhone's storage and make sure you have enough space available.
Syncing Issues: If you have iCloud Photo Library enabled, make sure that your photos are properly synced across all devices. Go to Settings > iCloud > Photos and ensure that the "iCloud Photo Library" toggle is turned on.
Photos Hidden: If you've hidden some of your photos, they may not show up in the camera roll. To unhide them, go to Photos > Albums > Hidden and select the photos you'd like to unhide.
Photo Corruption: In some cases, photos can become corrupted or damaged, causing them to become unreadable. If this is the case, you may need to use a third-party tool to recover the photos.