Last week, I wrote an article on how CHKDSK (Check Disk) reduces your hard disk space. Hope you got it right that CHKDSK shows reduced space in the hard disk for good. It indicates that your hard drive is failing. Today, I am going to drill down a bit more and will tell – you how to perform this CHKDSK on Windows 10.
Refer to this article if you are curious to know what is Command Prompt.
You can run the CHKDSK command in two ways:
- Through Command Prompt
- Through the Error Checking option in Drive Tools
Through Command Prompt
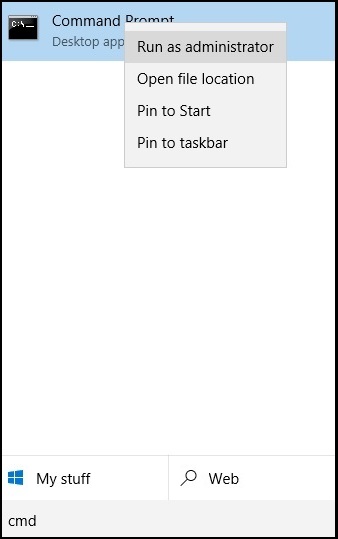
You’ll need administrator privilege to perform CHKDSK on Windows 10 through Command Prompt. For that, type CMD on the Windows search box and right click on the Command Prompt desktop app and choose Run as Administrator.
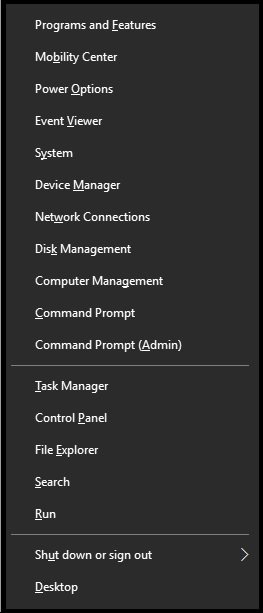
There’s one more method to access Command Prompt with administrator privilege. Press Windows + X to open power users menu. From here, you can choose Command Prompt (Admin) option.
In Command Prompt, type CHKDSK followed by a space, then the letter of the drive you want to check/repair. If you’re not specifying any drive, it’ll take system drive (usually C) by default.
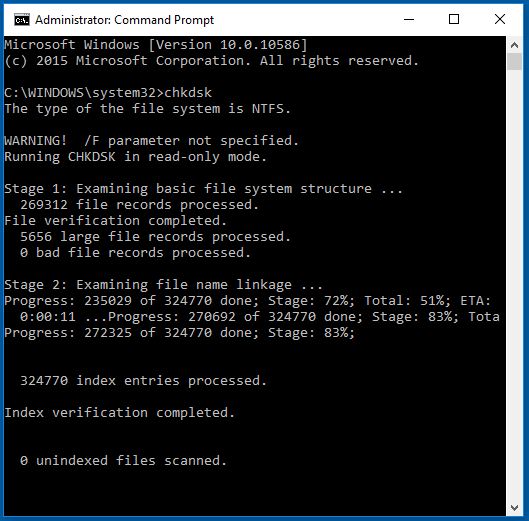
Since here we haven’t specified any parameters along with CHKDSK command, it is displaying only the current status of your drive. You’ve to specify parameters such as “/f /r /x /v” etc. to repair errors present on your drive. You can specify these parameters after specifying the drive letter separated by space.
Each parameter has a specific meaning.
/f: tells CHKDSK to fix errors on the disk
/v: shows the path and name of every file and directory in the disk
/r: locate bad sectors on the drive and recovers readable information
/x: forces the drive to dismount before process starts
If you are using /f parameter, CHKDSK needs to lock the drive before repairing. If it cannot lock the drive, it’ll ask you if you want to perform CHKDSK the next time you boot your computer.
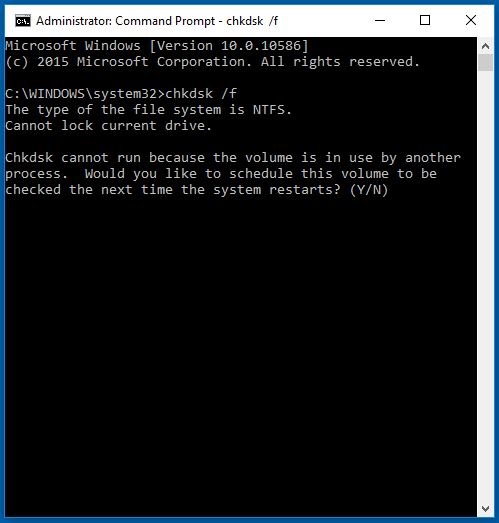
Click “Y” and press enter. CHKDSK will continue when the next time you restart your computer.
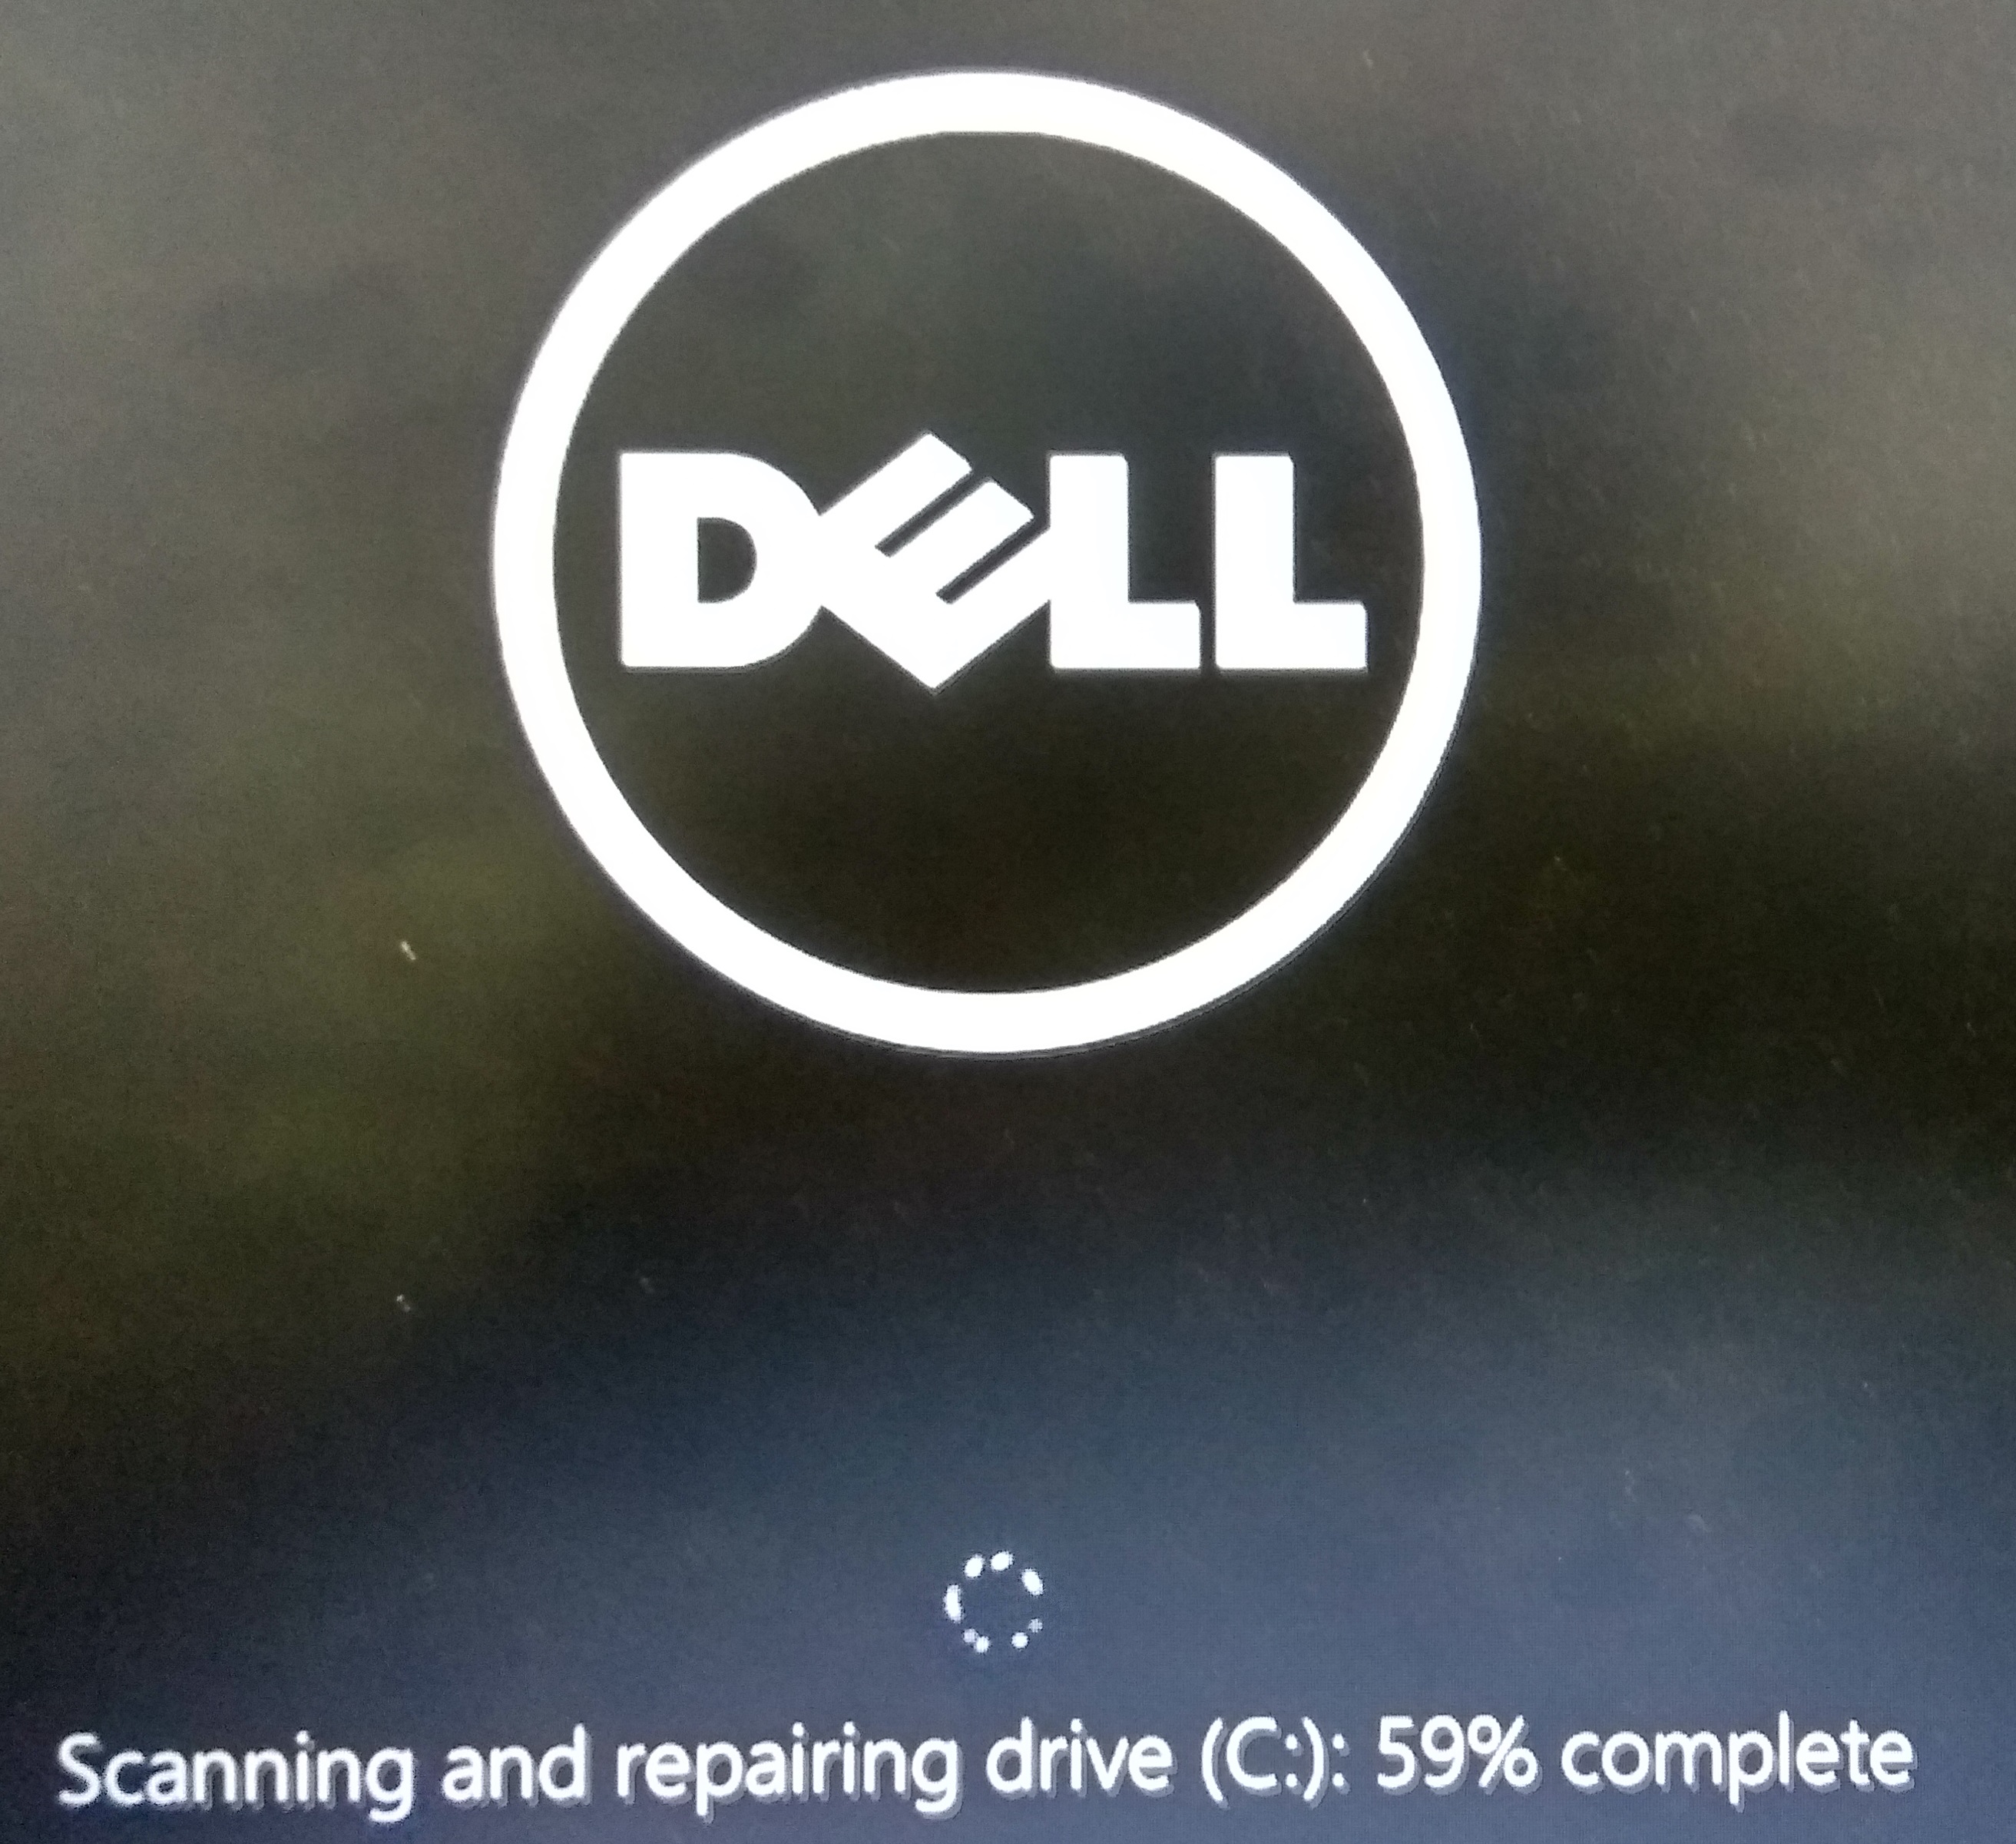
Since CHKDSK executes before Windows loads, it’ll get full access to the disk to repair errors on the drive.
Note: You can follow this article to find out how to recover files deleted automatically from Windows.
Many users have also lost files after using CHKDSK. In case you ever lose files due to any reason, you can follow the solutions mentioned in this article to recover files from Windows.
Through the Error Checking option in Drive Tools
You might be familiar with this tool. To access this, right-click on the drive you want to check and choose properties. Then, click on the “check” option from the Tools tab.
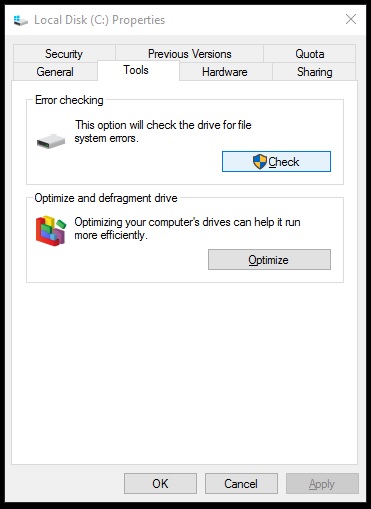
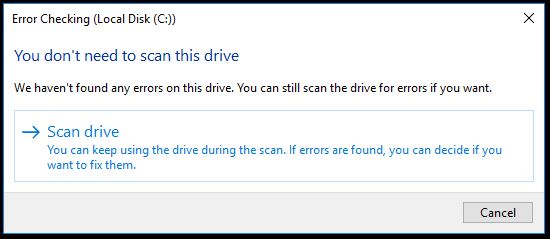
Here also, you’ve to access with administrator privilege. If your drive hasn’t any issues, it’ll recommend you “no need to scan the drive”. Otherwise, scan it.
Here’s the summary – you can perform CHKDSK on Windows 10 just in the same way as you did on Windows 7 or 8. But administrator access is mandatory here. You can either use Command Prompt or use Windows Error Checking tool.
Do Note: The newest version of Windows, Windows 11, is here. Refer to this article to find out how to upgrade to Windows 11 without losing data.