You are not the only one who prefers SSD NVMe over traditional HDDs because of its performance, speed, and reliability. However, data loss is something that cannot be away from and can happen on any supreme SSDs. So, if you are someone who lost all the important data from the NVMe SSD drive do not worry this article will help you to recover data from NVMe SSD.
In this article, we have covered some important information about NVMe SSDs and how you can perform hassle-free NVMe SSD data recovery using the best SSD recovery software.
Can Data Be Recovered from NVMe SSD?
Yes, you can recover data from an SSD. When you format or delete an NVMe SSD, the operating system can't reference the data that was on the disk. But, if the specific drive sectors are not overwritten, you can still recover data from M2 SSD.
However, there is one catch. Ever heard the term TRIM when working with SSDs? Keep reading to know more about that.
What is TRIM in SSD?
TRIM is an Advanced Technology Attachment (ATA) command that tells the SSD to erase data blocks when they are no longer in use.
The TRIM command is used to improve the performance of data writing to SSDs and contribute to increasing the lifespan of SSDs. Earlier SSDs did not have the TRIM feature. But new generation SSD comes with TRIM enabled. Performing M.2 SSD data recovery from TRIM-enabled NVMe SSDs is quite difficult because when an SSD erases data with the TRIM feature enabled, the data deleted gets immediately overwritten.
Although it is quite tricky to recover data from NVMe SSD, it is not impossible. Before performing NVMe recovery, make sure that the TRIM command is disabled; you can also try bypassing the TRIM trigger altogether by detaching the affected SSD and connecting the SSD via a USB port. Also, stop using your SSD once you lose data to avoid overwriting data until you recover it back.
In the below section of this article, we explained how you can disable your TRIM Command.
How to Disable TRIM?
- Type cmd in the start menu.
- Right-click on the cmd suggestion and select Run as Administrator.
- once the Administrator command prompt is open type the command: “fsutil behavior set DisableDeleteNotify=1” and hit Enter.
How to Recover Data From M.2 NVMe SSD?
Method 1: NVMe SSD Data Recovery Using Remo Recover
To perform a hassle-free NVMe SSD data recovery, make use of Remo Recover. This software can help you restore lost files, photos, and videos from your SSD. This powerful tool is built with an advanced scan engine that supports various file systems and can detect and recover more than 500 file formats. Follow the below simple steps to start the NVMe data recovery process using Remo Recover:
Steps To Recover Data from NVMe SSD Using Remo Recover
- Download the latest version of Remo Recover designed for NVMe SSD recovery from the Remo Software website. Follow the on-screen instructions to install the software on your Windows computer.
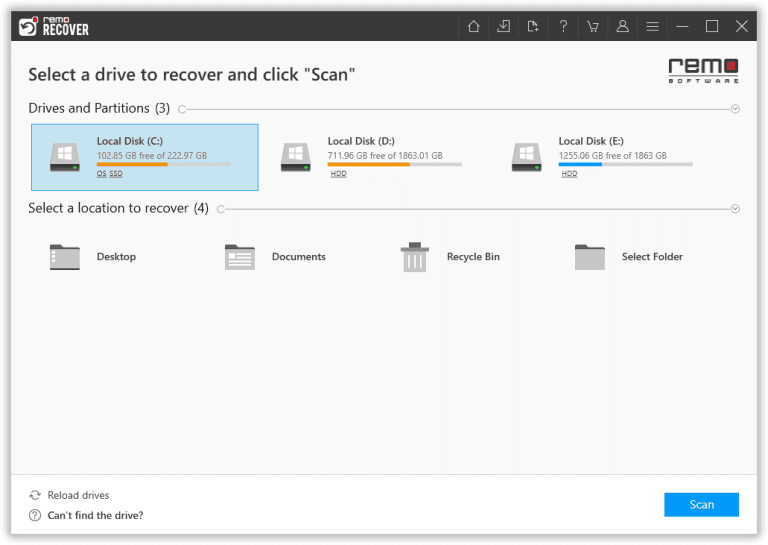
- Connect your NVMe SSD to your Windows computer using an NVMe-to-USB adapter or an NVMe enclosure. Ensure that the NVMe SSD is properly connected and recognized by your computer. Launch Remo Recover Windows and select the NVMe SSD from the list of available devices on the home screen.
- Click on the Scan button to initiate the scanning process. The software will analyze your NVMe SSD and attempt to recover your lost data.
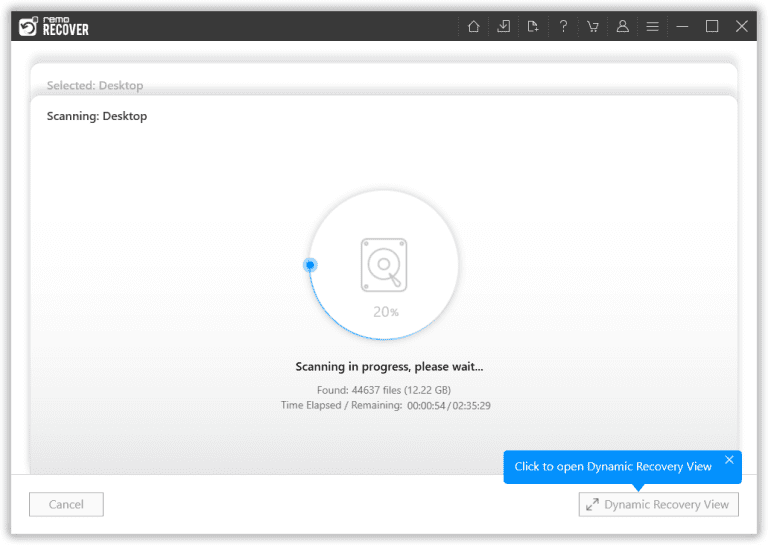
- While the scanning is in progress, you can use the Dynamic Recovery View feature in Remo Recover to preview the recovered files. This allows you to review the files and select the ones you want to retrieve.
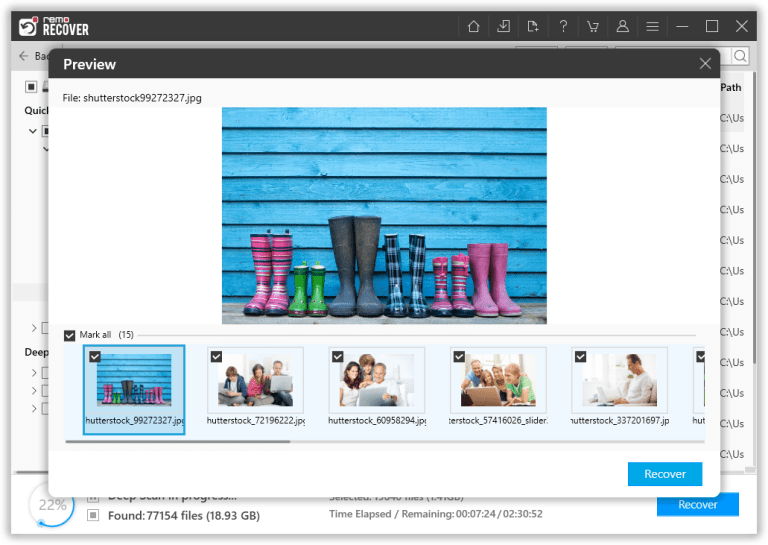
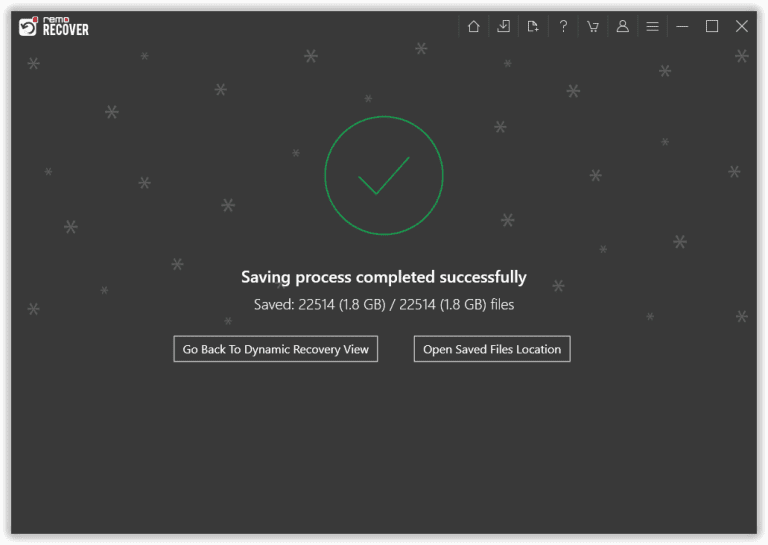
- Once the scanning process is complete, select the specific files or folders you wish to recover. Click on the Recover button and choose a secure location on a different drive to save the recovered files. Confirm the selection and wait for Remo Recover to complete the recovery process.
Method 2: Recover Data From NVMe SSD Using Professional Data Recovery Services
When confronted with the NVMe drive not showing up due to severe physical damage, traditional software solutions become ineffective in recovering the data. In these instances, enlisting the assistance of professional data recovery experts is crucial.
The process typically involves sending the affected NVMe SSD to a specialized lab where skilled technicians employ advanced equipment for data retrieval. The success of the recovery is contingent upon the extent of the damage incurred.
In summary, for cases where standard software approaches fall short, opting for the expertise of data recovery professionals offers a viable solution. This method involves entrusting the damaged NVMe drive to specialists who utilize specialized tools in a controlled environment, enhancing the chances of successful data recovery.
Also Read: How to Fix M.2 SSD Not Showing Up Windows 11
Difference Between NVMe, M.2, and SATA SSDs?
The main difference between NVMe and SATA is speed, drivers, and cable clutter. When it comes to superior storage technology, NVMe is second to none. Even at first glance, the performance difference between NVMe and SATA is impressive.
The communication drivers and interfaces between NVMe and SATA are completely different. SATA uses AHCI drivers designed for spinning hard disk drives (HDDs), while NVMe drivers are specifically designed for SSDs using flash memory technology. Additionally, NVMe can use PCIe slots to communicate between the storage interface and the system CPU for even greater impact.
Besides NVMe and SATA, M.2 is also a common term for SSD storage drive. M.2 SSD drive is nothing but a form factor for SSD drives. M.2 Solid State Drives were known as Next Generation Form Factor (NGFF).
NVMe SSDs only use the M.2 form factor, while SATA SSDs are available in the standard 2.5-inch form factor and the smaller, slimmer M.2 form factor. Most modern SATA SSDs come in a 2.5-inch form factor.
Below we added a useful table showing everything you need to know to distinguish between the most common SSD types.
| NVMe SSD | M.2 SSD | SATA SSD | |
| Price Range | 250 GB - $50 to $90 500 GB - $70 to $160 1 TB - $120 to $200 | 250 GB - $40 to $90 500 GB - $50 to $160 1 TB - $90 to $200 | 250 GB - $40 to $70 500 GB - $50 to $90 1 TB - $90 to $140 |
| Speed | PCIe Gen 3: Up to 3,500MB per second PCIe Gen 4: Up to 7,500MB per second | SATA: Up to 550MB per second NVMe: PCIe Gen 3: Up to 3,500MB per second PCIe Gen 4: Up to 7,500MB per second | Up to 550MB per second |
| Form Factors | M.2 U.2* PCle card* *Less common | N/A (This is a form factor) | 2.5-inch drive M.2 |
| Interface Types | N/A (This is an interface type) | SATA NVME | N/A (This is an interface type) |
| Advantages | Blazing speeds, especially when pairing top-end drives with an equally high-end motherboard | Takes very little space in a desktop PC build | Good balance between affordability and speed |
| Disadvantages | Higher cost | SATA M.2 drives can sometimes be more expensive than their 2.5-inch counterparts | Slow Speed |
| Mostly Found In | Higher-end (and some mid-range) laptops or pre-built desktop PCs | Mid-range and higher-end laptops or pre-built desktop PCs | Budget laptops or pre-built desktop PCs |
Conclusion
We hope this article helped you to recover data from your NVMe SSD. Moreover, always take a backup of your computer to deal with unexpected data loss. If you have any further queries regarding the article, please make use of the comment section below.
Frequently Asked Questions
Yes, you can attempt to repair a failed SSD by reinstalling it. Reinstalling a failed SSD is a potential fix, but it is important to remember to transfer all of your data to another device beforehand as this will erase the SSD and any information stored on it will be gone forever.
To recover data from dead M2 SSD all you have to do is download and install Remo Recover on your Computer and follow the below steps:
1. Launch Remo Recover software and select the M.2 SSD.
2. Now, click on the Scan Button to start the scan process.
3. The software starts scanning your drive and after the completion of scanning, it displays the list of recovered files.
4. You can Preview the files for free.
5. If you are happy with the recovery session. Select the files you want to restore and click on the Recover button to save them.
Repairing NVMe SSD depends on the kind of damage you are trying to repair. Physical damage to NVMe SSDs is unusual because of their design and the absence of moving components. If the drive is physically damaged and your SSD is not showing up in Windows at all, you can contact a specialist rather than attempting to repair it alone.
To address logical corruption, you can check for malicious software, alter the drive letter or modify the existing one, update or reinstall the SSD drivers, and run CHKDSK to attempt to repair the SSD.