Open Broadcaster Software is free open-source software with an integrated video encoder application, Majorly used by media professionals like vloggers, influencers, etc. It has unique features which help you to produce professional live streams. It also allows you to record your video or connect to Video platforms like YouTube, Twitch, etc.

In case, If you have lost your OBS Recordings due to accidental deletion or any reason for that matter don’t panic this article will help you to recover OBS recordings on both Windows and Mac with ease.
Where Do OBS Save Recordings?
By default, your OBS recording is saved in the main document section
Follow the below-mentioned steps to know the exact location of OBS recordings.
- Go to the settings section and select the Output tab to see where OBS keeps your video recordings.
- In the basic tab, simply set your recordings to the same bitrate as your live stream.
- However, if you're just doing video recordings with OBS, this might not be the greatest option. The advanced video recording section may be more appropriate for getting the most out of your recordings.
- To create a recording path for OBS videos, regardless of the video bitrate you use, so you know where to look for them. To do so, click the browse button next to the recording path.
Recover Deleted OBS Recordings from Recycle Bin.
Undoing a mistake might be simple if you act quickly. If you have not emptied the Recycle Bin, there is a high possibility that you can recover deleted OBS recordings from the Recycle Bin by following the below-mentioned steps.
- Open the Recycle Bin. You can do it by either right-clicking on its icon and choosing that option (open) or double-clicking on it.
- Locate the file you want to save from its impending deletion.
- Right-click on it and choose Restore from the pop-up menu that appears.
If the Recycle Bin does not work that means you have already emptied the Recycle Bin, But you still can recover the deleted OBS recording by following the next method.
How to Recover Permanently Deleted OBS Recordings?
If the saved OBS recordings are accidentally erased or your storage device is formatted, the best way to recover deleted OBS recordings is by using professional data recovery software like Remo Recover. This tool is capable of recovering video in any format such as FLV, MP4, AVI, MOV, etc.
Steps to Recover Deleted OBS Recordings
The software will help you recover deleted OBS recordings from all sorts of storage devices in 5 simple steps:
Step 1: Download and Install Remo Recover and select the drive where you have stored your OBS recordings.
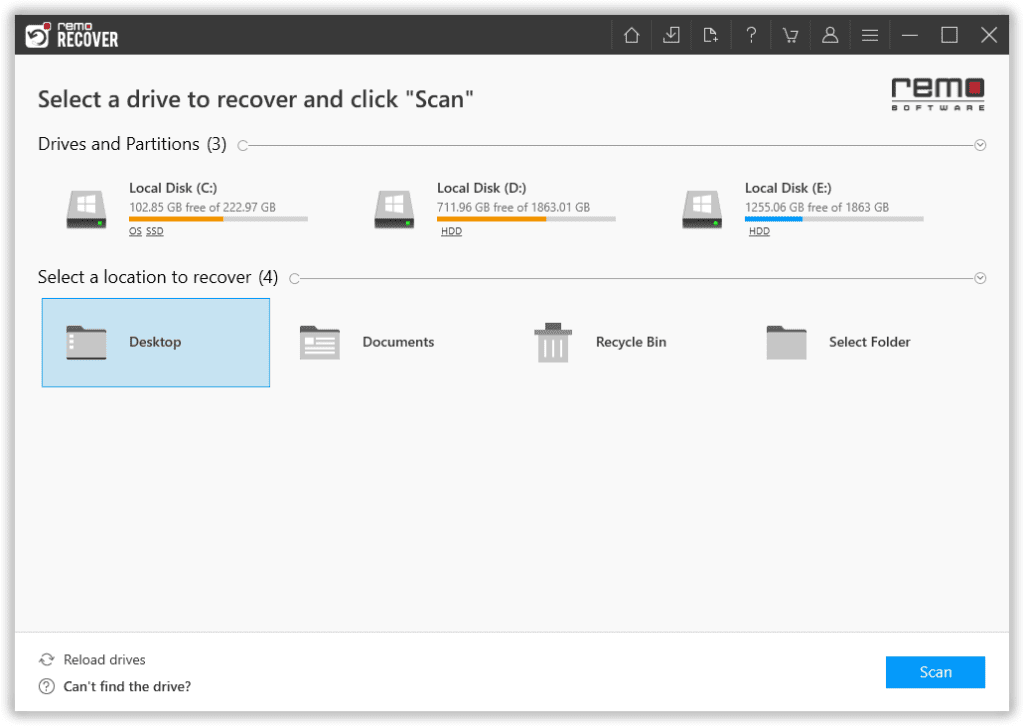
NOTE 📌: If you are unable to locate the drive on the Home Screen, click on the "Can't find drive" option.
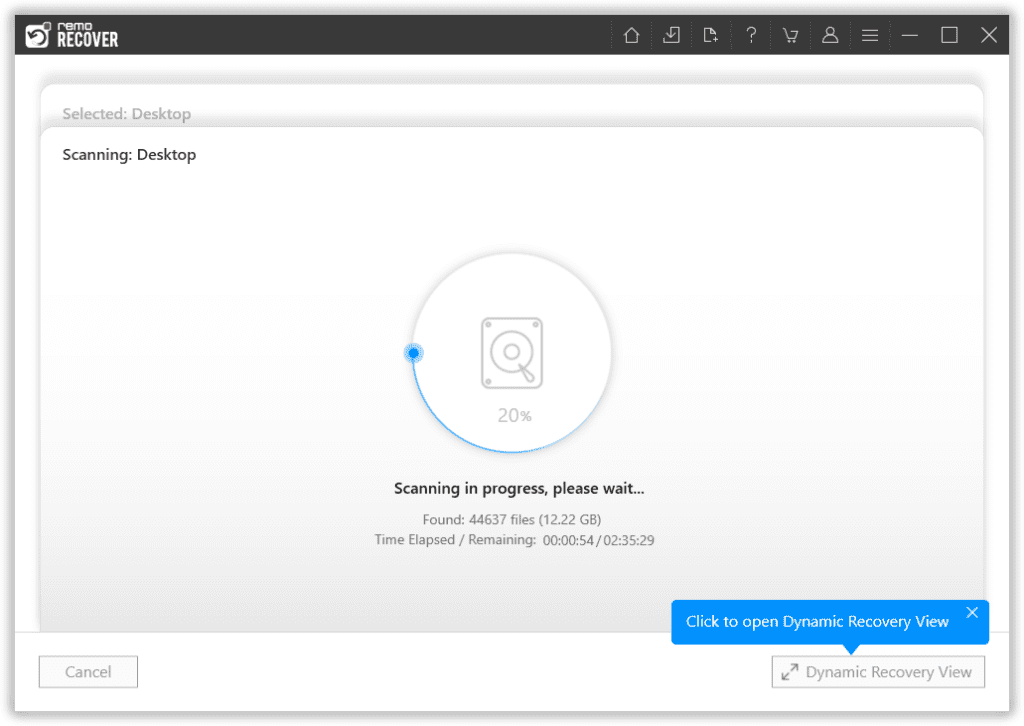
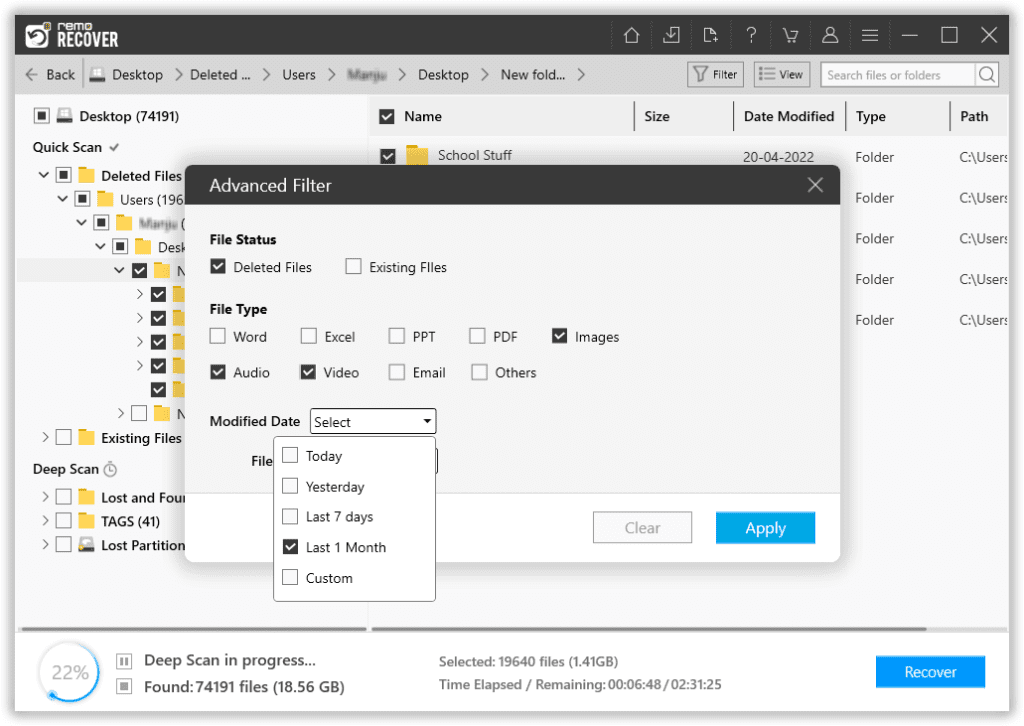
Step 2: Now, the software will start the scanning process. After completion of the Quick Scan, the Deep Scan will start immediately, files will be listed in Dynamic Recovery View.
Step 3: You can simultaneously save the recovered OBS recordings without having to wait for the scan to be completed if the tool has already listed OBS recordings.
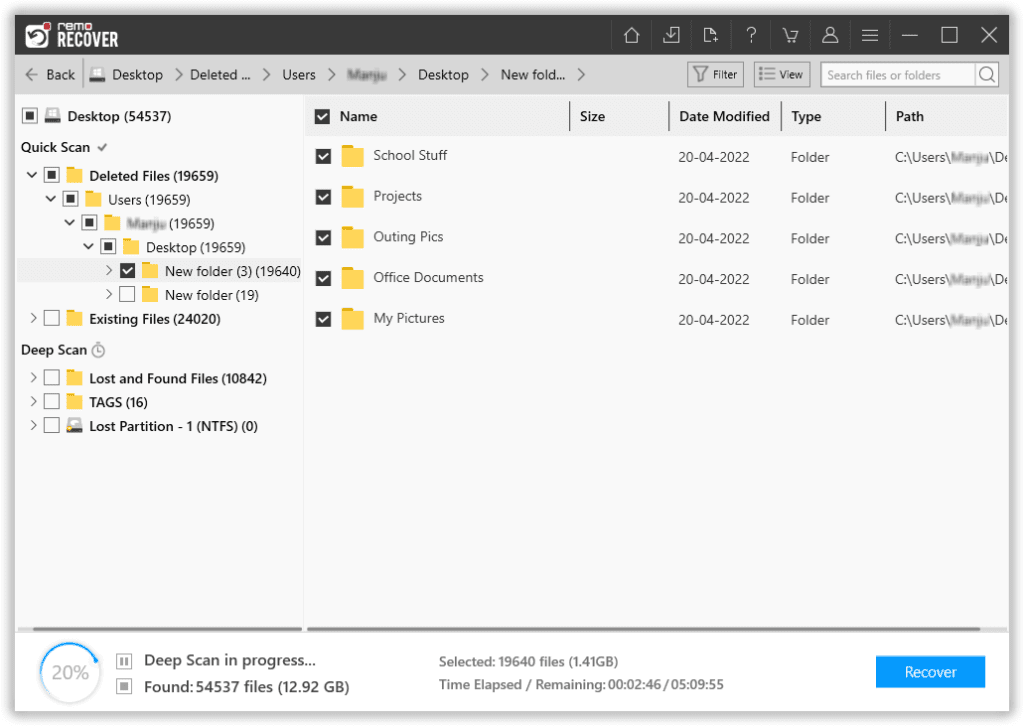
Step 4: Preview recovered OBS recordings before recovery and you also save the Recovery Session.
Step 5: Click on Recover to save the recovered OBS recording to the desired location.
That's all it takes to recover your deleted recordings from OBS. Besides the methods for recovering deleted recordings, in the next section, we will discuss a few common issues with OBS.
Some Common OBS Issues and How to Fix Them
Below are a few issues you might encounter when using OBS
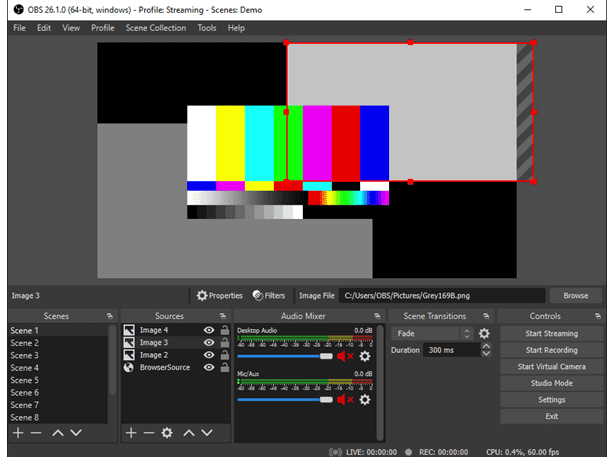
A Black Screen appears on the OBS
The black screen is probably the most common issue OBS users experience while streaming. However, due to many scenarios such as lack of administrator rights, integrated graphic interface, the software being incompatible with OS, etc.
Once you have determined the source of the problems, try the below methods to troubleshoot the issue.
1. Change the Compatibility mode:
Sometimes the latest versions of Windows are not supported by the application, changing the compatibility helps you in resolving the issue.
Follow the below-mentioned steps to change the compatibility.
Step 1: Press Windows + S, search for OBS, right-click on the application, and select Open file location.
Step 2: Now right-click on the executable and select Properties
Step 3: Once in properties, select the Compatibility tab and check the option Run this program in compatibility mode. Now you may choose Windows 7 or 8.
Step 4: Save changes and exit. Now try launching the application and see if the issue is resolved
2. Power cycle your computer
Sometimes the power cycling of your computer helps you in getting rid of the OBS black screen instantly. Power cycling involves shutting down your computer and removing its power source. This forces the computer to remove all your temporary configurations so whenever you start it again, everything will be initialized fresh.
- Shut down your computer properly
- Once it is turned off take out the power outlet or if you are using a laptop remove the battery.
- Now, press and hold the power button and turn it on for a couple of seconds and check if the issue is solved.
How to OBS Recording Not saving
Your OBS is not saving because you may be saving your OBS recording directly in MP4 and FLV format. Sometimes OBS has issues saving recordings in Mp4 and FLV format during such cases
- Save it as MKV, then use the REMUX feature in OBS to save it as MP4.
- Just go to the File and REMUX Recordings, select your file, and this will convert it into MP4 for you.
An OBS recording has been corrupted
If you have a previous OBS recording that you are unable to open, the most likely reason for the OBS recording not playing is that it might have become corrupt. Try to play it in a VLC media player if that doesn’t work, then you might need a video repairing tool like the Remo Video Repair tool which helps you in repairing the corrupted recording.
Bottom Line:
Hopefully, this article helped you to recover deleted OBS recordings using the Recycle Bin and professional software such as Remo Recover, as well as help you resolve the most common OBS issues. Please feel free to comment if you have any questions.
Frequently Asked Questions
OBS recordings are saved in the computer’s hard drive, typically Windows and Mac would have a different path.
Windows:
c:\users[username]\AppData\Roaming\obs-studio.
Mac:
Users/[Your Username]/Movies
You can restore a scene from your last stream using the backup .json files.
You can use a portable storage device like a USB and copy the Settings folder from the source computer. Then, paste the folder into the Settings folder on the receiving computer.
OBS recordings are saved as flv and MP4 and can be played in any media player like VLC.