Operation Failed error can occur when you are trying to open or use certain Outlook attributes/functions such as opening attachments, adding events in the calendar, sending or receiving emails, opening emails, managing rules and alerts, creating notes, finding something in Outlook, editing Outlook account settings, etc.
Sometimes this error can also stop you from doing the very basic tasks on Outlook and hence in this article we will be discussing the reasons and ways to fix the Operation Failed error in Outlook.
Why Operation Failed Error occurs in Outlook?
- The conflict between different add-ins
- Conflicting applications
- Using Outdated Outlook versions
- Improper Installation of Outlook
- Corrupt Outlook Profile
- Wrong configuration in Outlook
- Large Draft Size
- Outlook Calendar not working due to excess cache
- Corrupt PST files
1. The conflict between Different Add-ins.
Third-party Add-ins are utilities that are designed to improve users’ productivity and increase the functionality of Outlook. Many times there might be a conflict between two or more add-ins which results in the “Operation Failed” error. when you are attempting to do a particular task.
The solution is disabling all the add-ins and re-enabling the add-ins one by one to find out which add-ins were responsible for the error.
Follow the steps explained below to disable add-ins in Outlook.
Step 1: Launch the Outlook application, and Click on File.
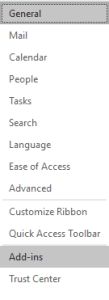
Step 2: Click on Options, then Click on Add-ins.
Step 3: A new window containing the list of all active, inactive, and disabled add-ins will appear on your screen.
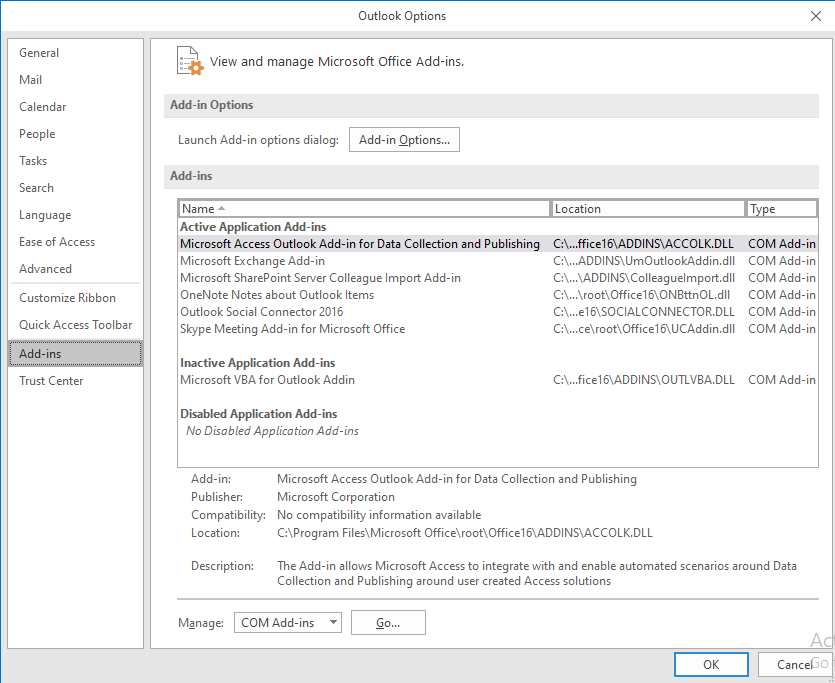
Step 4: Bottom of the page, Select Manage: COM Add-ins, and Press Go.

Step 5: Untick the add-ins that you would like to disable, then Click OK.
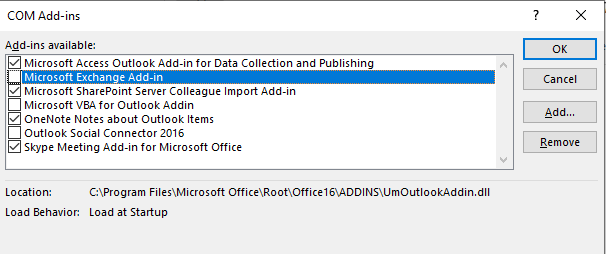
After disabling each add-in check if Outlook functionality has been restored. If you found out which add-in was at cause uninstall that add-in.
Note: Conflict between different add-ins can also trigger the “cannot expand the folder” error in Outlook. If you have faced the same issue, then we highly recommend you go through this article to find out various ways to solve cannot expand the folder error in Outlook.
2. Conflicting Applications
At times there might be a conflict between applications such as anti-virus software or firewall and your Outlook application which will affect the overall performance of the Outlook application many times if you are trying to add attachments “Operation failed” error will pop up in Outlook due to the same reason.
The users can try two ways to fix this issue.
- You can try uninstalling and reinstalling the anti-virus software.
- Try disabling the anti-virus software and check if the error is resolved or not.
Note: Verify if the recently installed application has a default add-in enabled in Outlook. If so, disable the add-in using the steps mentioned in the above section.
However, if the problem still persists, you can verify if there are any pending Office updates that are causing the problem. More info is in the next section.
3. Using the Outdated Outlook version
Microsoft releases regular updates of Outlook every now and then. If you are using an outdated version then the risk of facing an “Operation Failed” error is extremely high. Old updates or versions has bugs or issues, and Microsoft releases new updates which resolve problems with older versions of Outlook.
Check whether your Outlook application is up to date or not.
In case you are using an outdated version of Outlook. Follow the steps mentioned below to update your Outlook application.
Step 1: Launch the Outlook application, Click on File.
Step 2: Click on Office Account, Click on Office Updates and Select Update Now.
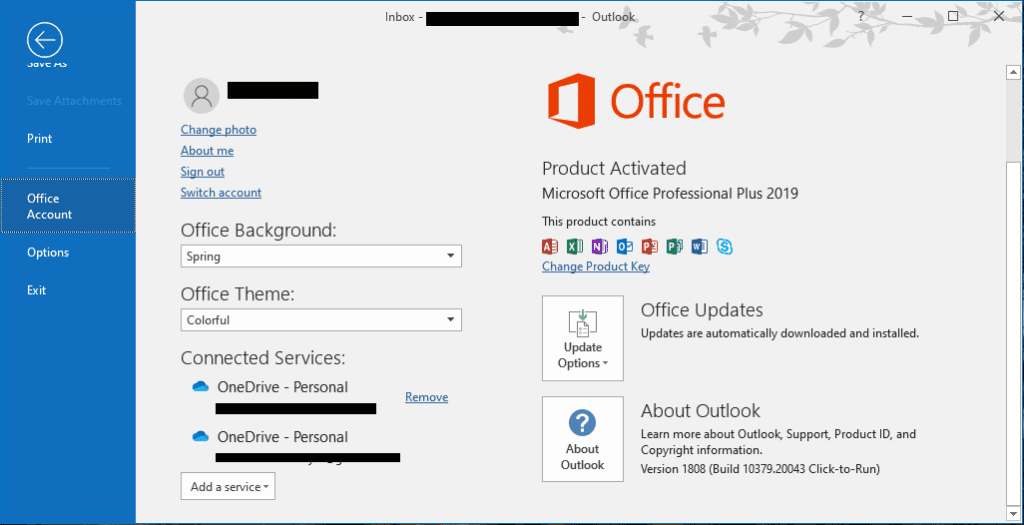
Step 3: In case your office is updated a new window will appear.
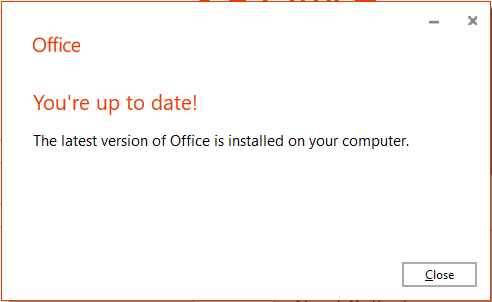
If you are using an updated version of Outlook. Then the cause of the “Operation Failed” error might be one of the below-mentioned reasons.
4. Improper Installation of Outlook
If you see an error pop up on your screen stating Operation failed because of a registry or installation problem. this error occurs when the Outlook application is not properly installed or incompletely installed.
This issue can be solved either in two ways.
- Reinstalling the Outlook application.
- creating a new Outlook profile.
Refer to the below section to find out how to create a new profile in Outlook.
5. Corrupt Outlook Profile
Microsoft Outlook lets you use multiple profiles in one application. For instance, one profile is for personal use and another for office use. In case your Outlook profile gets corrupted due to various reasons such as oversized PST file, PST file corruption, Outlook crash, abrupt termination of Outlook due to sudden power failure, etc. Then Outlook cannot access files and folders which contain your Outlook data such as emails, attachments, contacts, calendars, etc. In this case, outlook will show an “Operation failed” attachment error.
If the reason for the Operation Failed error is a Corrupt Outlook profile then there are two easy ways to solve this problem.
Method 1: Create a new Outlook Profile
If you have a backup of Outlook data, you can create a new Outlook Profile and restore the data in the newly created profile.
Note: one major drawback of creating a new Outlook profile is you will end up losing your Outlook data, hence it is recommended to repair a corrupt Outlook profile.
Follow the steps below to create a new Outlook profile
- Go to the Control panel and select Mail
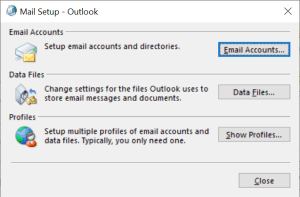
- Under Mail Setup-Outlook, click on Show profiles and Add
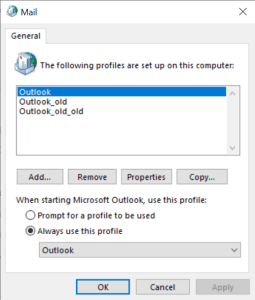
- Give a profile name and fill in the details (email id, password), and finish.
- Under When starting Microsoft Outlook, use this profile select Prompt for a profile to be used option and click OK.
- Restart Outlook in safe mode and in the drop-down list of choose profiles select the new profile you have created.
- Close Outlook and restart Outlook normally.
In case you don’t have a backup of Outlook data. We recommend you use the next method.
Method 2: Use Remo Repair Outlook PST to Repair an existing corrupt Outlook profile
Remo Repair Outlook is an advanced software with a powerful algorithm to repair extremely corrupt and damaged PST files with ease. Remo Repair Outlook tool uses a read-only mechanism to recreate a healthy PST file with the extracted data from your corrupt Profile.
6. Incorrect Configuration in Outlook
In case you face an error saying “Operation failed” error when you try to send an email. This happens when you have configured the Exchange server account and Google apps sync for the Outlook account in one single profile.
The solution to this issue is creating multiple profiles where one profile is connected to the Exchange server, and another profile is configured with Google Apps sync.
7. Large Draft Size
- Open the respective Draft message in Outlook.
- In the Format Text Tab, Click on the HTML option.
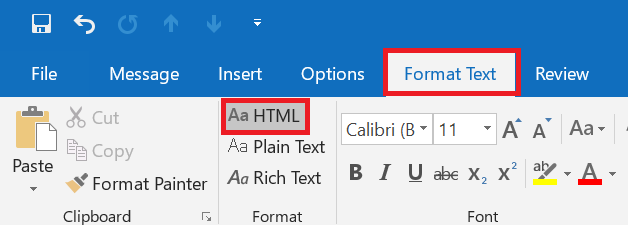
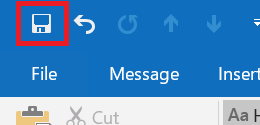
- Click on the save icon (top-left) to save the draft.
- Try to see if you can send/save the message.
8. Outlook Calendar not working due to excess cache
If the “Operation failed” error appears while using Outlook calendar, there is a good chance that there there is an issue with the latest update. You need not worry as Microsoft should be releasing a patch within a few days or weeks. There is also a chance that there may be an issue with your cache. So you may be able to solve your calender issue by reducing your cache. To do so you can follow the instructions below-
Warning: if you are not well-versed with how cached data works we recommend that you approach a professional for help.
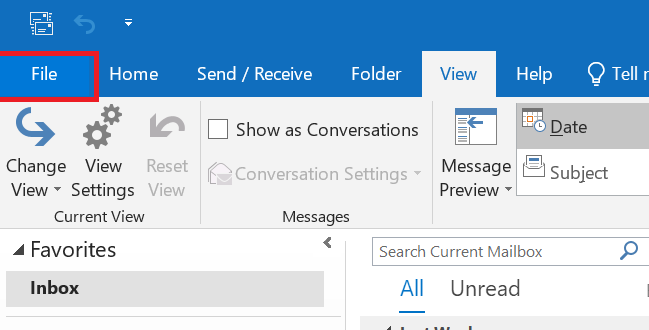
- Open Outlook, and go to File.
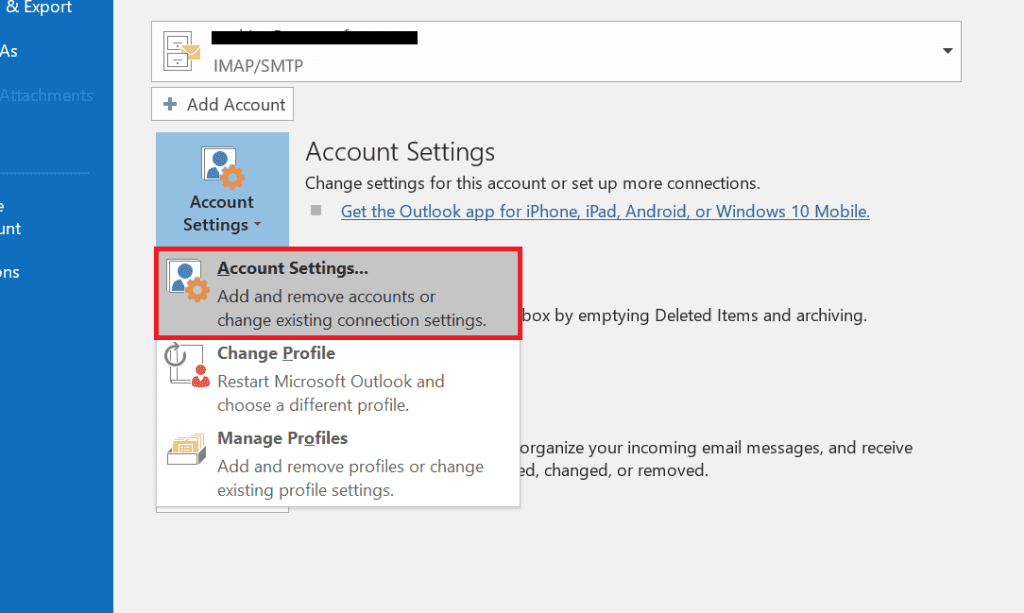
- Click on Account Settings, and then choose Account Settings.
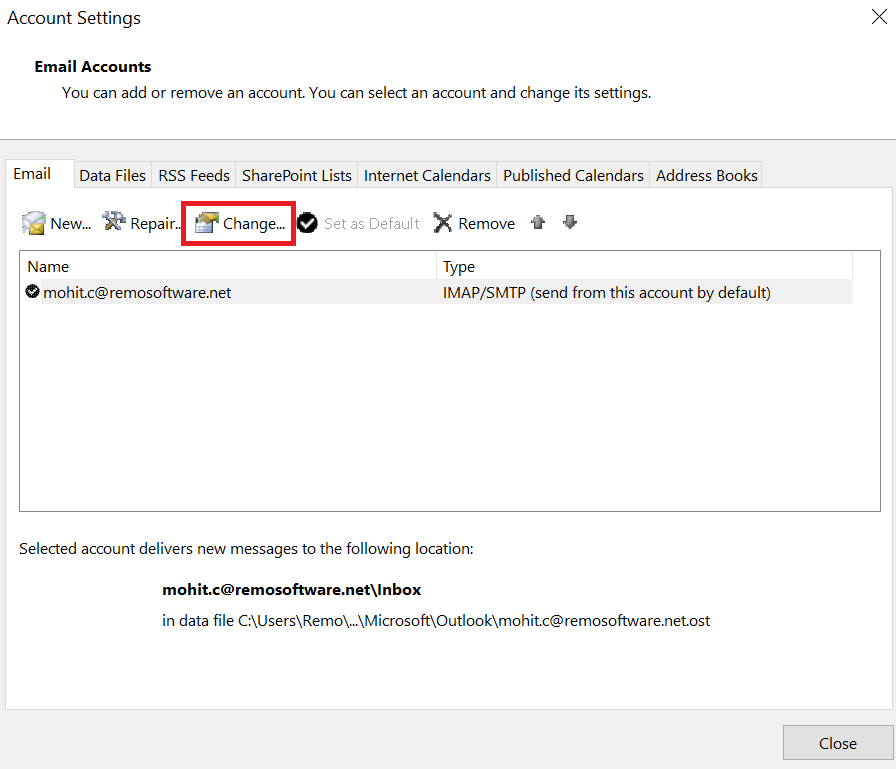
- Under the E-mail Tab, select Change.
- Turn Cached Exchange Mode on and change the time frame to 1 month.

- Click on Next/Finish to exit the dialogue box.
- Close and Re-Open Outlook.
- Check if your Outlook Calendar is working.
9. Corrupt PST File
If you got an error stating Operation failed, the object is not found. Then the possible reason is your PST files might have got corrupted and hence inaccessible and the users are unable to send or receive emails in Outlook.
Following are the methods you can use to repair corrupt PST file.
Method 1: Repair the PST file using the SCANPST.exe tool
SCANPST.exe is an inbuilt inbox repair tool that is designed to fix minor corruption in PST file.
Follow the below-explained steps to repair corrupt PST file.
Step 1: Locate the SCANPST tool on your system, depending on the Outlook version you are using.
- Outlook 2019: C:\Program Files\Microsoft Office\root\Office16\
- Outlook 2016: C:\Program Files (x86)\Microsoft Office\root\Office16
- Outlook 2013: C:\Program Files (x86)\Microsoft Office\Office15
- Outlook 2010: C:\Program Files (x86)\Microsoft Office\Office14
- Outlook 2007: C:\Program Files (x86)\Microsoft Office\Office12
Step 2: open SCANPST.EXE by double-clicking on it to start repairing the corrupt PST file.
Step 3: click the browse button and select the corrupt Outlook PST file that you want to repair.
Step 4: Click the Start button. Now, the inbox repair tool will start scanning the PST file to find any corruption or error in the Outlook data file (.pst).
Step 5: Once the SCANPST tool finds any corruption in the PST file, select Make a backup of scanned file before repairing option to create a backup copy. This will ensure the safety of your corrupt Outlook data file.
Step 6: Now, click the Repair button to start fixing PST file corruption.
In case your PST file is severely corrupted, we highly recommend you use the second method.
Method 2: Use Remo Repair Outlook PST to repair corrupt PST Files
Remo Repair Outlook PST is a highly recommended PST repair tool that is built not only to repair but also to recover extremely damaged, corrupt, and inaccessible PST files.
Click the Button Below to Download Remo Repair Outlook PST for free.
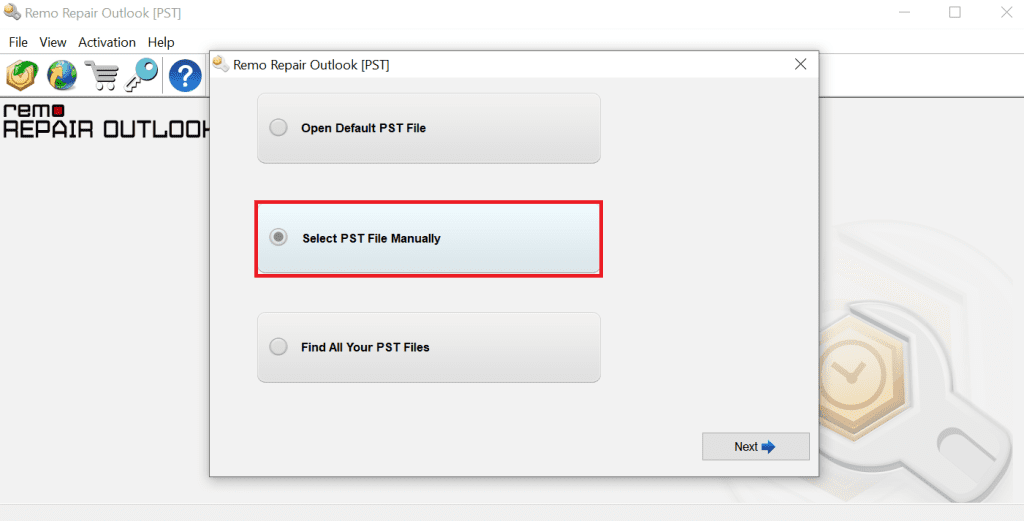
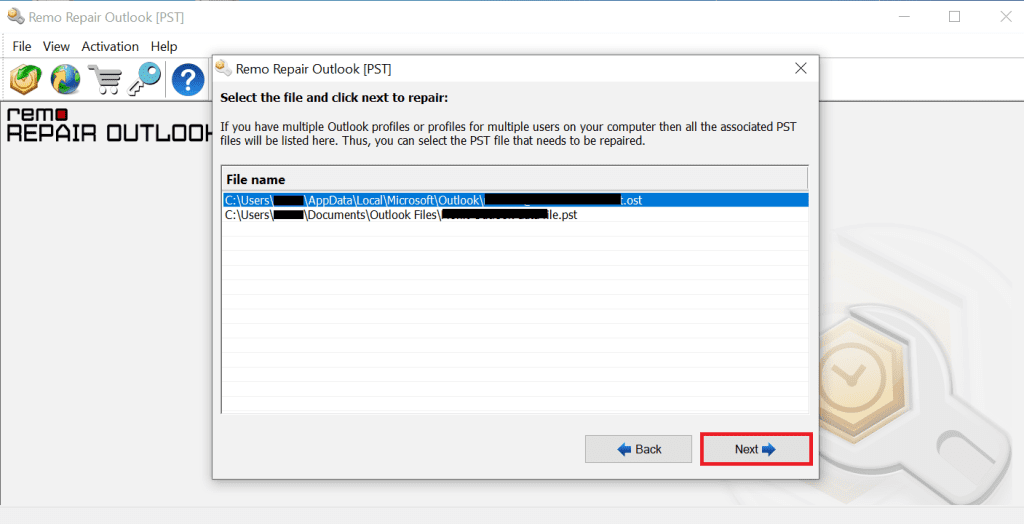
- Launch the tool and choose Select file manually, and select the required PST file.
- In the next screen, you can choose between normal scan and smart scan.
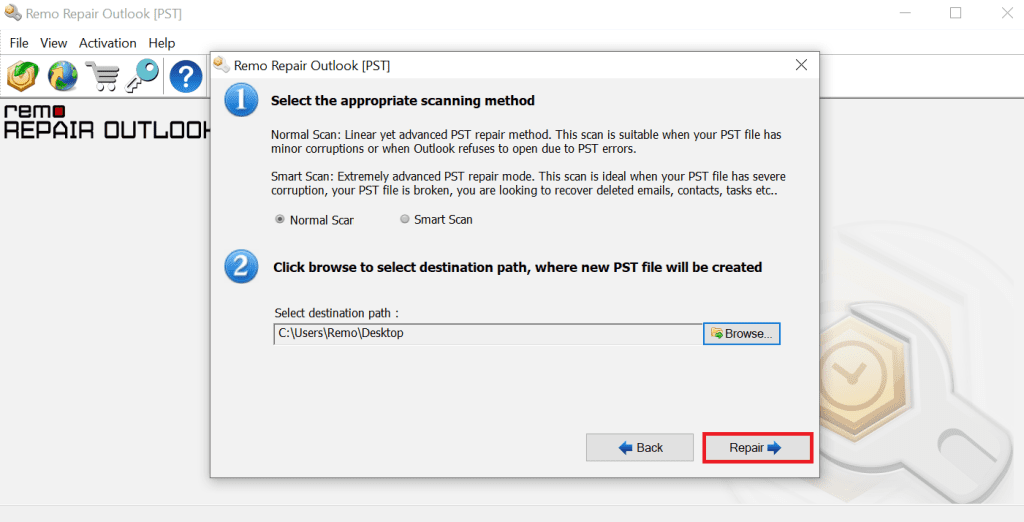
- Click on Repair to begin the PST repair process after which, you can Preview the repaired PST file in an Outlook-styled browser.
- Activate the tool and save the repaired PST file if you are satisfied with the results.
Conclusion
In the above article, we have discussed the various reasons which cause the “Operation failed” error in case you are trying to perform certain tasks in Outlook such as sending or receiving emails, managing rules, and alerts, creating notes, etc. Use the various methods to resolve the “Operation Failed” issue in the information provided above.
