Upgrading to High Sierra has left many users unsatisfied with common complaints about security flaws, slow system, frequent system freezes and so on. There are also complaints w.r.t installation errors such as Mac won't boot after installation, Mac grey screen of death error or getting stuck on the installation screen for hours, etc. In this article, let us discuss methods to fix ‘Mac not booting after a High Sierra upgrade’ error. Before you proceed with the fixes, make sure to backup / recover data from your un-bootable Mac using Remo Recover, as there are chances of losing your data. Read on to learn about simple and effective solutions to resolve this problem.
Note: You might also face a situation where your Macbook screen goes black but is still running. If you have faced this issue and are curious to know how to fix it. Then go through this article to find out how to fix black screen on Mac issue.
Step 1: Recover data from not booting Mac using Remo Recover Mac
Download the Remo Recover (Mac) tool and recover data first before performing any fixes. Some of the troubleshooting methods may delete data from your system. It’s better to secure your data before you go ahead. Follow the below-explained steps to backup & recover data from a not booting Mac after High Sierra Update.
Easy Steps to Backup / Recover Data from Unbootable Mac using Remo Recover Mac
First, remove your unbootable Mac’s hard drive and connect it to a healthy Mac. Then, download and install Remo Recover Mac on the healthy system and proceed with the recovery process using the steps below.
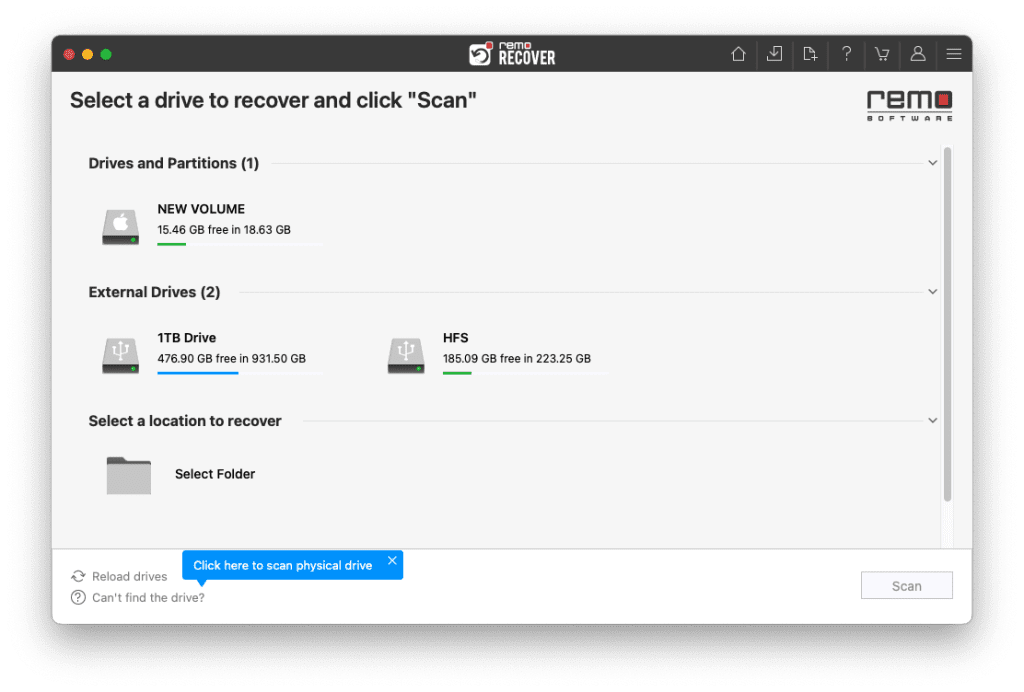
1. Launch the software, select the volume or drive from which you want to recover data, and click on Scan.
NOTE: If you couldn't locate your volume or drive Click on Can't find the drive? option to locate it.
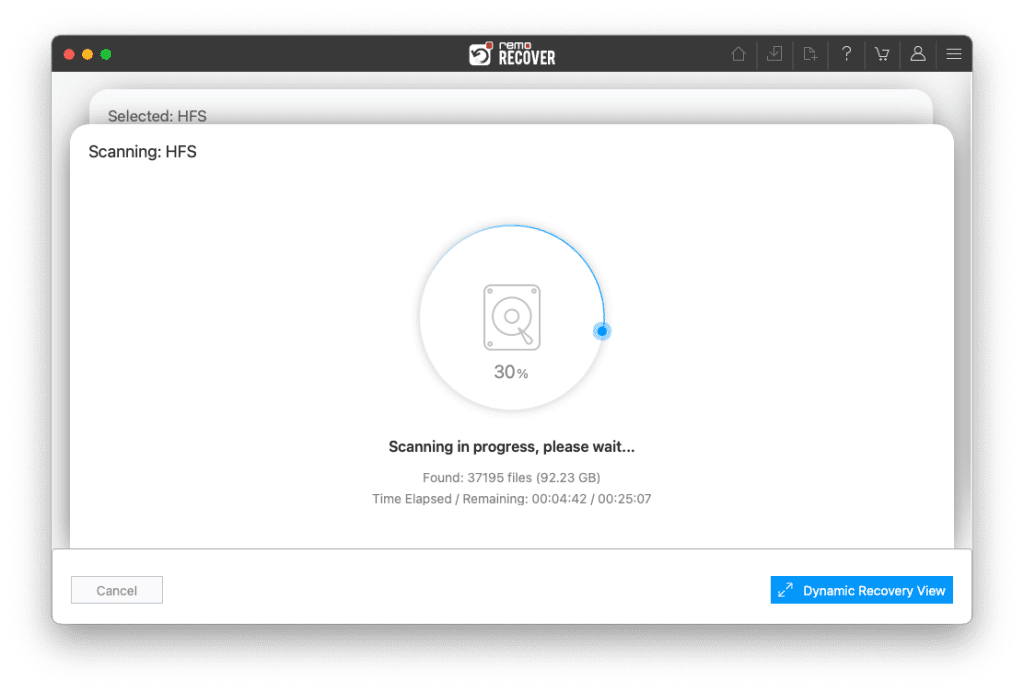
2. Click on Dynamic Recovery View to see the device's recovered data.
3. Find the recovered data from the Mac on Lost and Found or Deleted Files folders

4. Double-click to preview the recovered data.

5. You can click the Recover button to save the recovered files from the drive to your preferred location.
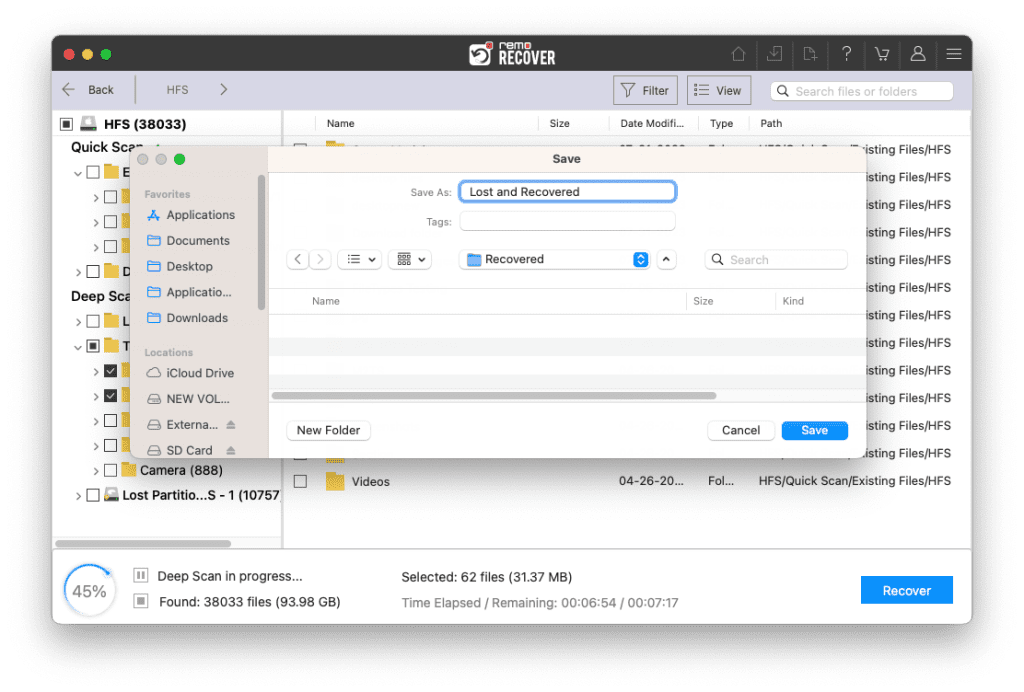
Caution: Save the recovered data from the drive in a different location from the previous one to avoid losing them again.
Note: The software works with all versions of Mac OS 10.5 and above.
Now that you have your data recovered, you are all set to proceed with the troubleshooting steps to resolve your Mac’s booting issues.
Step 2: Quick Methods to Fix ‘Mac won't boot after High Sierra upgrade’
Solution 1: Reset SMC on your Mac

An upgrade to High Sierra may have changed certain default values and settings on your Mac. Resetting SMC may help restore those settings to make it compatible with the new Mac OS. To reset SMC, follow the steps below.
- Power OFF your Mac and connect it to a power adapter
- Press Shift + Control + Option keys along with Power button
- Then release all the keys at once including the Power You will notice that the small light on the MagSafe adapter will change color indicating that the SMC has reset
- Then power ON your Mac the usual way and check if it resolves the issue.
Solution 2: Boot in Safe Mode
Safe Mode in Mac repairs issues with your start-up disk and directories. To boot your Mac in Safe Mode, restart your Mac and when you hear the start-up chime, press the Shift key. When you see the Apple logo, release the Shift key and wait for your Mac to start in Safe Mode. Please note that this may take a while as the repair process takes place in the background.
If the repair is successful and your Mac starts in Safe Mode, you may be able to boot normally. If this doesn’t help, proceed with the next step.
Solution 3: Reinstall Mac OS from Recovery Mode
If your Mac is not booting, there is a possibility that something went wrong with the installation process. In such cases, you can reinstall the OS and check if the issue is resolved. To reinstall Mac OS,
- Restart your Mac and as soon as you hear the start-up chime, press and hold Command + R keys
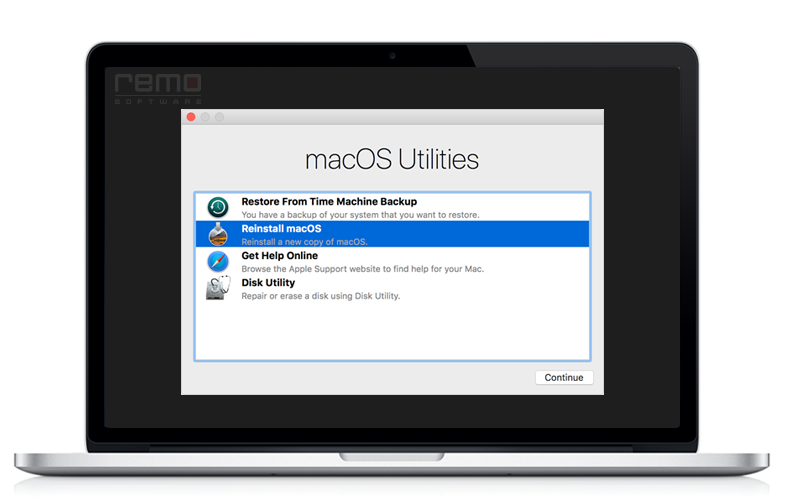
- When your Mac boots, you will see the Utilities screen
- Click on Reinstall Mac OS and follow the instructions on screen to complete the installation process
Once the installation is complete you will be able to boot into Mac quickly. in case, if you have trouble updating to High Sierra or Stuck while updating then, follow the link to the steps to fix High Sierra update errors in quick steps.
Good to know
To be on the safe side, always have a backup of all your files before you attempt re-installation or any other repair process that may delete data. If you’re using a Mac, take advantage of the Time Machine feature. If you don’t have Time Machine set up, download Remo Recover and protect your data.