It is a known fact that QuickTime player supports many types of video formats. But, the unknown fact is that it also works as a screen recorder. The screen recording feature of QuickTime helps to capture the things that happen on your computer screen. This feature could be helpful when you want to create your own video tutorial. Follow the steps to learn how to use QuickTime for recording.
How To Use Quicktime To Record Screen?
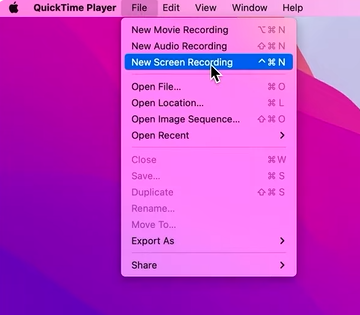
- Open the QuickTime media player and click on the File menu
- From the drop-down list, select the New Screen Recording (Control + Command + N) option.
- Choose your preferred screen recording and click Record either the entire screen or a section of the screen.

- Microphone: If you want to record with no audio click on None or choose built-in Microphone to record screen with audio.
- You can choose to Show Mouse Clicks in Recording.
- You can set a timer to record the screen
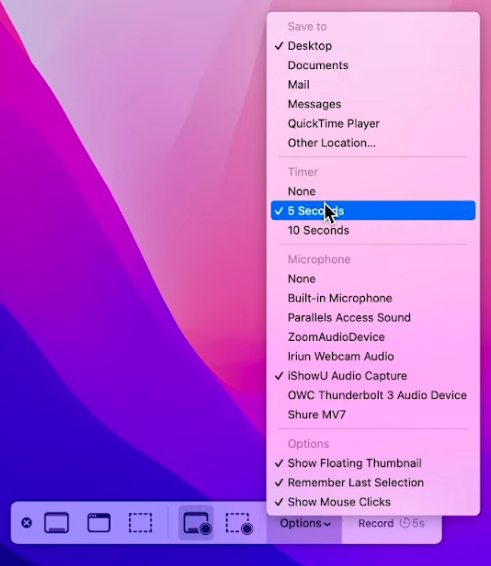
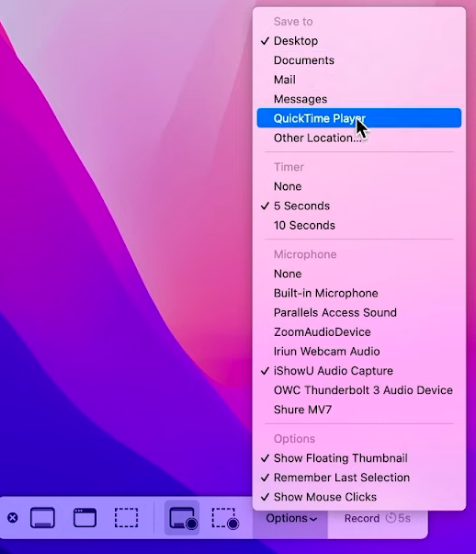
- You can choose your preferred location to save the recorded video.
- Click on the Stop button to stop recording the video.
Tip: Do not try to stop or switch the portion that you are recording. This may lead to MOV no video which means that your recorded video might just play audio. Once the recording has started, make sure to not make any changes in between.
- Then, go to your video and start it. Open it in a full-screen mode
- When the video ends, click on the ESC button or exit from the full-screen mode
- Then, click on the Stop Recording button, it opens the screen recording in the QuickTime player
- After verifying the video, close it
| Attention!!! If the recorded video has out of sync audio and video streams, then you can use VLC media player to fix the video. If it fails, then you can use MOV Repair tool to fix audio video sync problem instead of recreating it. |
To open your screen recording, go to Finder and click on Home Folder. Under movies, you will be able to see your screen recording by the name of screen recording.mov. If you have selected other locations to save your file, then go there and check for MOV file.
Further, note that, if you notice damage in QuickTime file, then you need not stress out. This is because it is possible to repair damaged QuickTime files using Remo MOV Repair application. There is also a Mac version available that helps you to fix QuickTime playback problems on Mac.