From the 2007 version onwards, Color Categorization has been included in Outlook. When used the right way, this kind of categorization can be very helpful in making your Outlook routine effortless. Let’s take a step forward to understand Outlook color categories and how to use them to our advantage.
ADVANTAGES OF COLOR CATEGORIZING YOUR OUTLOOK ITEMS
You can personalize your Outlook inbox by specifying a color for a specific mail/notes/events genre. The beauty lies in associating different Outlook items to a user-defined color category. Depending on the usage and association, more than one color can be assigned to an item.
For example, the below images show Outlook color categories assigned to a Meeting and To-Do items, respectively:
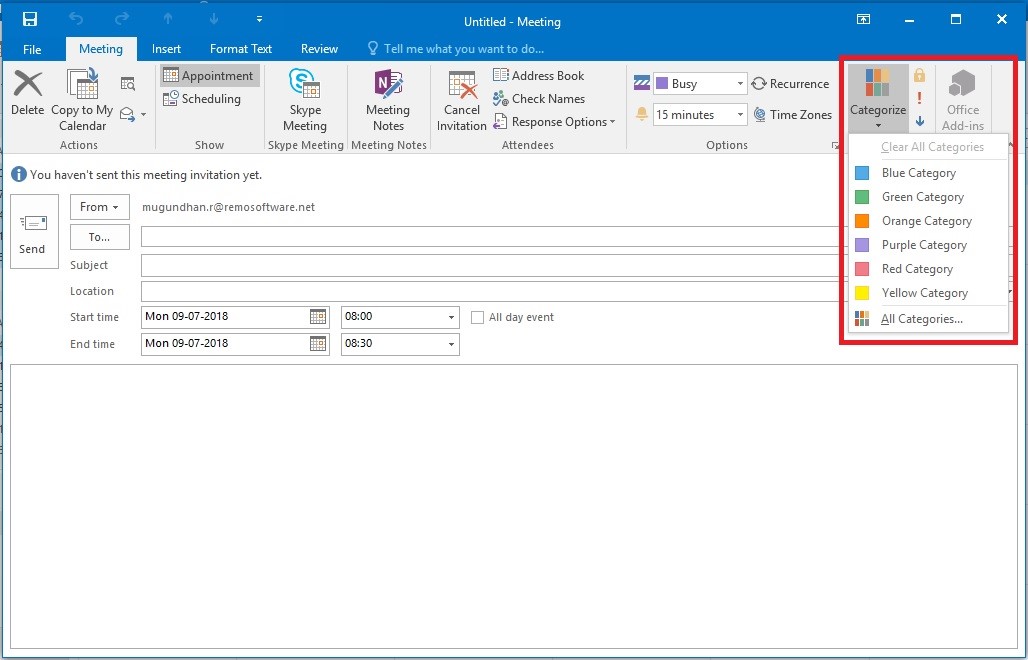
Figure 1: Color Categorize Outlook - Meeting
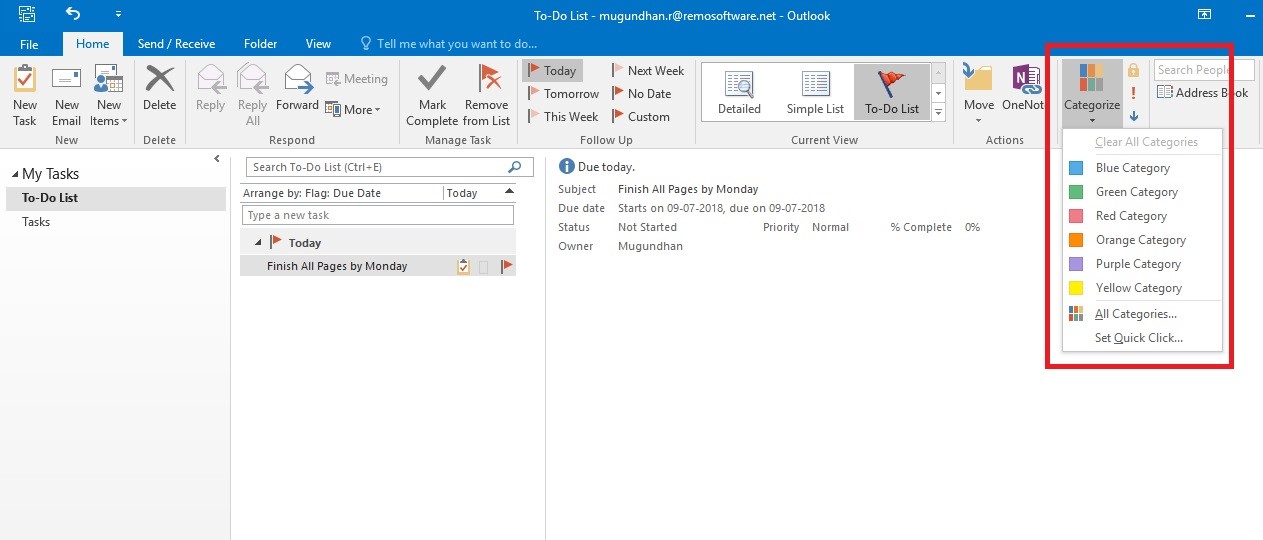
Figure 2: Color Categorize Outlook – To-Do List
Limitations of using Color Categorization in IMAP account:
While we lay our prime focus on POP3 accounts of Outlook 2016, this article also applies to other versions of Outlook, namely Outlook 2010 and 2013. Kindly note that IMAP accounts do not support color categorization due to limitations in the IMAP protocol.
By default, there are six colors you can use to categorize. You can also create a category by selecting a different color in Outlook color categories apart from existing quick categories or rename the existing color to serve your purpose.
How do you color code emails in Outlook?
If you intend to assign a category to a specific message in the list, right-click on the message. Click on Categorize and select the desired category.
While viewing the message, the categorize option can be found in the Tags displayed on the ribbon. If your intended category is not displayed, try looking for your category in the All Categories section.
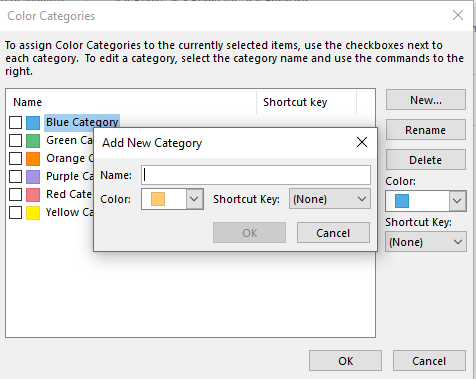
Creating an Outlook color category
- To Create a color category, choose the Tags option from the Home tab and select Categorize.

- From the drop-down menu, navigate to All Categories. Click the New option on the right from the dialogue box named Color Categories.
- Add new category dialogue box is displayed on the screen. Type the desired name of the category in the Name field, after which you are allowed to choose the color and shortcut from the respective drop-down menus.

- Click on OK to save your customized color category.

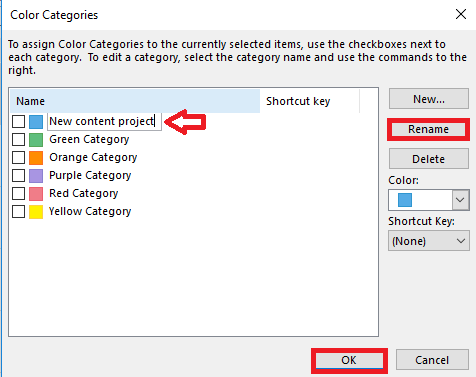
Renaming an existing color category
- Under the home tab, find Tags option and select categorize.
- From the drop down displayed select All Categories to have a color categories dialogue box displayed

- Select the category you want to rename and type in the new designated name.
- Click OK to save changes.
It is to be considered that multiple Microsoft Outlook categories can be assigned to a particular item. Any upcoming changes to the item are automatically applied.
What is Quick click and how to make best use of it?
Outlook color categories you frequently use can be added to the quick click section. Adding your category to this quick click section can make it more accessible. Once you successfully add your category to quick click section, you can instantaneously color categorize your mail by clicking on the tiny box on the right side of the message.
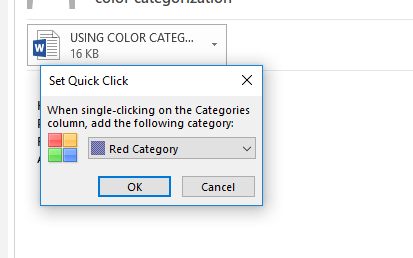
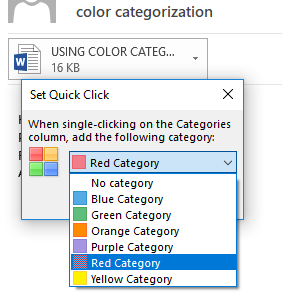
How to set quick click in Outlook 2016?
- Go to tags option in the home tab.
- Select categorize and choose set quick click from the drop-down menu
- A list of existing categories are displayed

- By just a single click you can add the category as a Quick click

- The setup is complete and saved once you click on OK.
How to sort your Outlook messages using Outlook color categories?
When you finally have all your messages color categorized, you can reap the harvest of sorting your emails in one single step.
Find categorize option on the column just above the messages and click on it. You can choose the category you want to sort. And also populate your search results accordingly.
Other sorting options to efficiently manage your Outlook
Other than just the color coding you can add a background image, or an inline picture and even sort your Outlook using other options like auto archive option which lets you maintain a slim PST file, you can also create Outlook rules which once set up, do not need any user interference and they are auto sorted.
After all your efforts poured into categorizing Outlook, you cannot let minor mistakes ruin your hard work. It is always recommended to have a backup so that you can restore your Outlook to its previous state.
In Outlook 2019, color categorization is expected to be much more exciting with better features and enhanced user interface. Outlook 2019 is expected to be released in second half of 2018, watch this space to get your hands on latest updates and tips.