Your Windows PC not working and the operating Software is to blame? Well, that may be a challenge. But you need not worry for we have straight forwards solutions to your tricky situation. In this article, we shall discuss Windows Recovery and share several tried and tested methods to help you get Windows up and running again.
Written by John Harris, Updated on September 13, 2023
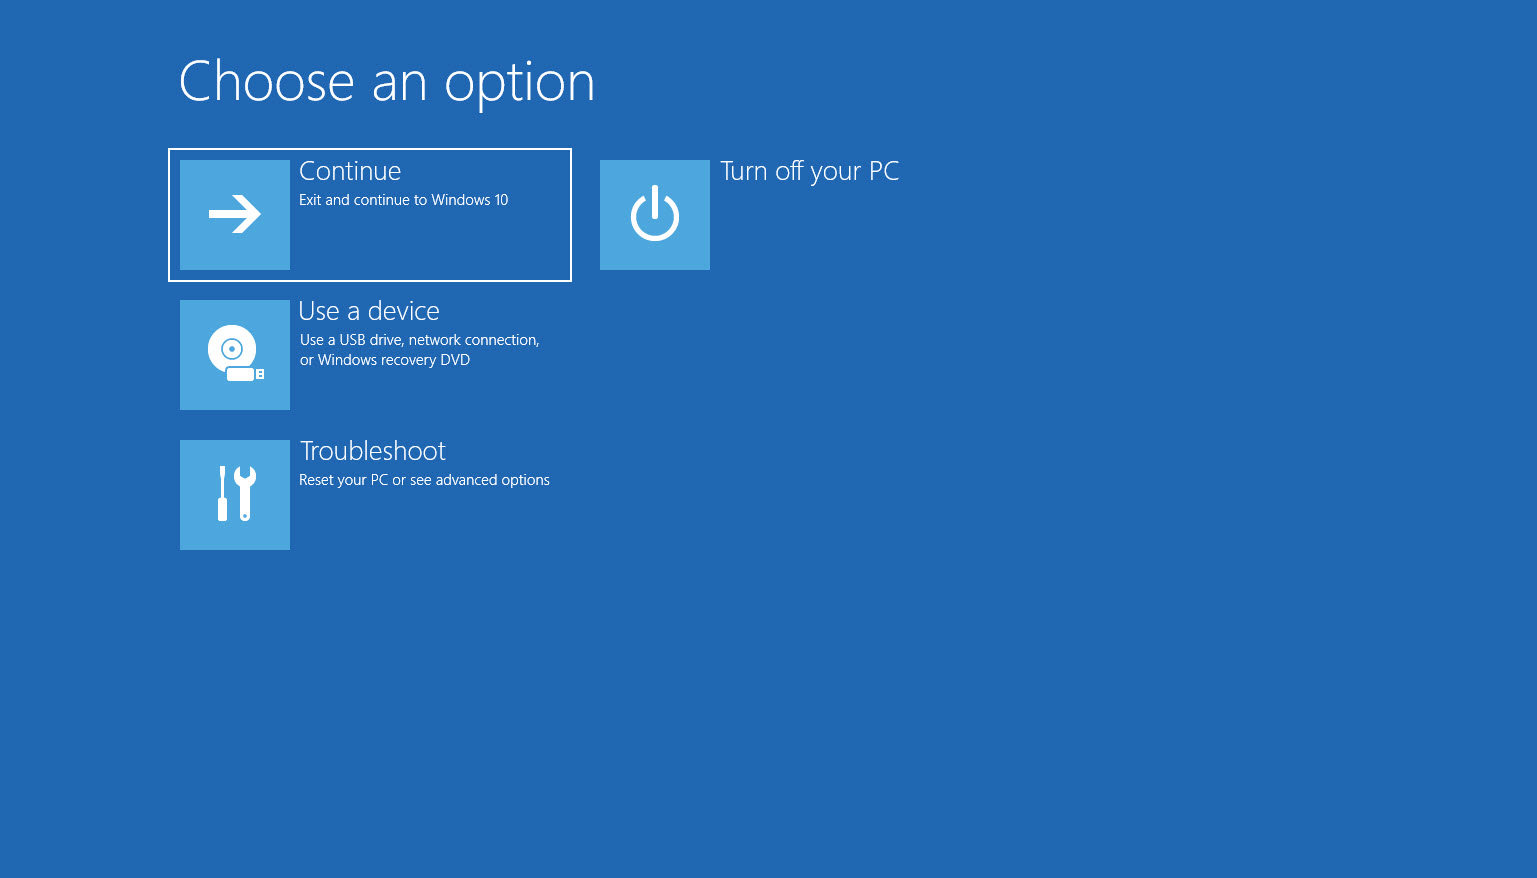
Windows Recovery can be described as the process of recovering or restoring Windows to its original or healthy state. In order to help users, Microsoft has created the Windows Recovery Environment. You could call it a menu that has every single feature and tool that you could use to ring your Windows OS back to normal. In this article, we shall explore each tool to highlight individual characteristics and utilities.
Windows Recovery Environment is a minimal operating system created by Windows that allows the user to make repairs when the software is unable to boot up. It comes with a select set of Windows recovery options that the user can use as per the situation.
| Windows Recovery Tool | Utility |
| Startup Repair | fixes common problems that prevent Windows from starting. |
|---|---|
| System Restore | Restores Windows to a previous point in time. |
| Command Prompt | Used to repair Windows by running commands. |
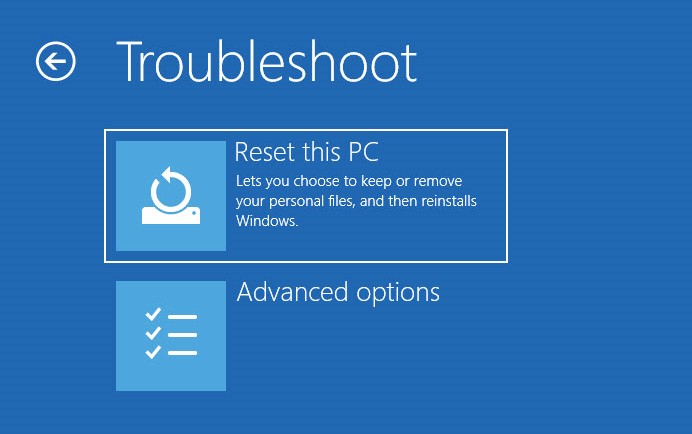
| Reset this PC | Allows the user to restore Windows to factory settings. |
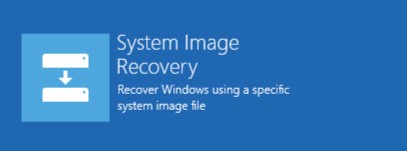
| System Image Recovery | Used to take a backup of your entire drive that can be used to restore your system at a later point in time. |
| Go Back To Previous Versions | Within The first 10 days of a Windows software upgrade, the user is allowed to revert back to the previous version. |
| Uninstall Windows Update | Allows the user to uninstall a problematic update. |
| Use A Professional Data Recovery Software | If all the above methods have been unsuccesfull, A data recovery software will be able to salvage any data that you may have lost. |
Note: Before making use of the Windows Recovery Environment, there are a few safety measures that you could take-
1. When your system is off-
2. When you are on the Logon screen-
Startup repair is usually enough to rectify a huge spectrum of common problems. It can fix startup issues by ensuring that your system loads properly. When your system fails to boot, Windows will attempt to automatically initiate startup repair. However, if you wish to do it using the Windows recovery environment, you can do so by following the instructions below-

This feature allows the user to revert back to an earlier state of Windows from a previous point in time. Think of it as resuming a game from a checkpoint. System Restore is ideally used in scenarios that include a system crash to recover the most recent data (changes made to a file etc.).

Command prompt is a feature that allows the user to execute and interact with Windows using commands instead. In this case, you can use it to troubleshoot any problems that you may have with your Windows PC.

| Command Name | Description | Command |
| SFC/Scannow | Scans disk to detect issues and fix them | sfc /scannow |
|---|---|---|
| DISM | Fixes Windows Image. Can be used after running the SFC command | DISM.exe /Online /Cleanup-Image /Restorehealth. |
| CHKDSK command | Scans the drive for file system errors and repairs | chkdsk /r |
The rest of this PC option shall restore the default factory setting of your Windows PC. This option usually comes in handy when users require a fresh start.
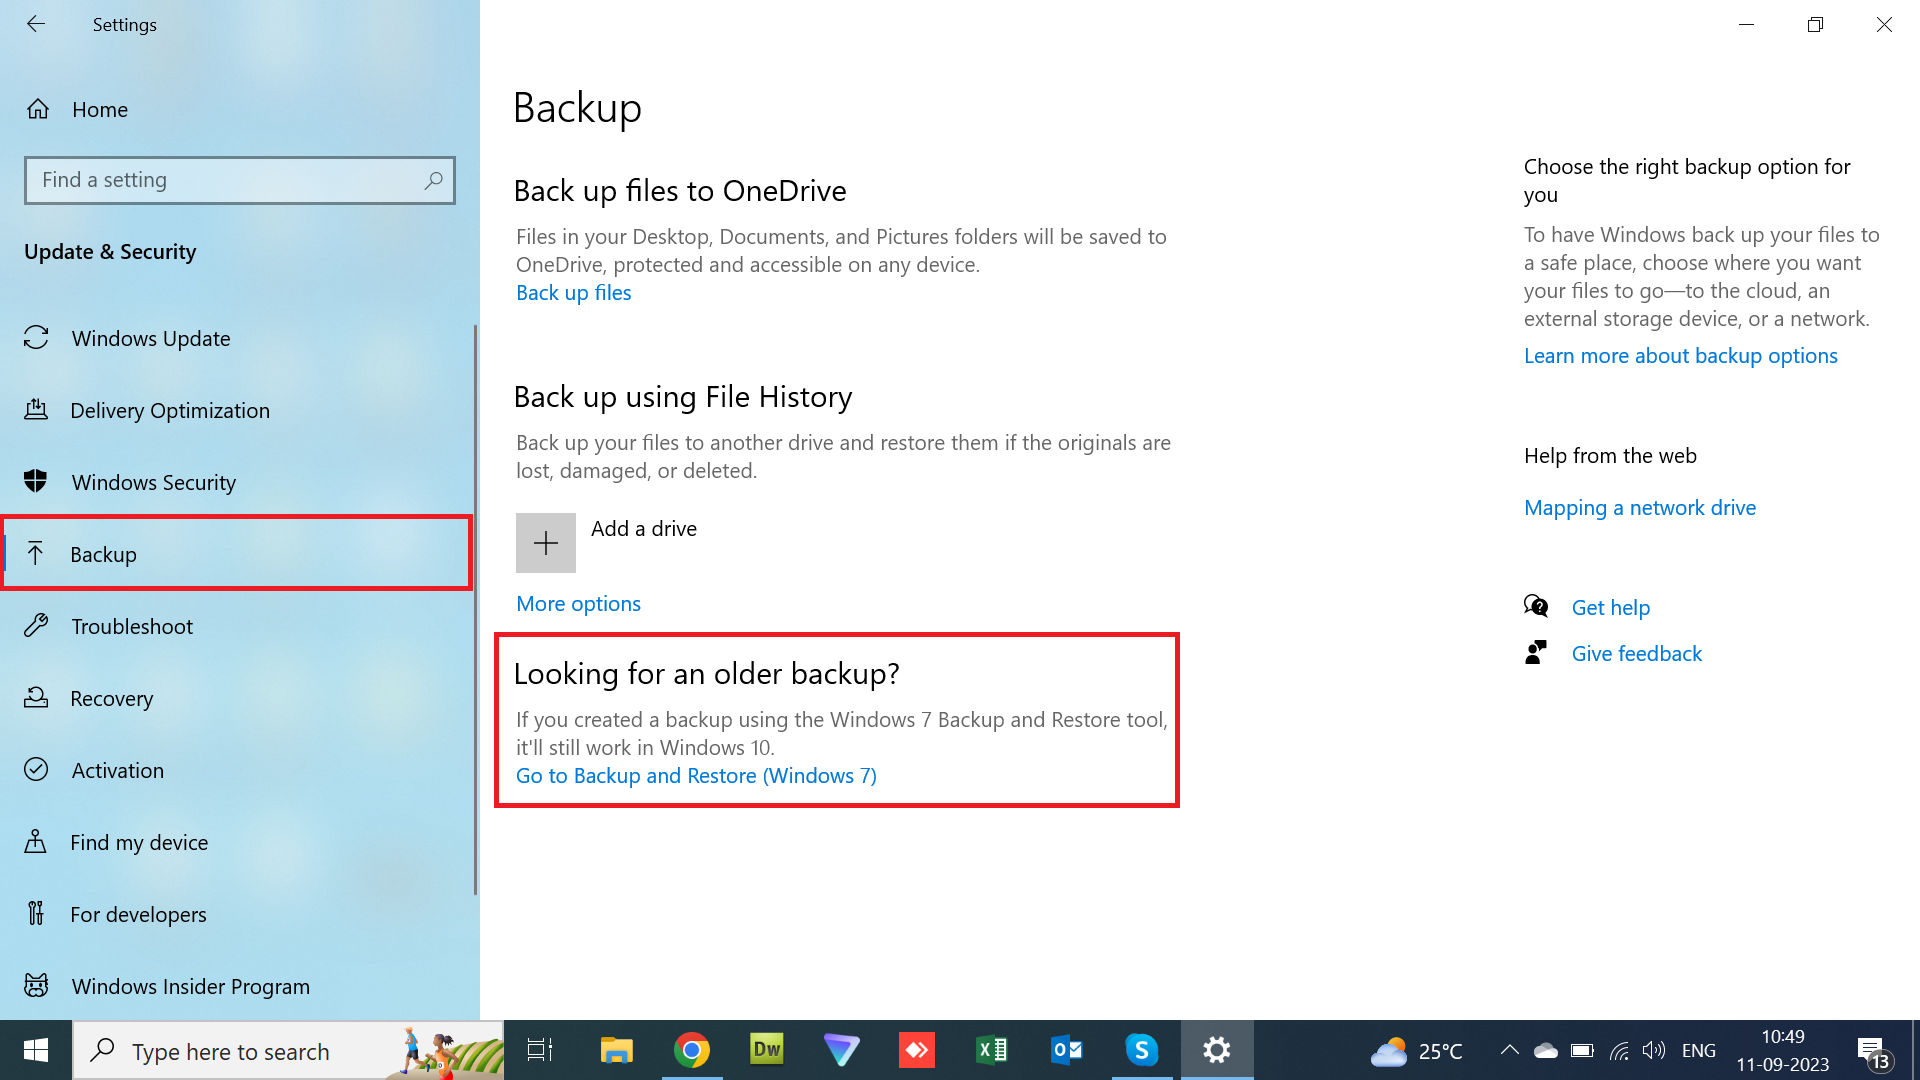
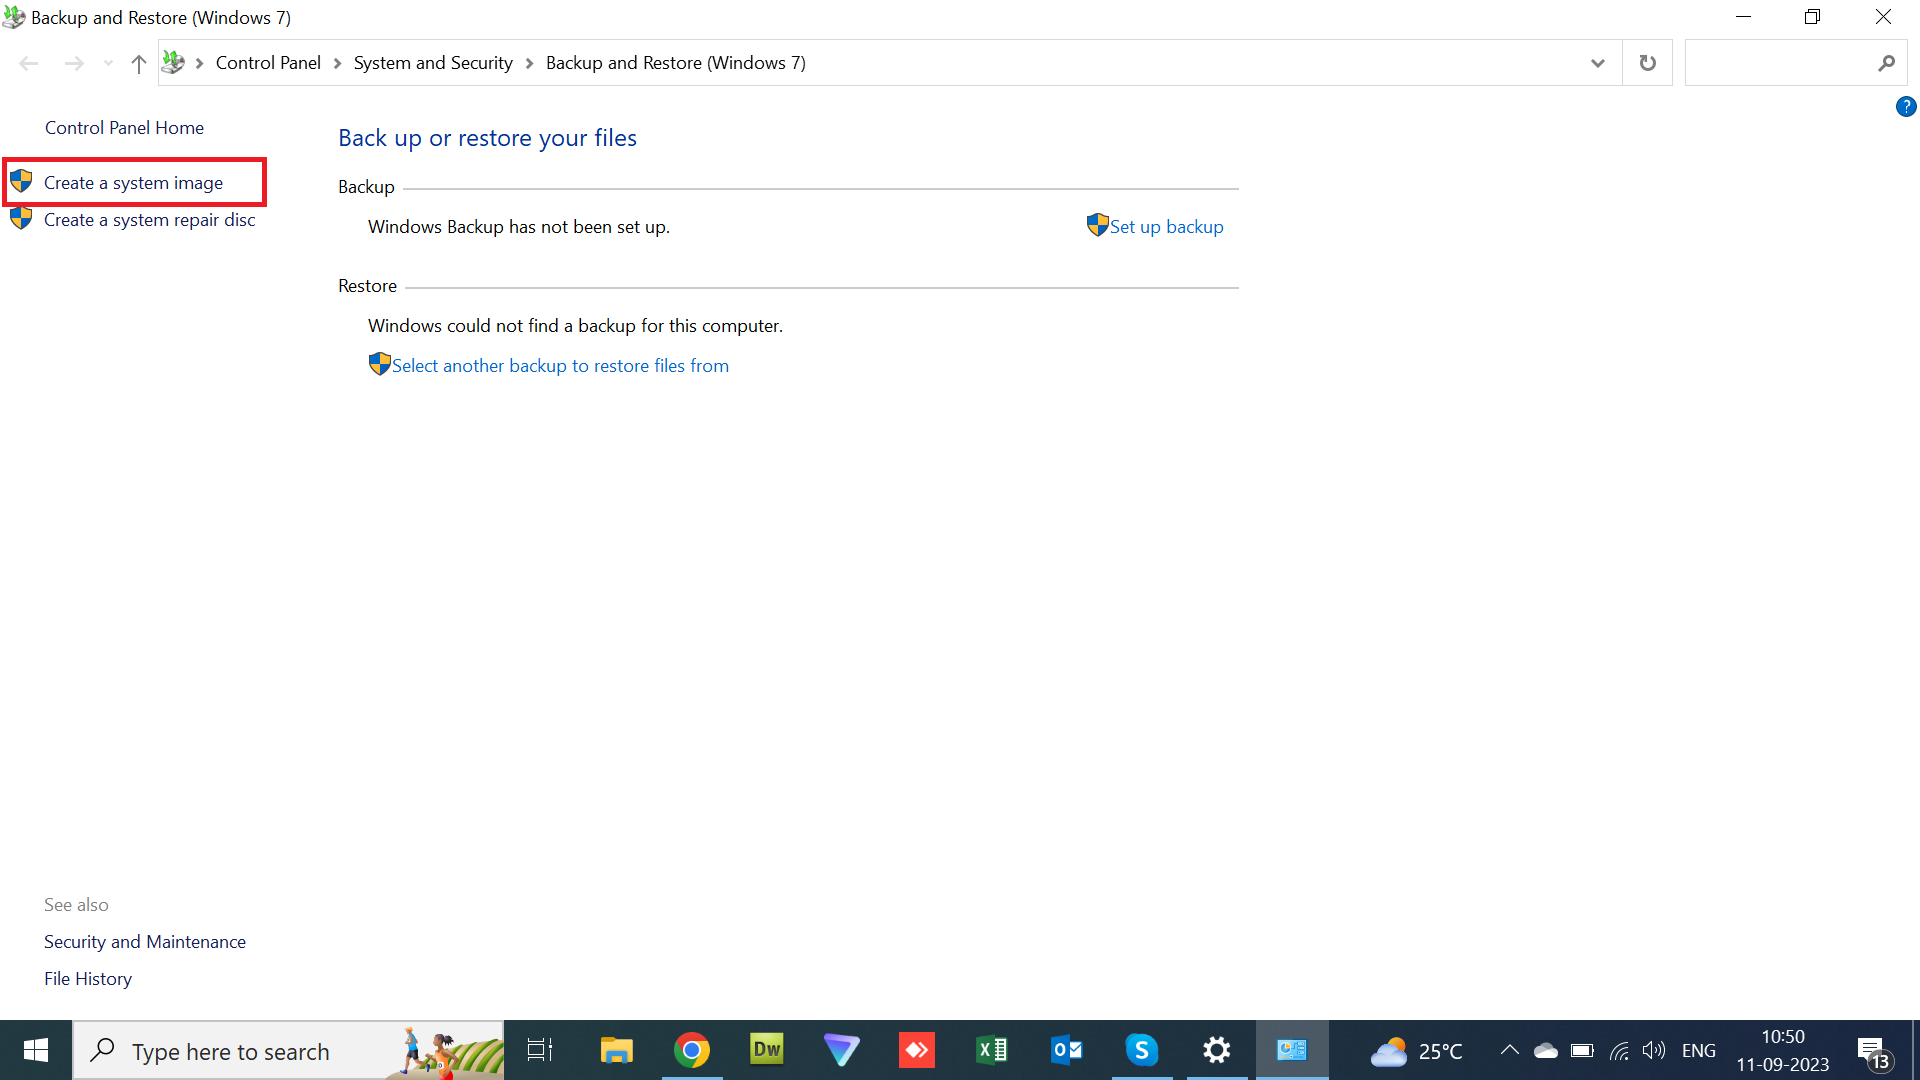
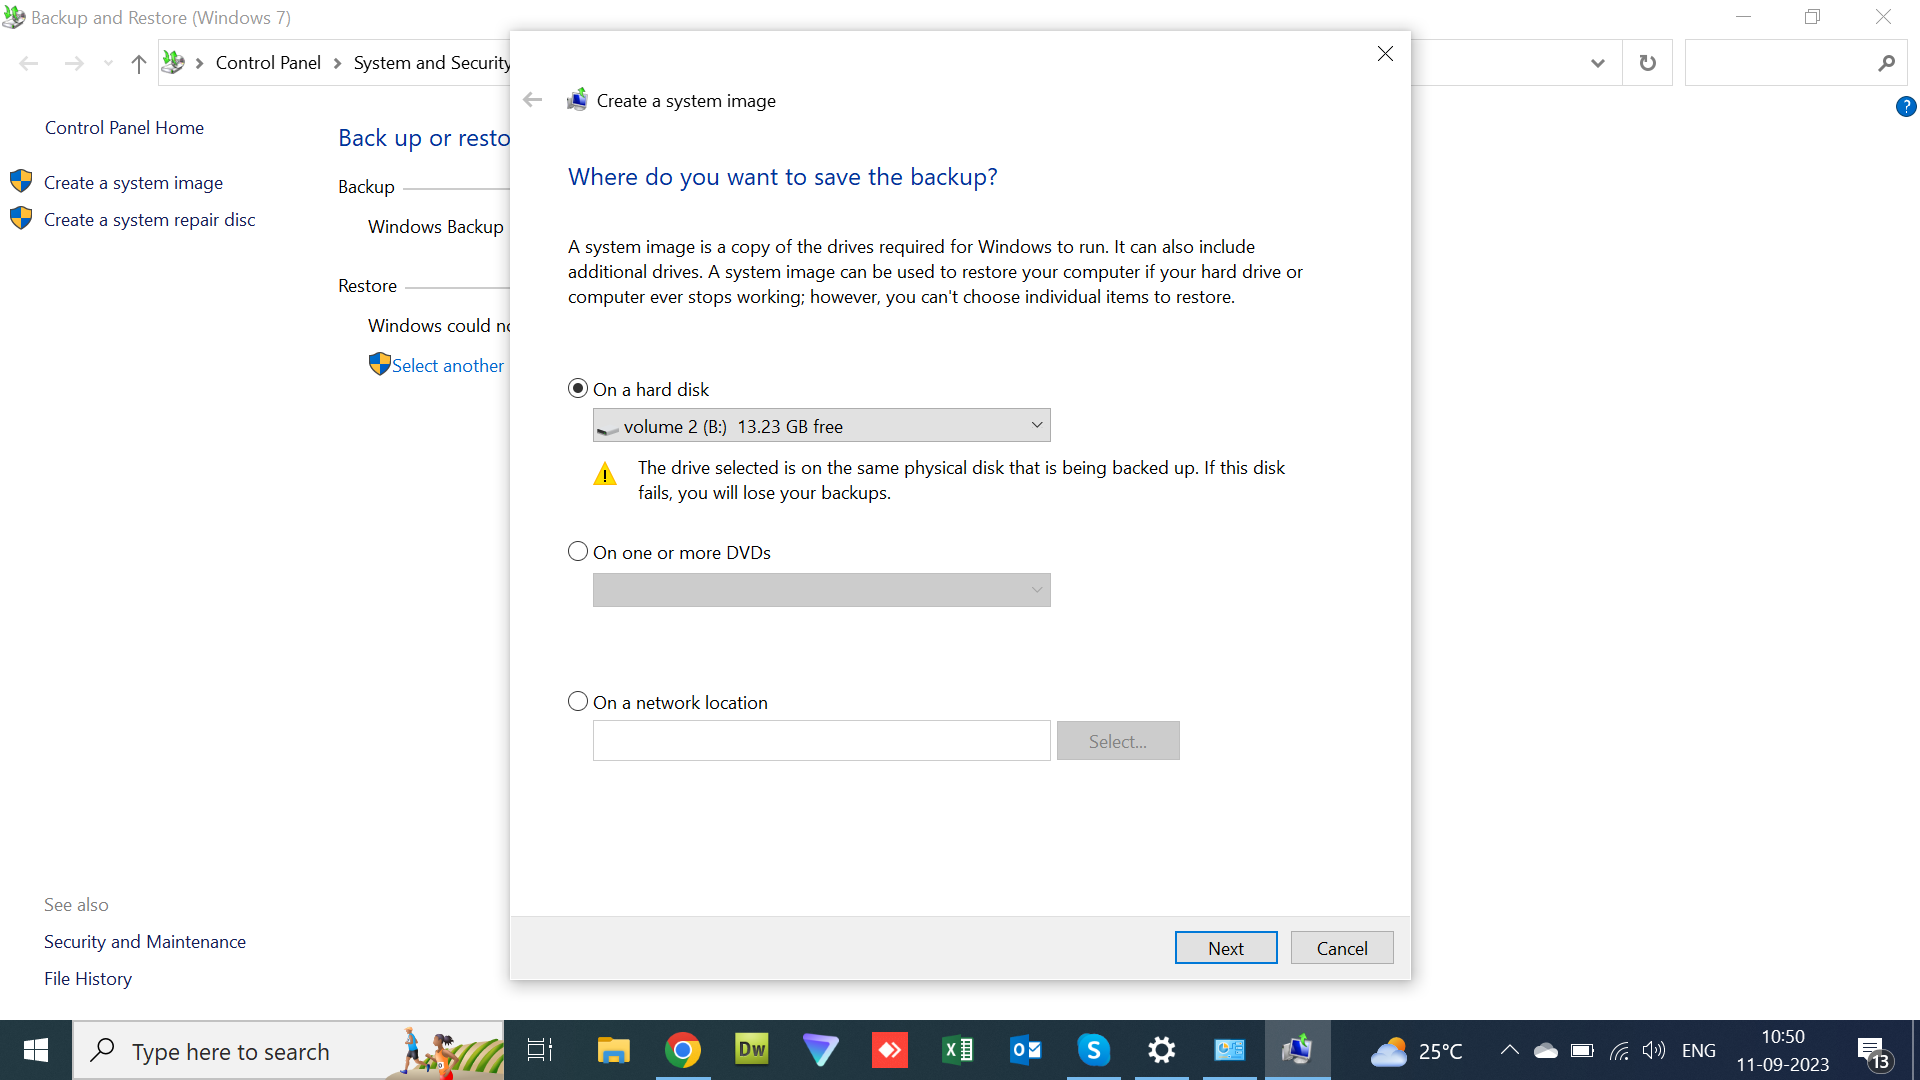
What is a system image?
Just as a photo captures every detail of a moment, a system image is a file that contains a copy of everything on a hard drive at the time of file creation.
Why is a system image important?
A system Image can also be used as a very reliable backup. In the event of an irreversible system crash or critical file system corruption, a system image can help restore your data, so the more recently updated a system image, the better.
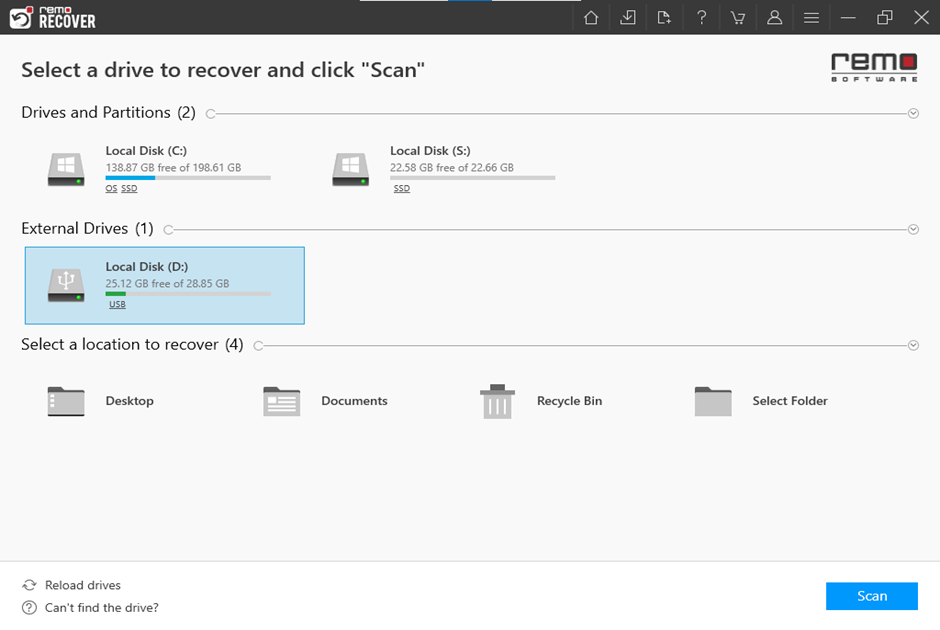
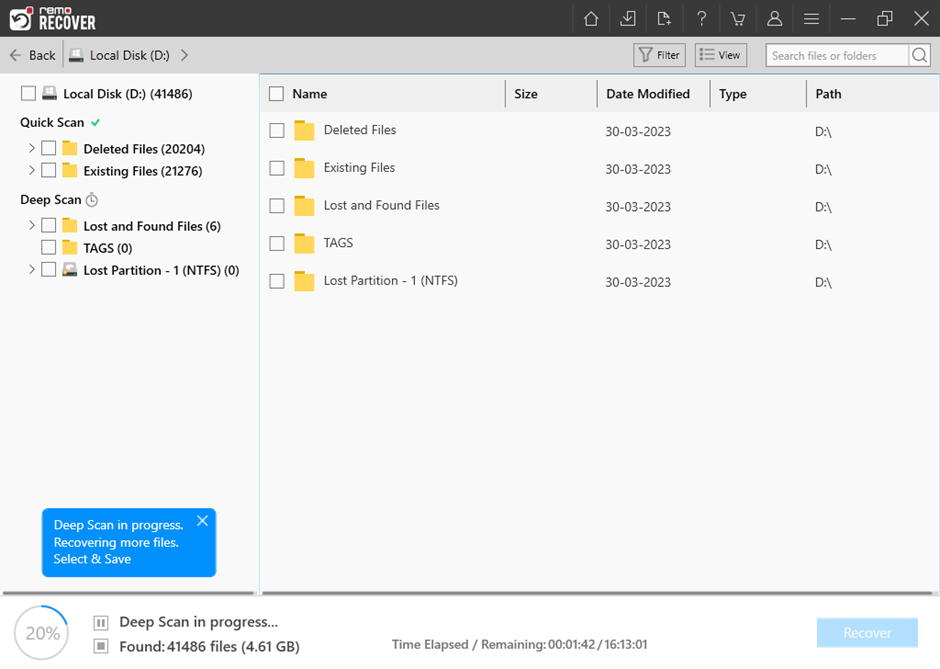
Note: If you do not have a system image readily available, you can always use professional data recovery software such as Remo Recover. Easy to use, and effective on the job, Remo Recover has a high success rate in recovering deleted or lost files even after they have been emptied from the Recycle Bin.
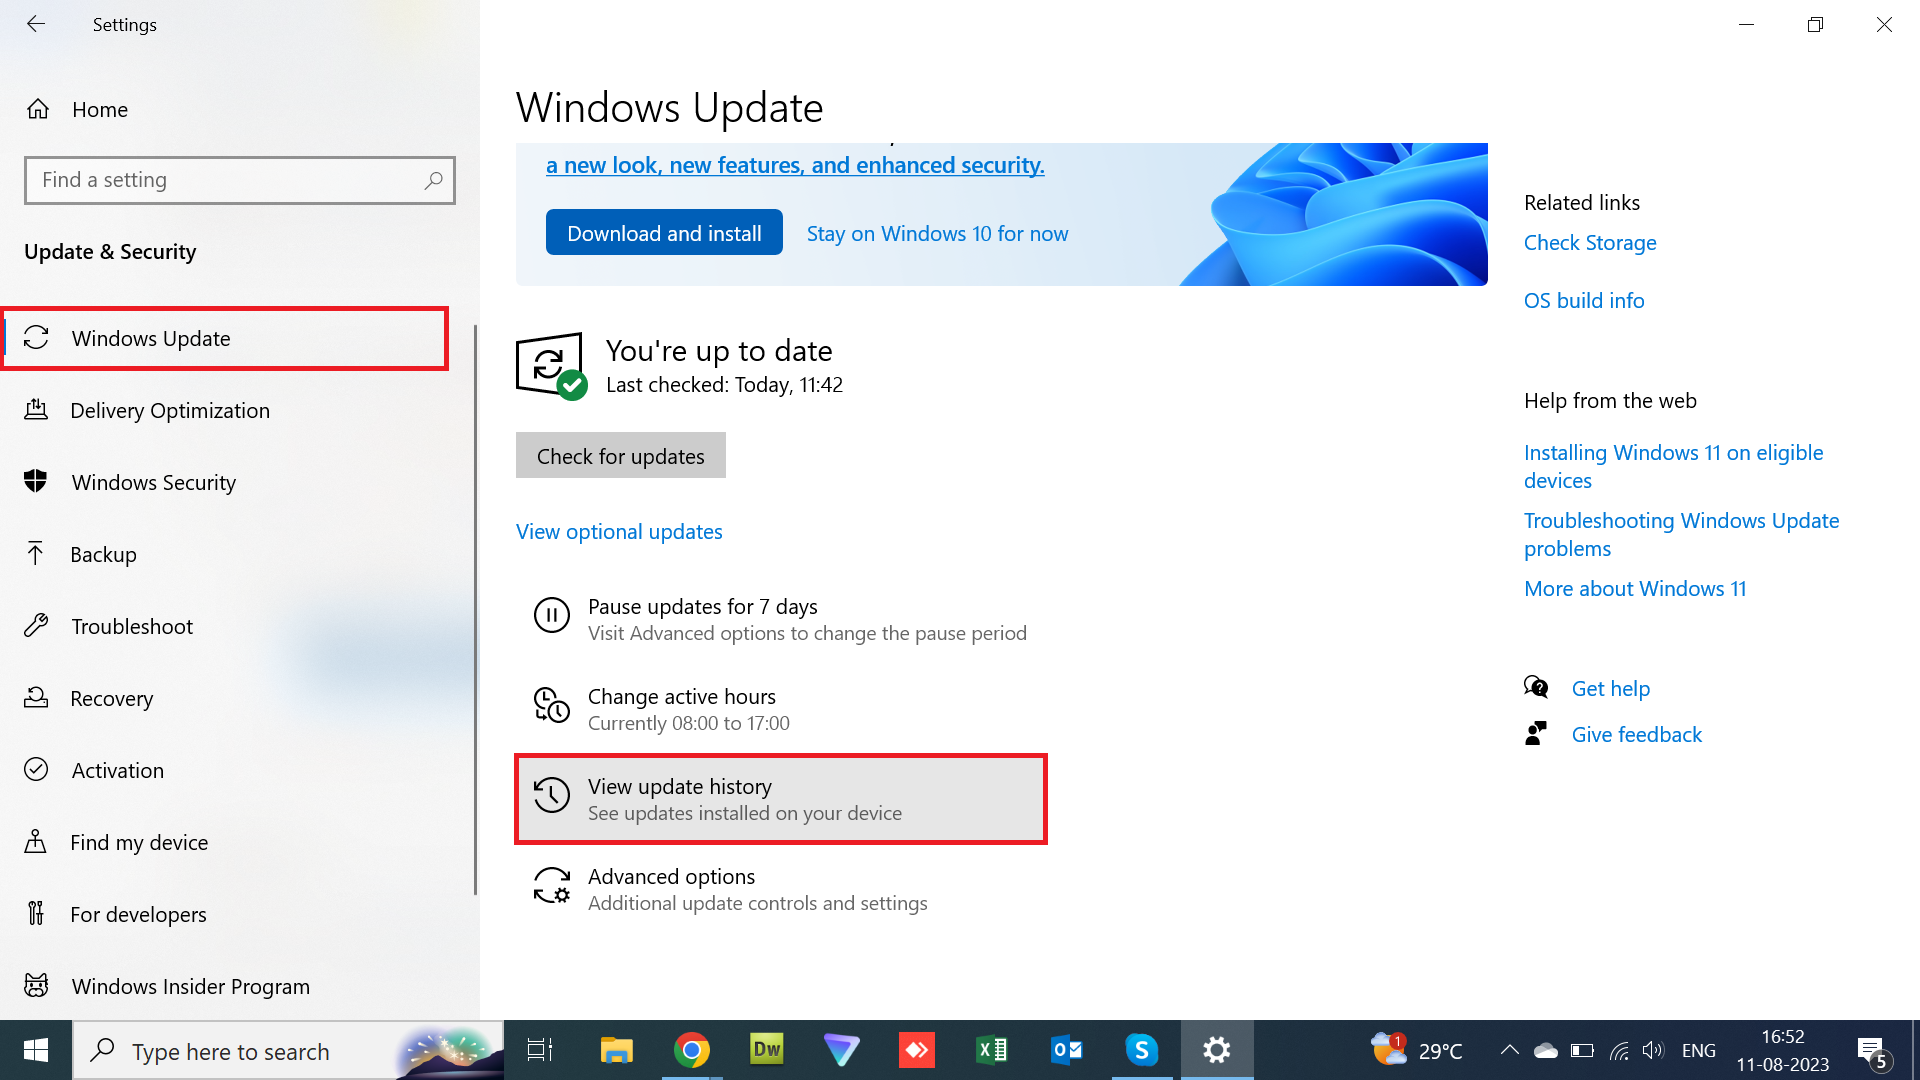
If you have recently upgraded your Windows Software to the next version you have the option to revert back to the original version within the first 10 days. This feature will allow users to correct issues faced due to a faulty update. However, this option has a few disadvantages attached.
In order to go back to previous versions, please follow the instructions below-
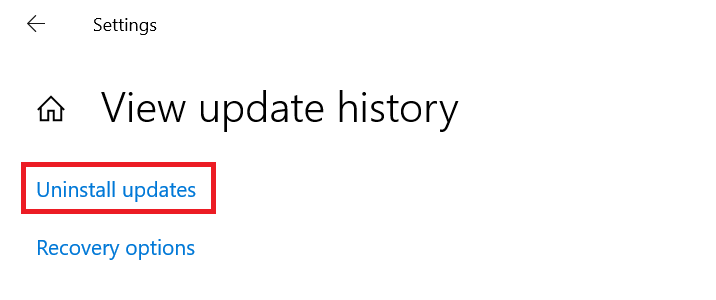
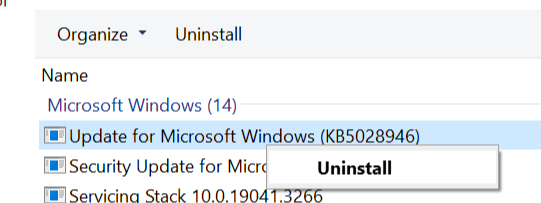
Some computers may face issues after a system update. In such cases, users have the option to roll back and uninstall the update. You can do so by following the steps below-
If your Windows System has crashed there is a good chance your file systems are corrupted. Data loss could be a major problem that you could experience with a corrupted file system. A really solid solution would be to make use of professional data recovery software such as Remo Recover.
Remo Recover is a User-friendly product that can recover lost data from corrupted Windows drives. You can recover your data today by downloading Remo Recover now!
Note: During this process, please ensure that your healthy laptop is plugged in at all times.
We hope that this article was able to help you restore Windows on your system. If you are unfamiliar with technology we would strongly advise that you approach a professional service. To prevent such scenarios in the future make sure to keep your Windows software updated.

Why Choose Remo?
100% safeSecure
100% SatisfactionGuarantee
10 Million+Downloads
Free TechSupport
Live Chat24/7 Support