How to Recover Data from SCSI Hard Drives in 2022?
Updated on April 02, 2022
SCSI server hard drives are used to store crucial data and losing them can be very costly. If you are one those who has lost data from SCSI hard drives, this article is for you. In this article, we present you a powerful data recovery software Remo Recover, that can help you recover data from SCSI hard drives easily like any other external hard drives. Download and try the tool for free now.
SCSI - small computer system interface, it is known for its rapid transfer speeds and relative versatility, SCSI hard drives are frequently employed with servers and business systems.
SCSI disk, like any other type of hard drive, can fail for a variety of causes, both physical and logical. Because SCSI systems commonly store databases and other essential information.
However, you may experience data loss issues even on the drives connected using SCSI interfaces due to various reasons. For instance, you may lose data due to a severe virus attack, due to corruption or bad sectors in the hard drive. Or it could be a hard drive crash or errors during formatting/partitioning that may lead to data loss.
But due to whichever reason you have experienced data loss, SCSI data recovery is possible with Remo data recovery software. This tool comprises of the most advanced crawl engines that scan through each sector of your SCSI hard drive. This enables recovery of every file without leaving any of them behind. The tool is capable of recovering about 300 types of files including all your documents, media files like photos & videos etc.
Next, let us see how to recover data from SCSI hard drives.
How to recover data from SCSI hard drives?
Remo Recover is an instant way to recover data from SCSI hard drives. Be it an electronic failure, corruption, accidental formatting, bad sectors or RAID rebuild failure, Remo Recover is the perfect choice for SCSI data recovery. It is an able tool that performs recovery from hard drives as well as SCSI connected RAID arrays. Check out a free trial now!
If your SCSI drive is a booting drive and has OS installed on it, please connect the SCSI drive to another computer or workstation. This will help avoid any overwriting of data and permanent data loss.
Download and install Remo Hard Disk Recovery software on the computer where you have attached the SCSI drive as secondary and start the recovery process using the steps below.
Step 1: Launch the application by double-clicking the shortcut on the desktop or using the Start Menu.
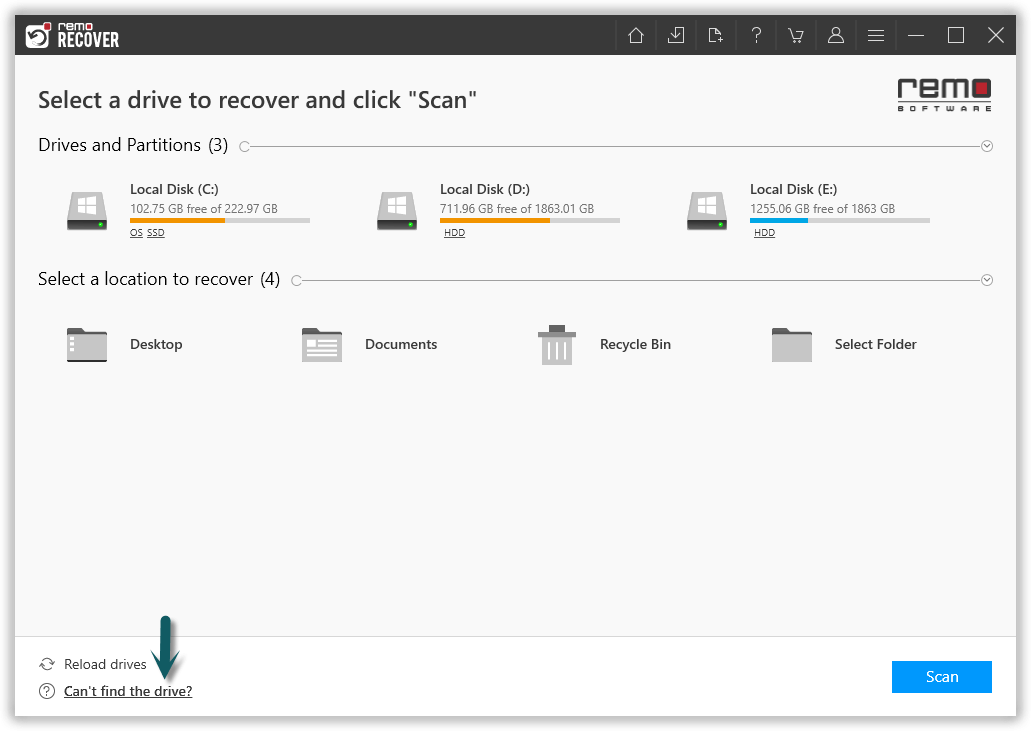
Step 2: Select the SCSI drive and click on the Scan option to begin the scanning process. If you are unabel to find the drive click on "Can't find the drive?" option.
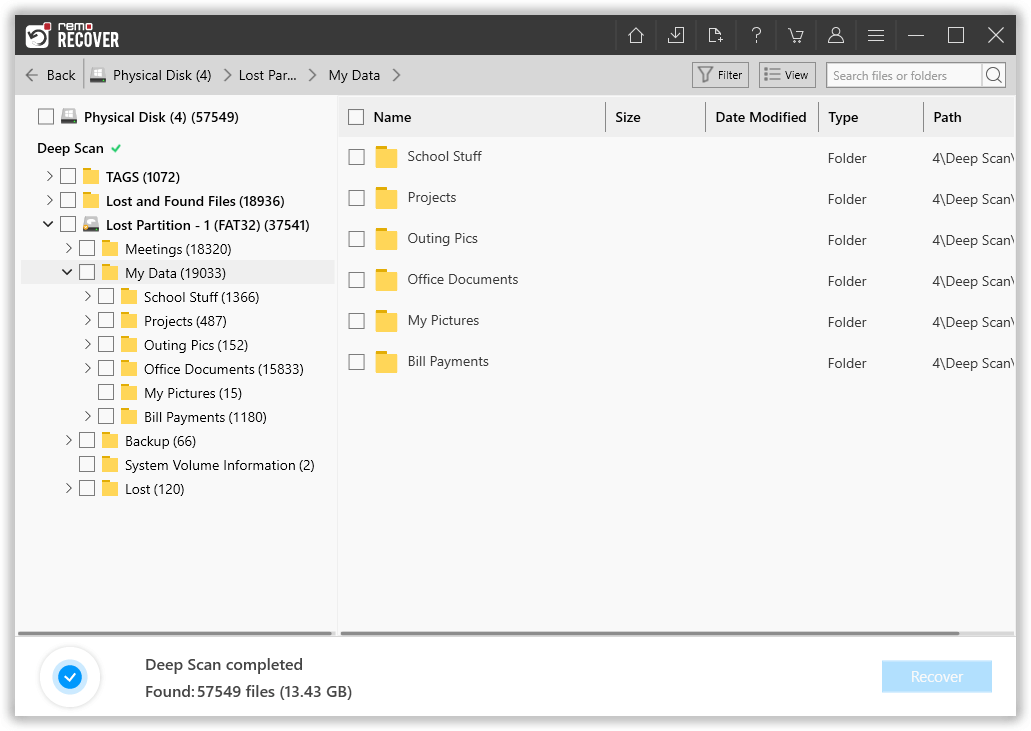
Step 3: Once the scanning process is finished it displays a complete list of recovered data.
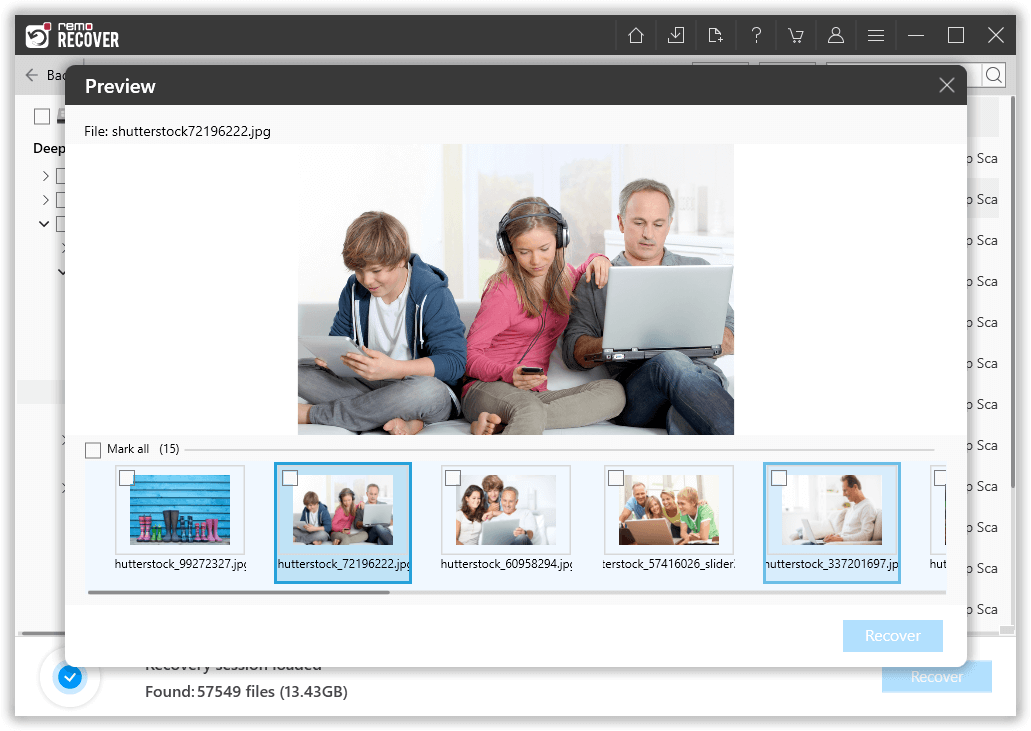
Step 4:Preview option allows you to view the recovered data.
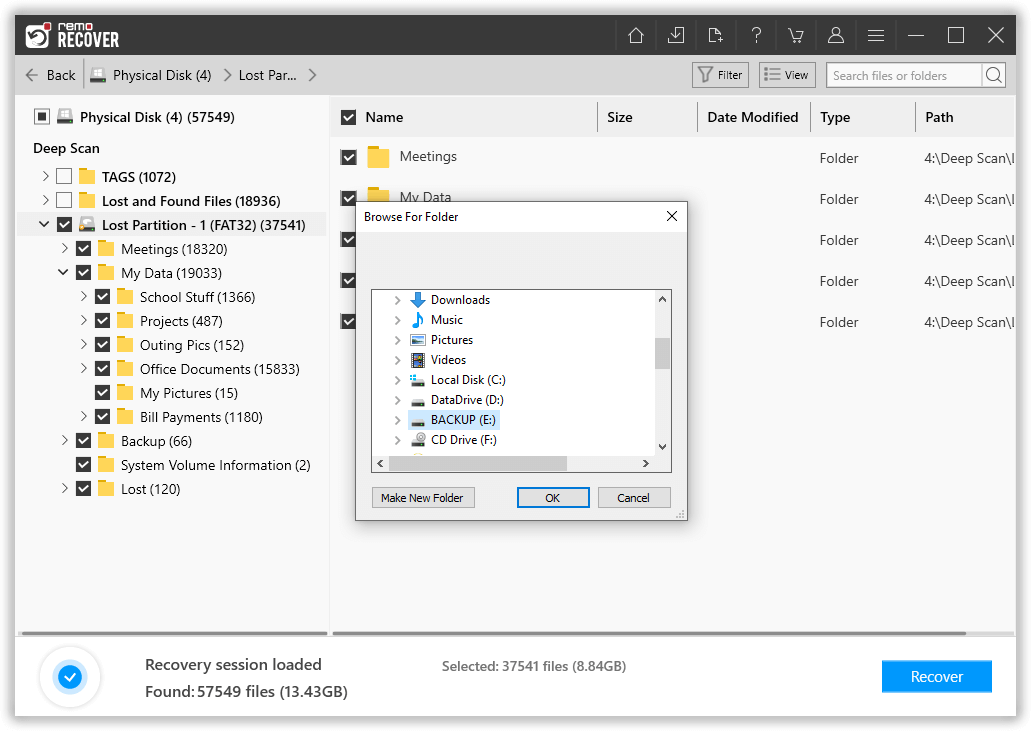
Step 5: As a last step, click on Recover button and select a folder where you want to save your recovered files, and click on the OK button to start the data saving process.
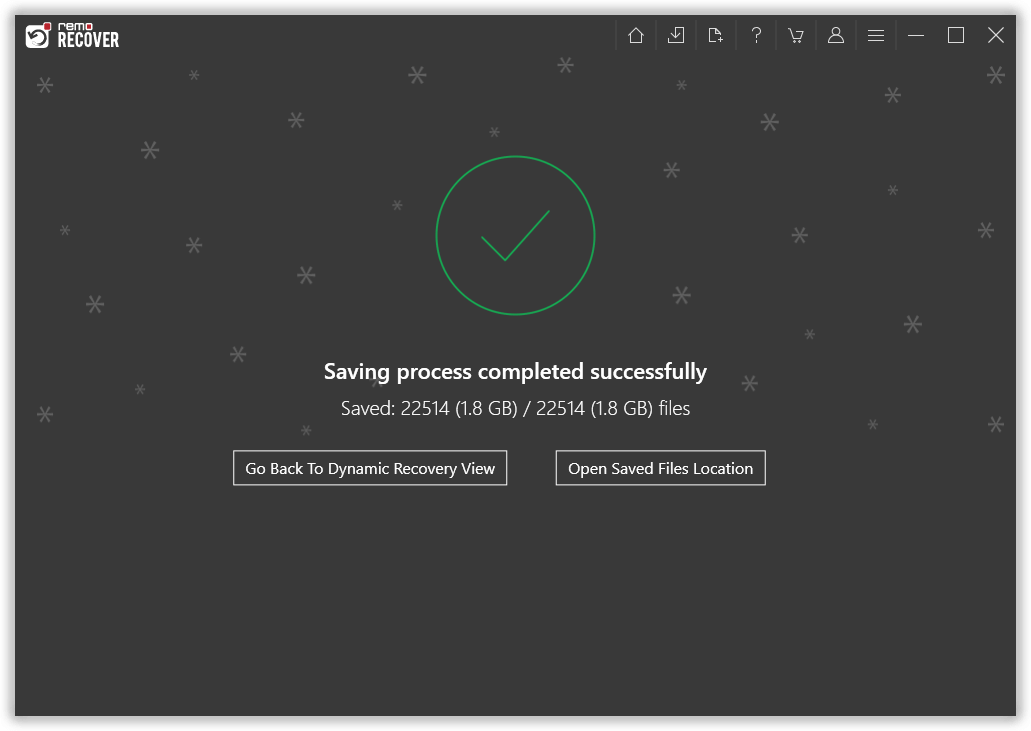
Step 6: Once the saving process is completed, the following image will appear on your screen.
Why you should choose Remo Recover for SCSI data recovery?
Ideal to perform SCSI data recovery from formatted SCSI drives
Recover data from partitions that are deleted, missing or inaccessible on SCSI drives
Recover deleted or lost data from RAID SCSI arrays
Supports inaccessible, corrupted and crashed SSD recovery as well as SATA and IDE recovery
Supports recovery of data from FAT16, FAT32, NTFS, NTFS5, ExFAT formatted partitions or drives
The software can also retrieve deleted files and folders from USB flash drive, SD cards, external HDD, thumb drives, and other storage devices with ease
Scenarios leading to data loss on SCSI drives
Damaged boot record: The Boot record may get damaged, corrupt or may sometimes go missing due to corruption in the drive. Due to this, data may be lost from these drives.
Bad sectors: Aged SCSI hard drives or severe corruption can cause bad sectors. This often results in the drive becoming inaccessible and consequently data loss.
Third party utility: Accidentally formatting or partitioning the SCSI hard drive with unfamiliar third party utilities may lead to data loss.
Power failure: When the power fails during the data transfer in SCSI drives, you may encounter SCSI transport failed error and that may result in data loss.
Improper shut down: Improper system shut down may cause corruption of system files leading to SCSI hard drive crash.
Improper hot swapping: SCSI drive provides the facility of hot swapping the drives to eject or plug-in drives in the server. Improper or abusive usage of hot swapping function may cause file system corruptions.
Related Information
Formatted NTFS Partition Recovery
Even though NTFS and FAT file systems are completely different in their mechanism of storing files but the process of recovering formatted data from both the file systems are the same. If you have accidentally formatted your NTFS drive or partition, Remo Recover is the one for you. The software can even retrieve compressed files from your NTFS partition.
Recover Files from Failed Hard Drive
Failed hard drive indicates that your laptop or PC hard drive is not able to load to the operating system, which makes all your files and folders difficult to access that are present in the hard drive. To get back those files and folders use Remo Recover, which is a complete data recovery utility for recovering data from disk that have logical failure. For detailed information refer to this page.