Wondering how you can take backup of your computer to an external hard drive? Don’t worry in this article we have explained how to take backup of your computer. We covered different versions of Windows and Mac OS. Read the full article to find out.
Backing up your data becomes crucial in today’s time. A 2020 global survey found that more than 40% of organizations have experienced a data breach or loss at some point. Even the smallest data holds importance, and losing it due to carelessness can lead to loss. Whether you have a laptop, mobile phone, tablet, or other digital devices, you should back up your data regularly.
Backing up data is important in case of device theft or loss, device damage, data corruption by viruses, and malware attacks that lead to data loss. By backing up your data, you can keep your data safe and always available. It’s surely better than losing it forever.
Table of Contents
The system image tool allows you to create a full backup to an external drive or network-shared folder. However, it is best to use removable storage, which you can then disconnect and store in a different physical location.
To create a full backup of Windows 10 with the system image tool, use these steps:
2. At the bottom of the left pane, you will see a link to System Image Backup, under "See also." Click on that link.
3. The System Image Backup utility will open. Select your external hard drive to save your system image backup, and click Next. Confirm your settings and click Start Backup.
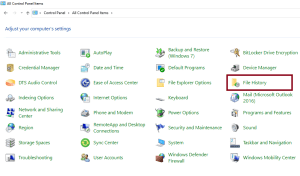
File History can help to get files kept in the Documents, Music, Pictures, Videos, and Desktop folders and the offline OneDrive files backup to an external hard drive on Windows 11. But it is important to find that File History is to create a full copy of the original files and folders.
Note: After multiple backups, you may find plenty of duplicates of the same file. You can use the Remo Duplicate File Remover tool to delete all your duplicate files with ease.
The method is to use another useful built-in tool - Windows 11 Backup and Restore for backing up files. It will backup data files saved in libraries, on the desktop, and in default Windows folders. These items will be backed up on a regular schedule. It can also create a backup image of your entire system, including the operating system, applications, and settings.
Follow the below simple steps to back up the laptop to an external hard drive.
Step 1. Go to Control Panel > System and Security > Backup and Restore (Windows 7).
Step 2. Select the Setup Backup option under the “Backup” section
Step 3. If prompted, enter your admin password.
Step 4. Select your Backup Drive and click Next.
Step 5. Select the Let Windows Choose option and click Next. It will backup files about users, such as files saved in libraries, on the desktop, and in default Windows folders.
Note: You can choose the “Let me choose” option as well and take the backup of the files of your choice.
To perform a manual backup of your computer to an external hard drive, all you have to do is connect your external hard drive or flash drive to your computer, and then you have to copy the files of your choice to the external hard drive.
To copy the files, you can drag and drop the files to the external hard drive/flash drive, or you can use the copy and paste feature as well.
Note: Make sure the storage size of the flash drive is enough to take the backup, for a safer side you can use external hard drives to take the backup as external hard drives have bigger storage also; external hard drives will help you to perform the backup faster as external hard drives work faster than the flash drives. These backups will come in handy in case you ever accidentally delete files from hard drive.
Time Machine is the easiest way to back up MacBook which is developed by Apple. Once you have a timely backup, it’s very easy to restore all of your data in case of unintentional deletion or a hard drive crash.
Follow the below steps to take a backup of your MacBook to an external hard drive:
You can manually back up your MacBook Pro to an external hard drive. Just plug in the external hard or flash drive to your Mac computer and follow the below steps to get started with the backup process.
You may have heard the mantras of “back everything up” and “if you have one, you have none,” but not everyone takes these mantras as seriously as they should. Not everyone is mindful of the reasons for needing additional copies or backups in the first place. Data loss can actually be a disaster for small and big organizations and even for individuals. The top five reasons are listed below for you to keep regular backups.
Why Backup Your Data?
Additional Information: If you are unable to access your hard drive because of corruption or any other hard drive issues, you can use a trusted data recovery tool like Remo Recover to recover your lost data from your corrupted hard drive with ease.
The tool is capable of recovering lost data even after severe hard drive corruptions that result in Raw partitions. Even in cases of deleted, lost, or formatted partitions, the software can scavenge each and every sector of the hard drive to recognize and recover more than 300 file types. Additionally, the tool has support for recovering data from FAT16, FAT32, NTFS, NTFS5, and ExFAT drives on any Windows and Mac OS.
The bottom line is backing up your computer is an easy and simple process that will save you time and effort just in case something happens to your computer. Making it a priority and taking the time to back up your computer frequently are great protective and safeguard measures from having your data lost or stolen.


