Outlook is more than just an Inbox tool. However in order to make the most of what Outlook has to offer, we can also set up rules that a customized to our work requirements. If you would like to learn more about Outlook rules and how to set them up, please continue reading-
We might have our email sorted according to our convenience, but grouping important emails that you receive every day is tiresome.
The primary objective of this article is to focus on creating rules in Outlook 2016 that automatically arrange your Outlook emails into assigned folders. This reduces your email sorting time and decreases the probability of missing out on important emails.
Now we are going to discuss different steps to create rules in Outlook 2016 and their uses to manage your Outlook inbox effectively.
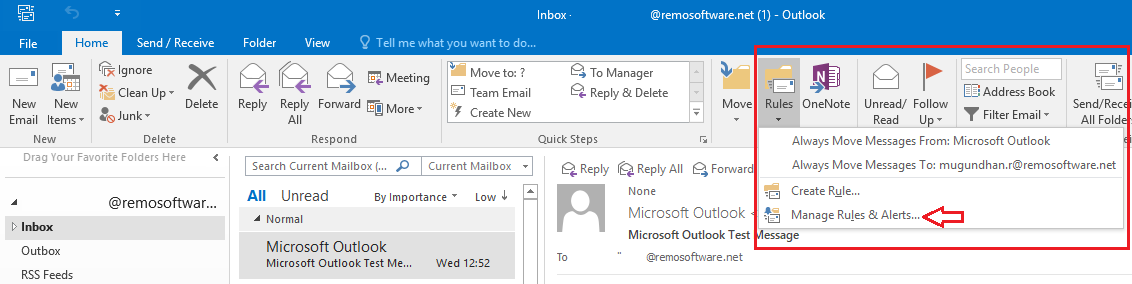
Step 1: Under Home tab->Choose Rules->Manage Rules & Alerts

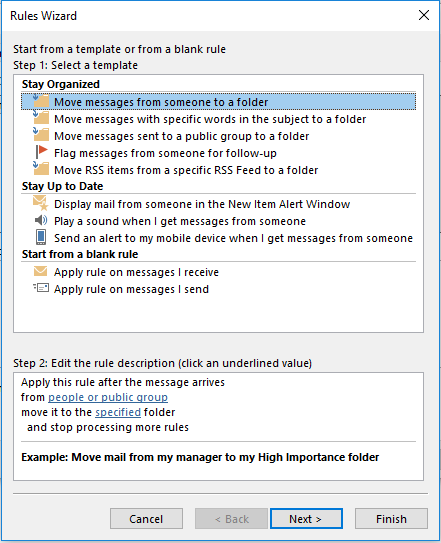
Step 2: Click New Rule in the window, a dialogue box opens as shown below with 3 options
Stay Organized, Stay Up to Date, and start from a blank rule
Basically, this option moves your incoming emails to different folders based on your prior rule plan.
For example, you can move a mail from a particular client to a specific folder (My Client) based on a specific word (Quotation) in the subject.
By using this option, you can flag a specific (Client) mail for follow-up.
Even your specific RSS feeds can also be sent to a particular Folder.
Separate group emails to a group-specific folder.
Use this option to organize your incoming mail to sort and respond to it effectively.
The new Item Alert Window helps you to take immediate action on high-priority emails.
You can activate a sound alert for a message from a specific sender
Receive mail alert SMS to your mobile.
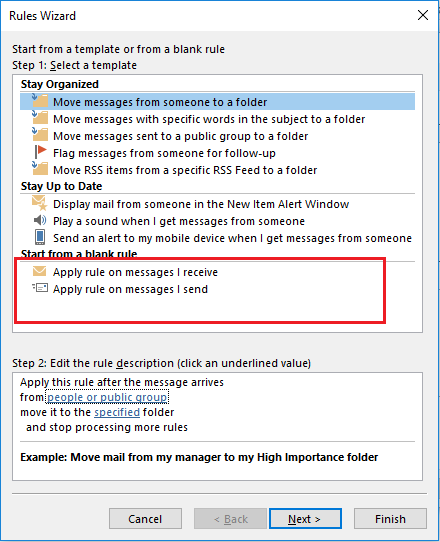
Sometimes you might want to customize the action that you want to take regarding an email.
In that case, you can use Start from a blank rule option.
Let us consider a scenario to better understand how we can create rules in Outlook 2016 and their respective Actions to pre-define the organization of your Inbox
Step 1: Create a new folder as Sample Project
Step 2: Open Rules by following the above-discussed method, Select Apply rule on messages I receive
Step 3: A list of 31 Rules will be displayed. Check the Assigned to Category category option from the Step 1 box. From the Step 2 box. C.hoose a blue color by clicking on Category.
Step 4: In the next window choose Move it to the Specified folder option from Step 1 In Step 2. Choose the Sample Project folder by clicking on Specified
Step 5: If you have any exception apply that by choosing it from the listed options. For example, select Except where my name is in the CC box to exclude that particular mail.
In the next window, you can assign a name to this specific rule as My Sample Project. Older messages can also be moved by using the Run this rule now on messages already in ‘Inbox’.
Review the options and proceed with Finish. Your new rule is displayed on the main window.
To confirm click Apply
Although the process involved in creating an Outlook rule is the same as the Wizard step as shown above procedure for Outlook 2016, we shall provide steps to help you navigate to the Rules options in various older versions of Outlook
Step 1: Select Mail from Navigation Pane
Step 2: Click the Tools Menu from Ribbon
Step 3: Select New Rule on the E-mail Rules tab to see the Rules Wizard window
Refer the Step 2 from the “Create Rules in 2016” section to progress further.
Step 1: Select File
Step 2: Click on Manage Rules & Alerts
Step 3: Select New Rule on the Email Rules tab to see the Rules Wizard window
Refer the Step 2 from the “Create Rules in Outlook 2016” section to progress further.
Now you have created a new customized rule to manage your project files. This method of grouping your emails can help you to stay organized. To preserve these rules created, backup regularly in order to migrate your Outlook data whenever necessary.
Once Microsoft launches Outlook 2019, we will discuss its unique features in the future.


