User Query: How To Transfer Photos From the Camera To Mac?
Solution: As a Mac user, keeping your photos organized is essential, and one aspect of this is transferring them from your camera to your Mac computer. This process may seem daunting if you're not familiar with it, but it's easier than you might think! In this article, we'll walk you through the steps to transfer photos from your camera to your Mac with ease.
Whether you're a professional photographer or simply someone looking to keep their memories safe and organized, our guide will provide you with easy-to-follow instructions. With the help of this article, you'll be able to import photos from a camera to Mac in no time and keep them organized for easy access and viewing.
- 10 Effective Methods to Transfer Photos From Camera to Mac
- Method 1: Transfer your Photos Using Bluetooth Transfer
- Method 2: Use AirDrop to Transfer your Photos From the Camera to Mac
- Method 3: Import Your Photos Using Cloud Storage
- Method 4: Upload Photos From Camera to iPhone Using Wifi SD Cards
- Method 5: Use a USB Cable To Transfer Photos From the Camera To Mac
- Method 6: Import Photos From Camera To Mac Using Image Capture
- Method 7: Use a Memory Card Reader to Transfer Photos From the Camera to Mac
- Method 8: Use Mobile Utility To Transfer Photos From Camera To Mac
- Method 9: Use File’s App to Transfer Photos from Camera to Mac
- Method 10: Import Photos to Mac Using the Camera Adapter
- Conclusion
10 Effective Methods to Transfer Photos From Camera to Mac
Below we have mentioned 10 effective methods to help you transfer photos from a camera to Mac:
Method 1: Transfer your Photos Using Bluetooth Transfer
- Make sure that your Camera is Compatible with Bluetooth transfer and that it is turned on and paired with your Mac. You can check your camera’s user manual for specific instructions on how to do this.
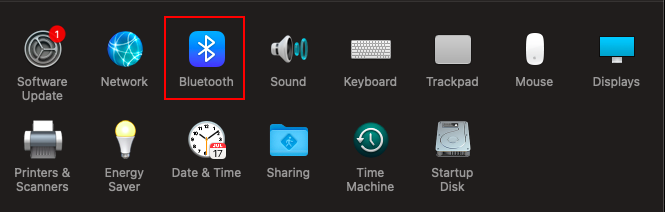
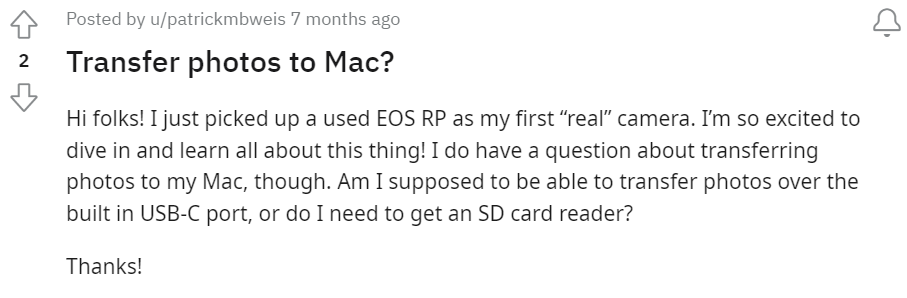
- On your Mac, turn on Bluetooth by going to the Apple menu and selecting “System Preferences,” then clicking on “Bluetooth”.
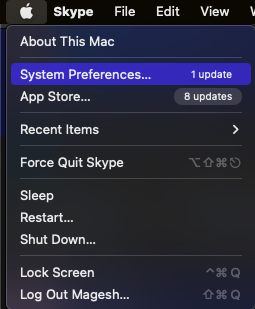
- In the Bluetooth preferences windows, make sure that Bluetooth is turned on and that your camera is listed as a paired device.
- On your camera, select the photos that you want to transfer to your Mac and choose the option to send them through Bluetooth. The specific steps for doing this will depend on your camera’s make and model, so consult your user manual if you are not sure how to do it.
- On your Mac, you should receive a prompt asking you to accept the Bluetooth transfer from your camera. Follow the prompts to accept the transfer.
- The photos should now be transferred from your camera to your Mac through Bluetooth. Check your Downloads folder or another designated folder for the transferred files.
Method 2: Use AirDrop to Transfer your Photos From the Camera to Mac
- If you have an iPhone, iPad, or iPod touch running ios 7 or later, you can use AirDrop to transfer photos wirelessly to your Mac.
- Make sure both devices are connected to the same WiFi network and have Bluetooth turned on.
- Then, on your iPhone or iPad, open the photos you want to transfer.
- Tap the share icon and select your Mac, and Accept the AirDrop List.
- On your Mac, Accept the AirDrop transfer request and the photos will be transferred.
Refer to this article to learn more about Airdrop and how it works.
Method 3: Import Your Photos Using Cloud Storage
Managing your images is simple and convenient when you transfer them from a camera to a Mac using cloud storage. The steps are as follows:
- Use a USB cable to connect your camera to your computer, or use your computer's card reader to place the memory card there.
- On your Mac, launch iCloud. You can use a web-based service or download one from the app store if you don't already have a cloud storage app installed.

- To store your images, make a new folder in the iCloud storage application.
- Drag the photos you wish to transfer to your Mac from the cloud storage program to the folder you made there.
- See the photographs as they upload to the cloud storage application.
- The time it takes to upload will depend on the size and number of photos.
- Once the photos have been uploaded, you can access them on your Mac by opening the cloud storage app and navigating to the folder you created.
- To download the photos to your Mac, select the photos you want to a folder on your Mac.
Method 4: Upload Photos From Camera to iPhone Using Wifi SD Cards
A WiFi SD card, commonly referred to as a wireless SD card, is an SD memory card with WiFi connectivity already built in. This eliminates the need for cables or card readers by enabling users to wirelessly transmit photographs and other files from their digital camera to a computer, tablet, or smartphone.
When linked to other devices that are within the wireless network's range, the card serves as a WiFi access point. Once linked, users may see and control the camera remotely from their smartphone or tablet, transfer files between devices, and more.
Wifi SD cards are available in a variety of storage capacities and are compatible with a range of digital cameras, making them a popular option for photographers who want to quickly and easily transfer their photos to a computer or mobile device.
Method 5: Use a USB Cable To Transfer Photos From the Camera To Mac
- Using a USB cable, connect your camera to your Mac. A USB cable that you can use for this purpose should have been included with your camera.
- When your camera is connected to your Computer, the Pictures program should launch automatically and the camera should be detected.
- At the top right corner of the Photos app window, select the Import button. By doing this, a window displaying all of the images and movies on your camera will open.
- The pictures and videos you want to transfer to your Mac should be chosen. By selecting Import All New Photographs, you can import a selection of particular images and videos.
- Once you have selected the photos and videos that you want to transfer, click on the Import button in the bottom right corner of the window. This will transfer the selected photos and videos from your camera to your Mac.
- After the transfer is complete, you can disconnect your camera from your Mac by unplugging the USB cable.
Method 6: Import Photos From Camera To Mac Using Image Capture
- Use a USB cable to link your device to your Mac.
- Activate Picture Capture. It may be found via spotlight search or in the Applications folder.
- On the left side of the image capture window, from the list of devices, choose your camera.
- By selecting a destination folder from the Import To drop-down option at the bottom of the window, you can decide where you wish to save your images.
- By clicking on them, you may choose which pictures you want to transfer. Hold down the command key while clicking on several photos to pick them all.
- If you want to import all the photos on your camera, click the Import All button to transfer only the selected photos.
- Once the Import is complete, you can disconnect your camera from your Mac.
Method 7: Use a Memory Card Reader to Transfer Photos From the Camera to Mac
- Insert the memory card from your camera into the Card Reader.
- Plug the card reader into your Mac’s USB port.
- Open the Finder app on your Mac.
- Look for the card reader under the Devices section on the left-hand side of the Finder window.
- Click on the Card Reader to open it.
- You should now see the Contents of your Memory Card.
- Navigate to the folder containing the photos you want to transfer.
- Select the photos you want to transfer by clicking on them.
- Drag and drop the selected photos into a folder on your Mac.
- Wait for the transfer to complete.
- Eject the memory card reader by clicking on the eject button next to it in the Finder window.
Method 8: Use Mobile Utility To Transfer Photos From Camera To Mac
- Install the mobile Utility App on your mobile device and connect it to your camera using a USB cable or WiFi.
- Make sure your camera is set to the correct mode for transferring photos. For example, on a DSLR camera, this might be called PC mode or USB mode.
- Launch the mobile utility app on your mobile device and select the option to transfer photos from your camera to your device.
- Choose the photos you want to transfer and confirm the transfer process.
- Once the photos are saved on your mobile device, connect your device to your Mac using a USB cable.
- Open the Photos app on your Mac and import the photos from your mobile device.
Method 9: Use File’s App to Transfer Photos from Camera to Mac
- Connect your camera to your Mac using a USB cable
- Open the Files app on your Mac. You can do this by clicking on the finder icon by pressing command + Spacebar to open Spotlight and searching for “Files”.
- In the Files App, you should see your camera to open it.
- You should now see the contents of your camera in the Main Windows of the Files app. Locate the photos that you want to transfer and select them by clicking on them.
- Once you have selected the photos you want to transfer, drag and drop them into a folder on your Mac’s desktop or into the photos app to import them into your photo library.
- After the transfer is complete, you can disconnect your camera from your Mac by safely ejecting it from the Finder.
Method 10: Import Photos to Mac Using the Camera Adapter
- Connect the camera adapter to your Mac’s USB port.
- Insert the SD card from your camera into the SD card slot on the adapter.
- Turn on your camera and set it to Playback Mode.
- Your Mac should recognize the camera and automatically Open the Photos App. If not, open the Photos app manually.
- Select the photos you want to transfer and click on the Import Selected button.
- If you want to transfer all photos, click on the Import All New Photos button.
- After the Transfer is complete, you can eject the SD cats from the adapter from your Mac’s USB port.
Conclusion
Apple users may face the loss of precious photos while importing from their camera to Mac. Remo Recover Mac is here to help. This user-friendly software is compatible with the latest macOS Ventura 13 and lower versions and can retrieve not only deleted photos but also lost videos, music, and podcasts from various sources. Download Remo Recover now to retrieve your precious memories.