Your Windows 10/11 PC is equipped with a hard drive that stores your operating system, programs, and all the digital content you accumulate over time. However, relying solely on a single partition, commonly known as the C drive, can pose a significant risk to your data's safety.
Partitioning a hard drive in Windows 10/11 can provide numerous benefits, including improved data organization, easier system reinstallation, and the ability to run multiple operating systems on the same machine. But wait, how to partition a hard drive?
In this article, we will explore 2 effective methods to help you partition your hard drive on your Windows 10/11 computer. Keep Reading!!
Why Partition a Hard Drive?
- Improved Data Organization: Partitioning helps categorize and store files more efficiently.
- Enhanced Data Safety: It minimizes the risk of data loss by isolating files on separate partitions.
- Simplified Windows Reinstallation: You can reinstall Windows on one partition without affecting personal files on others.
- Easier Software Repairs: Troubleshooting and reinstalling specific programs become simpler with separate partitions.
- Support for Multiple Operating Systems: Partitioning enables dual-booting or running different operating systems on one machine.
- Flexibility in File Systems: You can choose different file systems for each partition, optimizing compatibility and performance.
- Smaller Backups and Easy Cloning: Backing up critical data and cloning become more efficient with dedicated partitions.
Interesting Read: Find out how to partition a hard drive on Mac.
Method 1: Partition a Hard Drive with Disk Management
Step 1: Access Disk Management
- Right-click on the Windows icon located on the taskbar.
- From the context menu, select "Disk Management."
Step 2: Shrink an Existing Partition
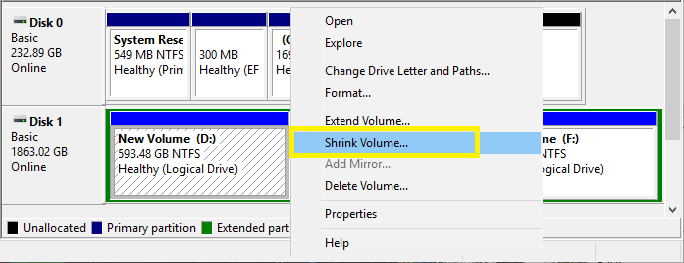
- Locate the partition you want to shrink in the Disk Management interface.
- Right-click on the desired partition and choose "Shrink Volume."
- Specify the space you wish to allocate to the new partition in megabytes (MB).
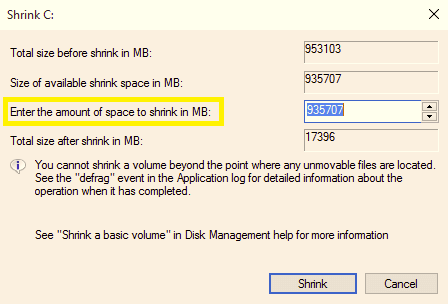
- Click the "Shrink" button and wait for the process to complete.
Step 3: Create a New Partition
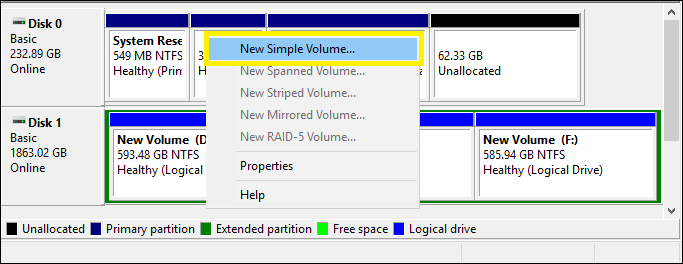
- Right-click on the unallocated space that appears after shrinking the partition.
- Select "New Simple Volume" from the context menu.
Step 4: Configure the New Partition
- In the New Simple Volume Wizard, click "Next" to proceed.
- Specify the new partition size in megabytes or use the default size.
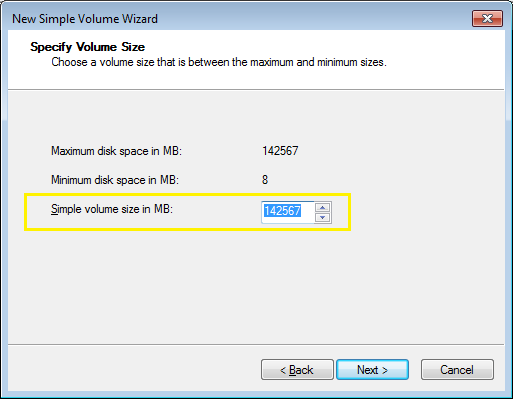
- Click "Next" to proceed.
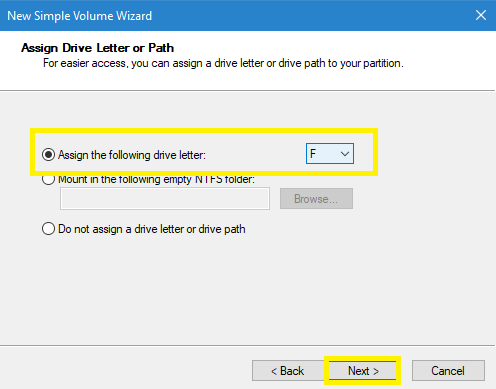
Step 5: Assign a Drive Letter
- Choose a drive letter for the new partition (or accept the default).
- Click "Next" to proceed.
Step 6: Choose the File System and Format the Partition
- Select the file system, typically NTFS, from the options.
- Click "Next" to proceed.
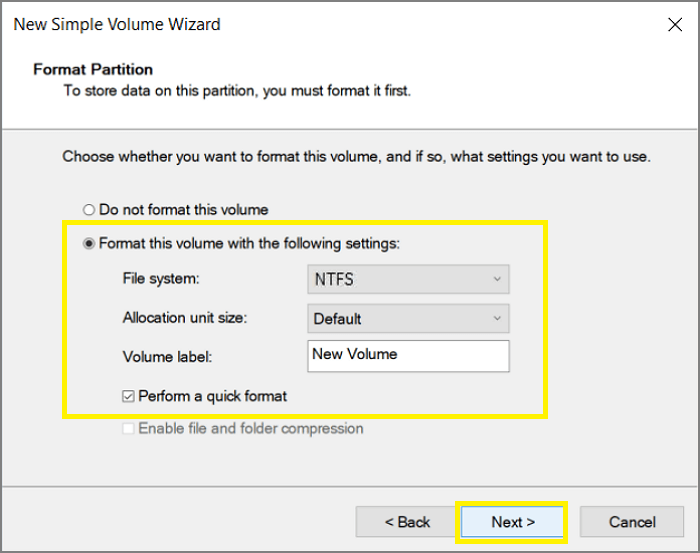
- Confirm the formatting of the new partition by clicking "Finish."
Method 2: Partition a Hard Drive Using Diskpart
- Launch Command Prompt as administrator.
- Type "diskpart" and press Enter.
- Type "list disk" to view available disks.
- Select the desired disk with "select disk X" (replace X with disk number).
- Create a partition with "create primary partition size=XXXX" (replace XXXX with the desired size in MB).

- Format the partition with "format fs=ntfs quick."
- Assign a drive letter with "assign letter=X" (replace X with the desired letter).
- Repeat steps 5-7 for additional partitions.
- Exit Diskpart with "exit."
Conclusion
We hope this article helped your partition your hard drive on Windows 10/11 computer. Creating partitions of your hard drive is crucial to access your valuable data easily, you can also reverse changes by merging your partitions.
In worst-case scenarios, you might lose your important files while partitioning a hard drive. In such cases, we strongly suggest you use a professional hard drive recovery tool like Remo Recover to recover your lost data from the hard drive.