Partitioning a hard drive on a Mac was once considered a task reserved for technical users. However, with advancements in macOS, the process has become more accessible to all.
Partitioning a hard drive involves dividing it into separate containers, or partitions, that function independently without interference. Each partition can house a different Operating System, such as a beta version of macOS alongside the stable one or even an entirely different OS like Windows. This segregation enables you to have multiple computers within a single system effectively.
In this useful article, we will help you to partition your Mac's hard drive, allowing you to install multiple Operating Systems or create separate containers for enhanced functionality.
We will explore different methods, including partitioning internal and external drives, formatting options, and essential tips for a successful partitioning experience.
Pre-existing Partitions on Recent Macs
It's worth noting that recent Macs come with pre-existing partitions, including a secret boot drive containing the macOS Recovery System and essential utilities for troubleshooting critical issues. Understanding these pre-existing partitions can provide valuable insights into your Mac's storage configuration.
How To Partition Mac Hard Drive?
When it comes to partitioning a Mac hard drive, two options are available, depending on the macOS version:
- Creating or Modifying Partitions (Pre-Catalina): For macOS versions before Catalina (using the HFS+ file system), partitioning the hard drive is the recommended approach. However, it's important to consider that adjusting partition sizes after creation can be challenging. This method is ideal if you have a specific space requirement for each partition.
- Creating Volumes (Catalina and later): Starting with Catalina and later versions (using the APFS file system), Apple recommends creating separate volumes instead of traditional partitions. Volumes offer greater flexibility, allowing them to be adjusted in size dynamically. This is particularly advantageous when installing a new Operating System or conducting temporary tests.
If you frequently encounter low disk space issues, partitioning may not be the best solution, and alternative options like expanding your hard drive or using an external drive should be considered
Methods To Partition A Hard Drive on Mac Computers
To partition your Mac's internal hard drive, you have two primary utilities: Boot Camp Assistant and Disk Utility. The choice between them depends on your specific requirements.
Method 1: Boot Camp Assistant (For Windows Installation)
If you intend to install Windows on your Mac, Boot Camp Assistant is the recommended utility. It provides a straightforward step-by-step process for partitioning your drive and installing Windows.
If you have an Apple M-series chip, Boot Camp will not work because it requires a Mac with an Intel processor. If you want to run Windows on one of those new Macs, the solution is to use an Arm-version of Windows through virtualization software.
Follow the below steps to install Windows using Boot Camp Assistant on your Intel Mac:
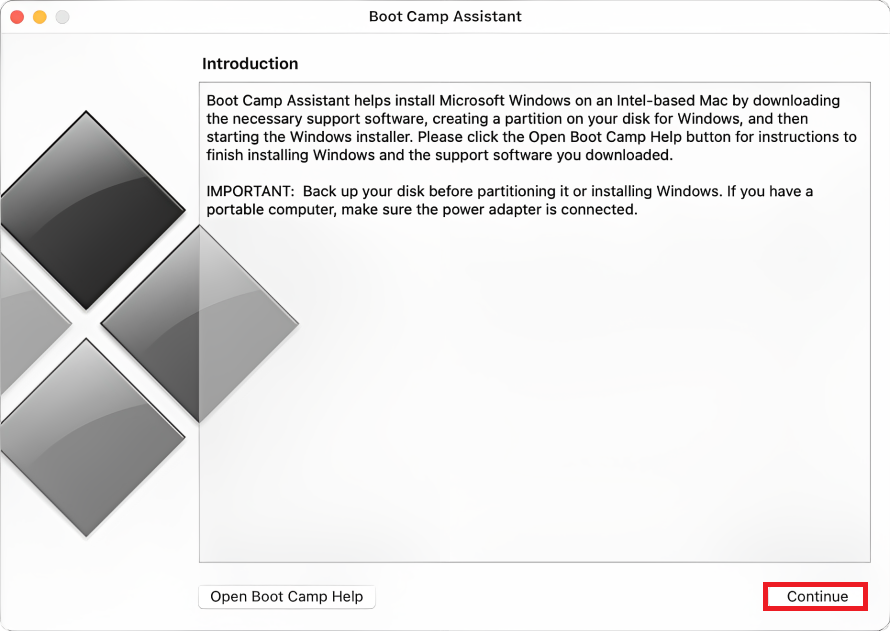
- Launch Boot Camp Assistant from Applications ➙ Utilities.
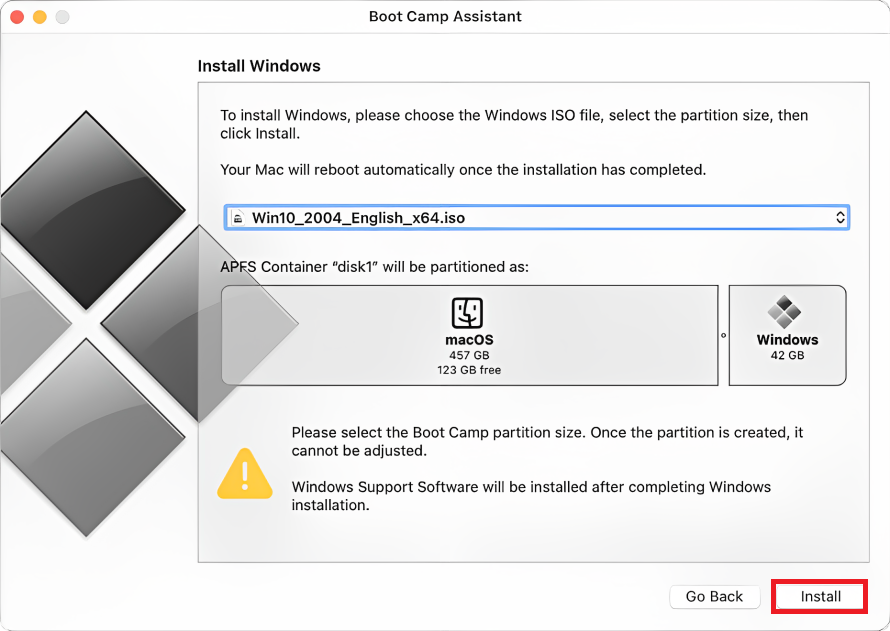
- Click "Continue" and choose the Windows ISO file.
- Adjust the partition size for Windows.
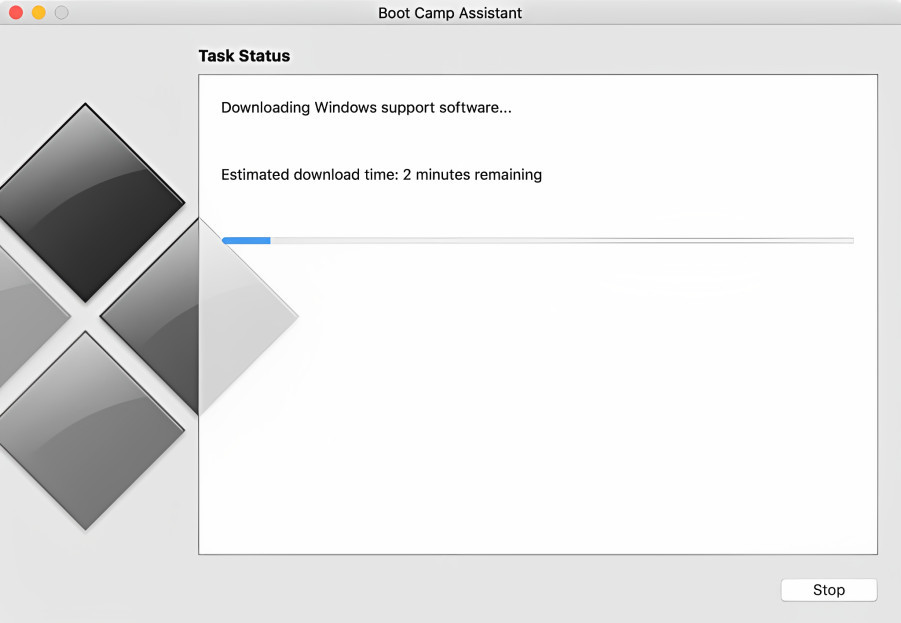
- Click "Install" to start the partitioning process.
- Your Mac will restart and enter the Windows installation.
- Select the Boot Camp partition during installation.
- After installation, your Mac will reboot into Windows.
- Install necessary drivers and software using Boot Camp.
- Restart your Mac and choose between macOS and Windows.
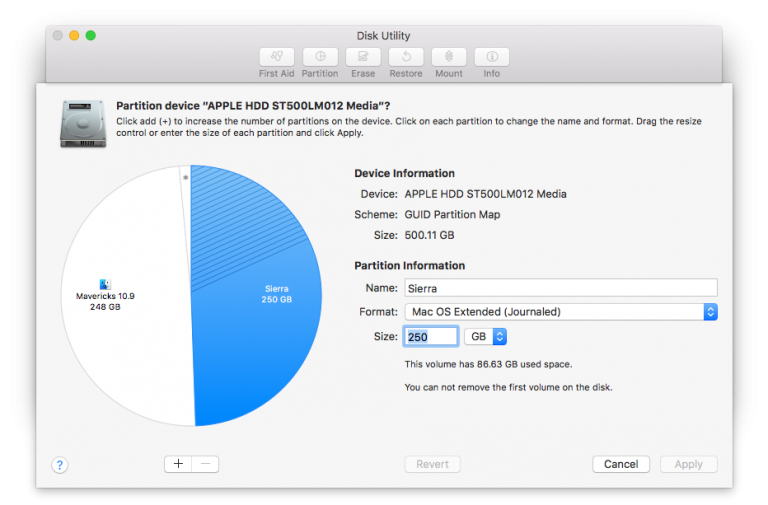
Method 2: Disk Utility (For Other Partitioning Needs)
For partitioning purposes other than installing Windows, Disk Utility is the go-to tool. Follow these steps to partition your internal hard drive using Disk Utility:
- Launch Disk Utility from Applications ➙ Utilities.
- Select your hard drive from the sidebar.
- Click on the "Partition" button in the top toolbar.
- Create a new partition by clicking the "+" (plus) icon.
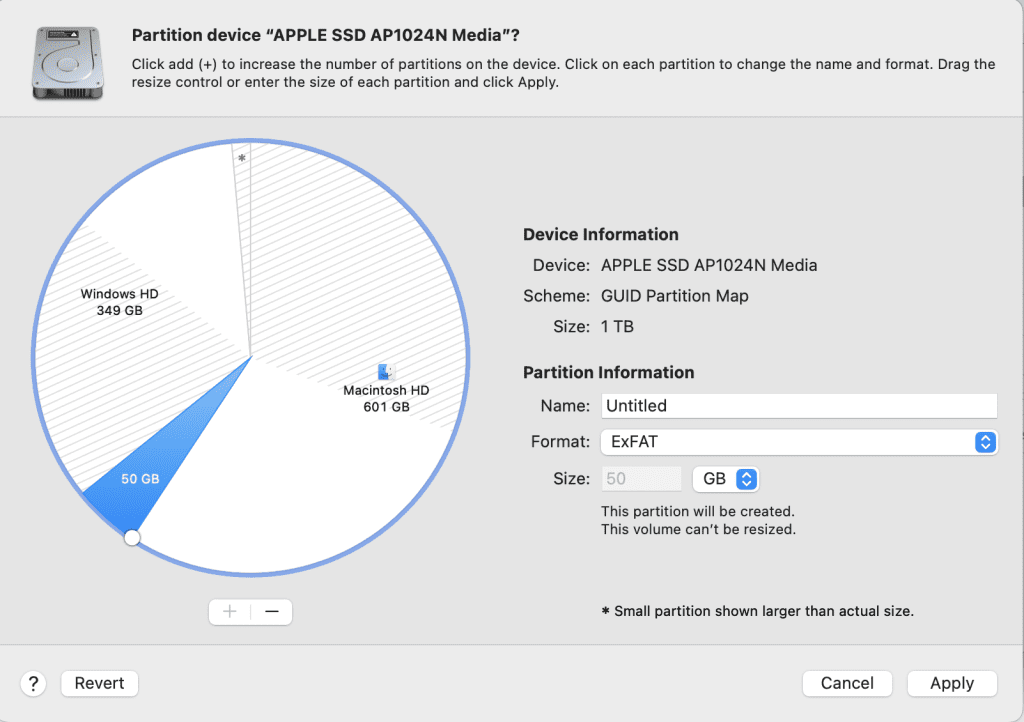
- Provide a name for the partition and specify its size.
- Click "Apply" to finalize the partitioning process.
Your newly created partition will appear as a separate hard drive on your Mac. It remains empty, allowing you to install the desired macOS version or conduct experiments without affecting the other partitions. Disk Utility also enables you to resize or delete partitions if needed. Remember to back up your data before making any changes.
Method 3: Create New Volume On Mac (For macOS Catalina and Later)
For macOS Catalina and later versions, volumes provide a more flexible alternative to traditional partitions. Volumes can be created within the same partition using the following steps:
- Launch Disk Utility from Applications ➙ Utilities.
- Select your hard drive from the sidebar.
- Click on the "+" (plus) icon next to "Volume."
- Give the volume a name and choose the APFS format.
- Click "Add" to create the new volume.
Volumes dynamically share available space with existing volumes, eliminating the need to allocate specific sizes.
How To Switch Partitions On Mac?
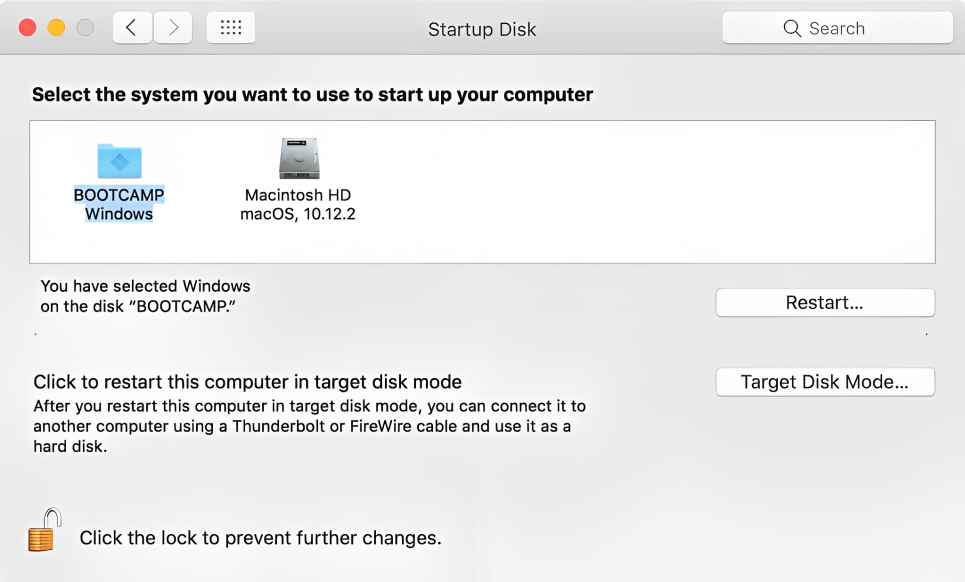
To boot your Mac into a specific partition, follow these steps:
- Go to System Preferences ➙ Startup Disk.
- Click the lock icon, and enter your password to unlock changes.
- Select the desired partition for booting.
- Click "Restart" to initiate the boot process.
Alternatively, you can restart your Mac while holding down the Option key to access the Startup Manager, where you can choose the desired partition.
How to Partition External Hard Drives for Mac and Windows:
To make the external Hard drive compatible with Mac and Windows, you'll need to consider formatting compatibility. By default, Windows uses the NTFS format, while Mac uses HFS, which are incompatible with each other. However, you can resolve this issue by reformatting the external drive to a format recognized by both systems, such as exFAT.
Follow these steps to format an external drive for Mac and Windows compatibility:
- Launch Disk Utility once again.
- Connect your external hard drive.
- Select the drive from the sidebar.
- Click on the "Erase" button in the top toolbar.
- Provide a new name for the drive and select the exFAT format.
- Click "Erase" to complete the formatting process.
Your external hard drive is now ready for use with both Windows and Mac systems. If you want to partition your Windows hard drive then you can refer to this article to find out how to partition a hard drive on Windows.
Conclusion
Partitioning a hard drive on your Mac is a valuable process that allows you to enhance your system's capabilities by installing multiple Operating Systems or creating separate containers.
By understanding the available options and following the appropriate methods, you can easily partition internal and external drives, providing flexibility and improved functionality. Remember to backup your Macbook before making any changes and enjoy the benefits of a partitioned Mac system.