The newest version of Windows (Windows 11) is finally here. Microsoft launched its newest version of Windows (Windows 11) in the last quarter of 2022. However, the newer Windows 11 version 22H2 has been released recently. If you are using Windows 10 or other older versions of Windows Operating System in 2023. This article is sure to help you.
This comprehensive article has tried to answer all the questions any Windows user might have about Windows 11 and how to upgrade to windows 11.
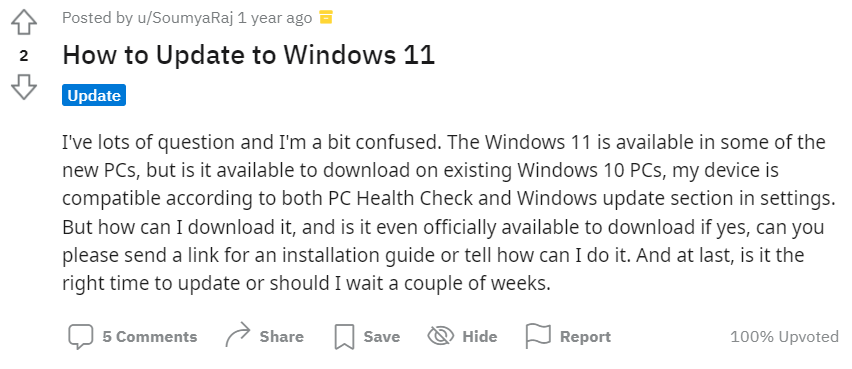
Source: Reddit
Answering questions like, how to upgrade from Windows 10 to Windows 11, is your system compatible with Windows 11, free upgrade to Windows 11, and what’s new in Windows 11, as well as clarifying about data loss during the upgradation process, moreover, we have also explained how to recover lost or missing files after upgrading to Windows 11.
So without wasting any more time let's get started!
Table of Contents:
The answer is Yes as well as No. Windows 11 is a free upgrade for Windows 10 2004 and other latest versions. As well as for those whose system meets the minimum system requirements.
But if you are using an older version of Windows such as Windows 8 and 8.1 or Windows 7. The user needs to first upgrade to Windows 10 and then to Windows 11.
Upgrading to Windows 11 on a system that fails to meet the minimum system requirements is usually not recommended due to the fact that the system might later on run into compatibility issues.
In such cases, Microsoft as well as many tech experts suggest buying a newer system.
Note: If you are a Windows 11 user, do refer to this article to find out how to recover deleted files on Windows 11.
We leave that up to you. You can answer that question for yourself. But we have tried the OS here’s everything that’s new and exclusive to Windows 11.
Microsoft is betting big on Windows 11. The newest version now comes with some of the most exclusive features as well as a few improved features.
Do refer to this article to know 9 ultimate reasons why you should upgrade to Windows 11.
However, Some Windows 10 users are not very keen on upgrading to Windows 11 due to the following reasons.
Note: You can refer to this article to find out how to bring back the old taskbar on Windows 11 system.
All in all Windows 11 is definitely worth a shot. However, you can easily downgrade from Windows 11 to Windows 10 in case, you are not happy with the latest version.
However, to get the most out of Windows 11 we suggest you get a newer Windows 11 device for a much better experience.
If you have decided to upgrade to Windows 11. You first need to make sure your system is absolutely ready for the change.
Preparing your computer prior to the installation process makes things much easier and smoother at the same time minimizing the chances of encountering common Windows 11 issues.
| What do you need to do? | Why do you need to do it? |
| Check for the System Requirements | To confirm if your Windows 10 computer or laptop is capable of running Windows 11. |
| Activate TPM 2.0, and enable Secure Boot in BIOS | Enabling Trusted Platform Module 2.0 - Provides better security and allows you to perform a clean installation of Windows. Whereas, Secure boots ensure that the system boots into software that is trusted and reliable. |
| Take an entire backup of your system | To Make sure you don’t lose any important data prior to and post-installation of Windows 11. |
| Uninstall unimportant applications | Getting rid of conflicting applications such as anti-virus software might cause issues during the installation process. |
| Get rid of unnecessary data to free up some space on the disk | You need a minimum of 64 GB of free space to install and an additional 20 GB to process the installation. |
| Find and fix any system errors | Any minor or major issues might cause problems when you try to upgrade Windows OS. Therefore, try the CHKDSK, SFC scan, or DISM tools to repair any issues with the system or the disk. |
| Detach any unwanted peripherals such as cameras, printers, scanners, or other external drives | To Prevent Hardware and software conflict during Win 11 upgrade. |
Once your system is ready and you have decided to install Windows 11 on a Windows 10 PC or Laptop. Then follow the next section to find out how to do it without losing data.
Here’s a three-step process that shows how to upgrade to Windows 11 without worrying about losing data.
Microsoft has set criteria or the basic requirements that your system needs to fulfill if you want to update Windows 10 to 11. Let’s quickly find out if your computer can run Windows 11.
The Basic Requirements are as follows:
| Secure Boot |
| Trusted Platform Module 2.0 (TPM 2.0) Should be Enabled |
| 11th Generation Intel Core |
| A minimum of 4GB of RAM is required |
| System Disk Storage Space Should be More than 64GB |
| 2 Core Processor with 1 or more Gigahertz on a 64-bit processor |
| Screen size should be more than 9” with a 720-pixel resolution and 8 bits per color channel |
| Other Requirements: High-speed internet connection and a Microsoft Account |
One of the Best and simplest ways to find out if your PC is Compatible is by making use of the PC Health Check App, which is available for free on the Microsoft Store.
Just download and run the app, and follow the instructions.
Once you know that your system is absolutely compatible with Windows 11. It’s time to move ahead with the next step.
As Benjamin Franklin rightly said, “An ounce of prevention is better than a pound of Cure”. That’s why we believe regular backups of data are a great way to ensure you never lose your important files.
Here’s how you can take a backup of files on your computer system.
One of the best ways to take a backup of the entire computer system is by utilizing System Image Tool
System Image Tool lets you take a backup of all important files from any computer as well as any laptop and store that on any external drive as well as the cloud.
1: Open the Settings app and click on Update and Security option, followed by clicking on the Backup option.
2: Click on the Go to Backup and Restore (Windows 7) option, under Looking for an older backup Section.
3: In the left side pane, find and click on Create a system image option.
4: Choose the on a hard disk option and select a location to restore the backup, and hit the Next button.
5: Click on the Start backup button to initiate the data backing up process.
You can also use any good third-party backup tools to clone your system.
When you are sure that the backup is safely stored in the external hard drive. Do proceed with the next step.
Here are various ways to upgrade your OS from Windows 10 to Windows 11.
If Windows knows your system is good enough to run its updated version. Then it will automatically suggest you install the newer version available.
Here’s how you can find out if you have any newer updates available or not.
Many Windows users complain that Windows 11 is not showing up in the Windows update option. The next solution comes in handy when the latest update is not showing up in Windows.
Along with Windows 11, Microsoft has also released new installation and upgradation tools to make the Microsoft Windows 11 upgrade easier. One of them is the Windows Installation Assistant Tool.
However, here’s the catch, there are a few requirements your system needs to fulfill in order to use Windows 11 Installation Assistant tool.
When your system meets all the above-mentioned requirements you can now safely proceed with the upgradation process.
Step 1: Download and Install the Windows 11 Installation Assistant tool from the Microsoft Software Download page.
Second Step: The tool will start downloading the Windows11InstallationAssistant.exe file on your Windows 10 computer.
Third Step: Hit the Accept and Install option to start the Win 11 update process.
Step 4: Upon completion of the entire installation process, Restart your Windows 10 system to complete the Windows 10 to 11 upgrade process.
NOTE: You can use your system normally during the installation process. We suggest you use this time to save all of your files and other data before you reboot your Windows system.
If you are using an ARM-based computer then we suggest you try the next solution to perform Windows 10 to Windows 11 upgrade.
Media Creation Tool lets you install Windows OS on a USB or DVD and then install the same on any computer or laptop. Additionally, this option also lets you reinstall or clean-install Windows 11 on your Windows computer.
A word of advice, this is a long process and not as easier as the earlier mentioned solutions.
Before you proceed with the OS updating process, here are a few basic things to need to use this solution.
And other requirements such as x64 processors, Hardware specifications, etc.
You first need to download the Windows 11 Media Creation Tool from the Microsoft Software Download page and then follow the below-mentioned steps.
Step 1: Install and set up and run the tool. Make sure you run the tool as an administrator.
Step 2: Agree to the License and terms set by Microsoft.
Step 3: When you are on What do you want to do? Page, Choose the Create installation media for another PC option and select the Next button.
Step 4: Choose the appropriate Language, Edition, and Architecture (64-bit) for Windows 11 options.
Step 5: Select the Drive you want to utilize:
You can either choose a blank USB flash drive or select your PC to save the ISO file.
Once the Installation Media is created, do follow the next steps to find out how to use it.
Step 1: Go to Settings, followed by clicking on Update and Security.
Step 2: Click on the Windows Update option and also click on the Check for updates button.
Once you have installed Windows 11 on the selected USB flash drive or the DVD. Follow the next section.
1. Connect the USB or insert the DVD to the Windows PC where you would like to download Windows 11. Once your device gets connected, Restart your PC.
2. By default your Windows should automatically boot into the connected USB or DVD media.
If your PC did not boot to the connected device. You can try to open a boot menu or modify the boot order in the PC’s BIOS or UEFI settings.
3. When you are on the Install Windows page, Choose desired Language, time, and appropriate Keyboard preferences and hit the Next button.
4. Click on the Install Windows button to start the Windows 11 installation process on your desired PC.
We are sure by now you were able to successfully install the newest version of Windows that is Windows 11 on your PC.
However, if you have lost any files prior to, during, or post-Windows 11 upgradation process. Then worry not. The next section talks about a time-tested and proven way to recover files.
You need to keep in mind that you will in most cases after upgrading Windows, lose some of your files that were hidden using the Winmend folder. If you have lost your hidden files, then follow the steps mentioned in this article to recover lost files from a hidden Winmend folder on Windows.
The answer is by making use of file recovery software. Remo Recover is a renowned file recovery tool that is tried, tested, and approved by millions of happy users across the world when it comes to data recovery of varied types.
Options like the Dynamic Recovery view feature allow you to recover the files without having to wait for the complete drive scan process, the Advanced Filter option to easily filter, sort, and find recovered data, and the Preview option lets you quickly look at the recovered deleted files.
Download and try the tool now for free!!!
Conclusion:
Here we end our exhaustive write-up on Microsoft Windows 11 update. Where we have explained everything you need to know about Windows 11 as well as various ways to upgrade to Windows 11 from Windows 10 for free without worrying about losing data.
However, if you have lost files during the OS upgradation then make use of the Remo File Recovery tool for an absolutely effortless data recovery experience.

