Too many people using your PC! Do you want to keep a secret user account for yourself? Here’s the guide on how to hide user accounts from the sign-in screen on Windows 10.
By default, Windows 10 will display every user account on the sign-in screen. But you don’t want all user accounts to be listed every time – an account that you don’t want regular users to see or accounts of remote users that you don't want to show up.
However, the Windows 10 operating system doesn’t have the option to pick specific user accounts for the sign-in screen. All you can do to hide any user account from being listed on the Windows 10 sign-in screen is modify the registry.
In today’s post, we’ll guide you through the steps to hide specific user accounts from the sign-in screen on your Windows 10 PC.
Warning: Before proceeding, ensure that you understand that you’ll be modifying the Windows registry, which could always be dangerous as it can cause damage to your computer when not done properly. So, it’s always recommended to do a full backup of your PC.
How to hide specific user accounts from the Windows 10 sign-in screen?
By default, your Windows 10 displays the full name of the user on the sign-in screen, in order to make this happen you need to have the username of the account. Open Local Users and Groups to collect this information. But this option is only available for Pro users, we’ll use the old User Accounts Manager available on Windows 10 Pro and Windows 10 Home.
1. Open the Run command (Windows key + R), type "netplwiz" and click the ‘OK’ button to open User Accounts.
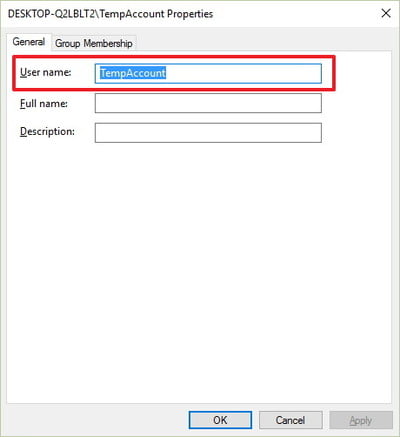
2. Select the user account which you want to hide from sign-in and click on Properties.
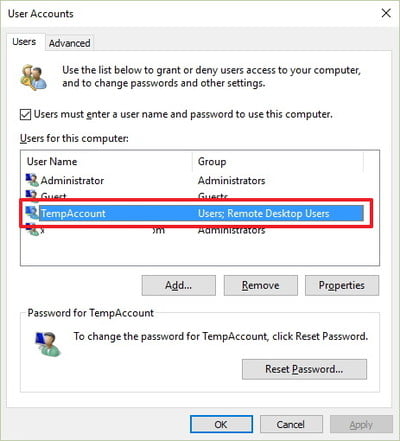
3. Keep a note of the Username.
Follow these steps to hide user accounts from the sign-in screen on Windows 10:
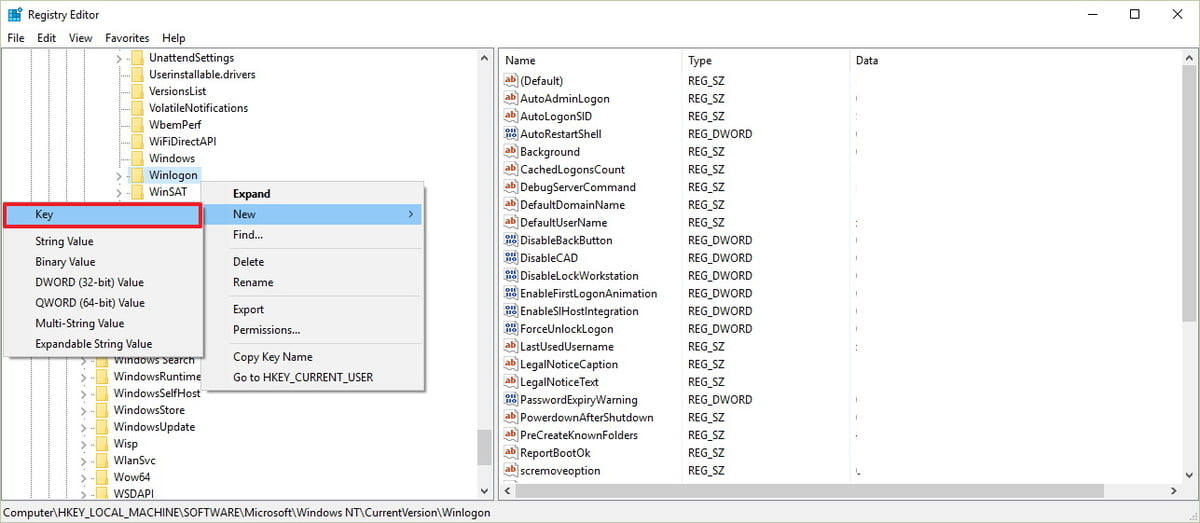
1. Open the Run command using the keyboard shortcut Windows key + R, type Regedit, and proceed by clicking ‘OK’ to open the Windows Registry.
2. Browse the path:
HKEY_LOCAL_MACHINE\SOFTWARE\Microsoft\Windows NT\CurrentVersion\Winlogon
3. Right-click the Winlogon, select New and click Key.
4. Give the name for the new key as SpecialAccounts.
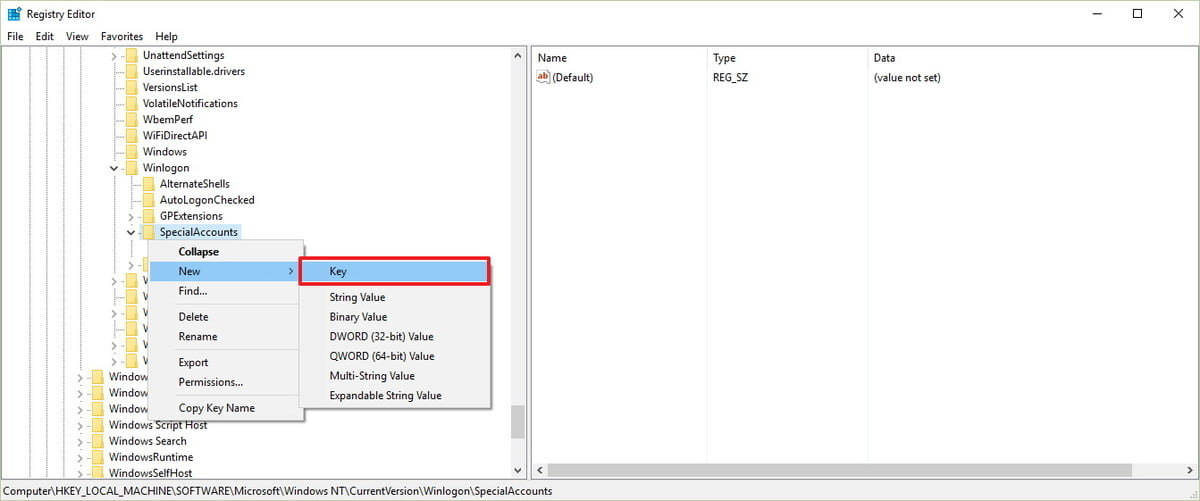
5. Right-click on the SpecialAccounts key, select new, and click Key.
6. Name the created key as UserList.
7. Right-click on UserList, select New and click DWORD (32-bit) Value.
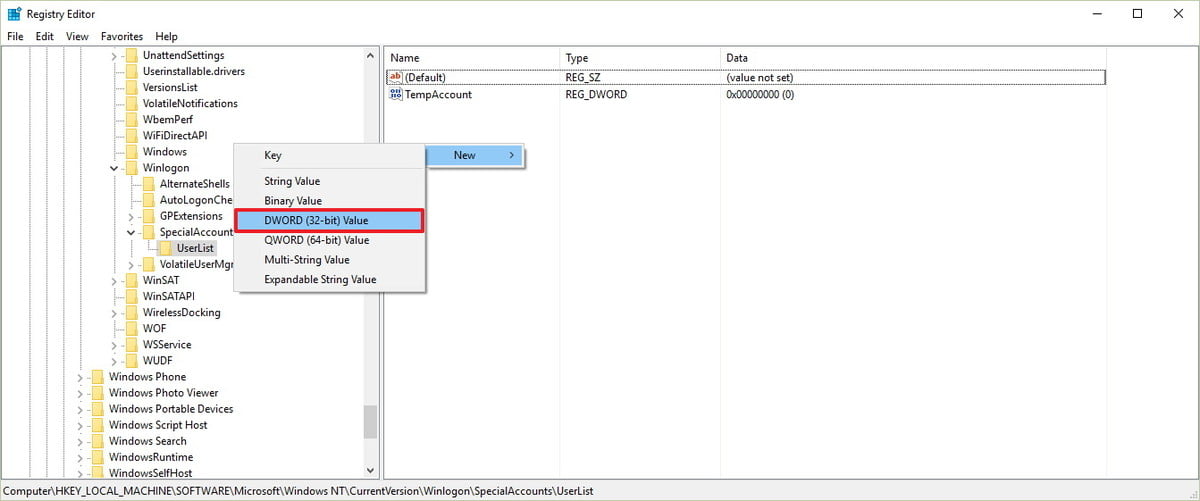
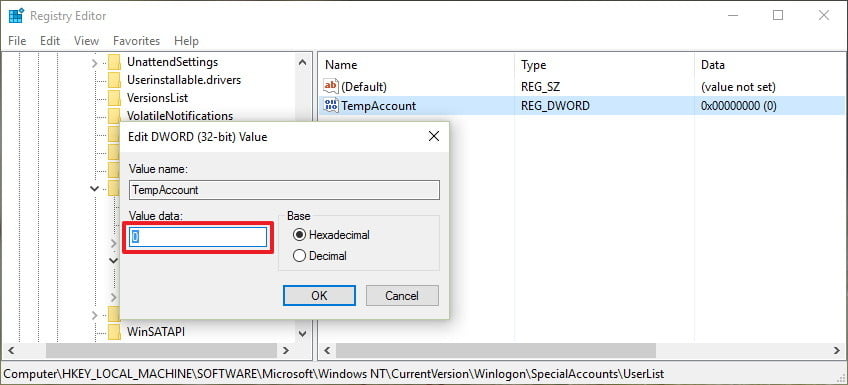
8. Give the name of the DWORD key exactly as the name of the user account that you want to hide.
9. Double-click on the DWORD key and ensure its data value is being set to 0.
Sign out now and check, you will notice that the account is no longer visible on the Windows 10 sign-in screen. This method will actually hide the account from virtually everywhere in your system, from the start menu, Control Panel, and the settings app.
To make it visible again, get back to the registry editor and change the DWORD key data value from 0 to 1.

If you just want to hide a remote user account, you don’t need to worry about anything else because anyway, the user will be able to log in remotely without facing any troubles.
Note: This guide helps to remove user accounts from sign-in screen, don’t try to remove all the accounts as you may find it extremely hard to get back into your system.