System Reserved Partition (SRP) - a tiny partition on the hard disk that holds the information to boot for Windows. When this small partition is full, you will receive an error message “We couldn’t update the system reserved partition”. Third-party antivirus applications would have been written to the SRP causing the space to be full. In this article, we will guide you on how to solve the System Reserved Partition error while upgrading to Windows 10.
Alert: This procedure is a little complicated and might carry the risk of data loss. If you enter a wrong command in the Command Prompt, you may put your computer in a no-boot mode. Hence it is highly recommended that you back up your hard disk in an easy way. You can create a disk image of the hard drive with the help of a Hard Drive Recovery Tool and copy the disk image to an external drive
Increase the Space to Solve The System Reserved Partition Error
To solve the upgrade problem, you need 15MB of free space on the System Reserved Partition. To get that free space just follow the below-mentioned procedure. But before that, you should determine whether it is an MBR or GPT partition style. To check;
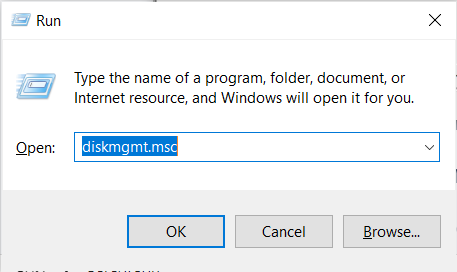
- Type diskmgmt.msc in the Windows Run dialog box
- Right-click the disk that has System Reserved Partition and select Properties
- Select Volume tab
- The Partition Style will be either Master Boot Record (MBR) or GUID Partition Table (GPT)
Now, choose the appropriate method:
- Windows 7 or 8 with GPT Partition
- Windows 7 with MBR Partition
- Windows 8 with MBR Partition
Windows 7 or 8 with GUID Partition Table (GPT)
- Open Command Prompt as Admin
- In the Command Prompt window type mountvol y: /s and press Enter. Y: drive letter will be added so that System Partition can be accessed.
- Next, type the command taskkill /im explorer.exe /fand hit Enter.
- Type and hit Enter. This will restart the explorer in Admin Mode.
- Go to File Explorer and add Y:\EFI\Microsoft\Boot\ in the address-bar and hit enter.
- Choose the language folders you want to delete permanently. They will be displayed by four letters separated by a hyphen. E.g. en-US implies US English.
- Reboot the system after removing the unwanted files. Now, the drive letter will be removed and explore.exe will be returned to normal mode.
Windows 7 with MBR Partition
- To remove the language folders;
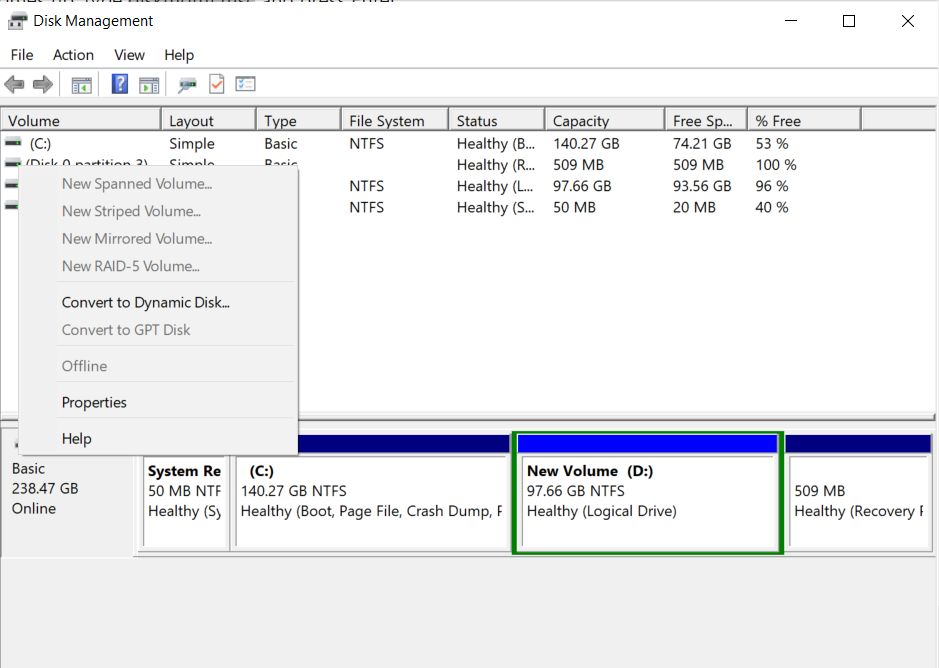
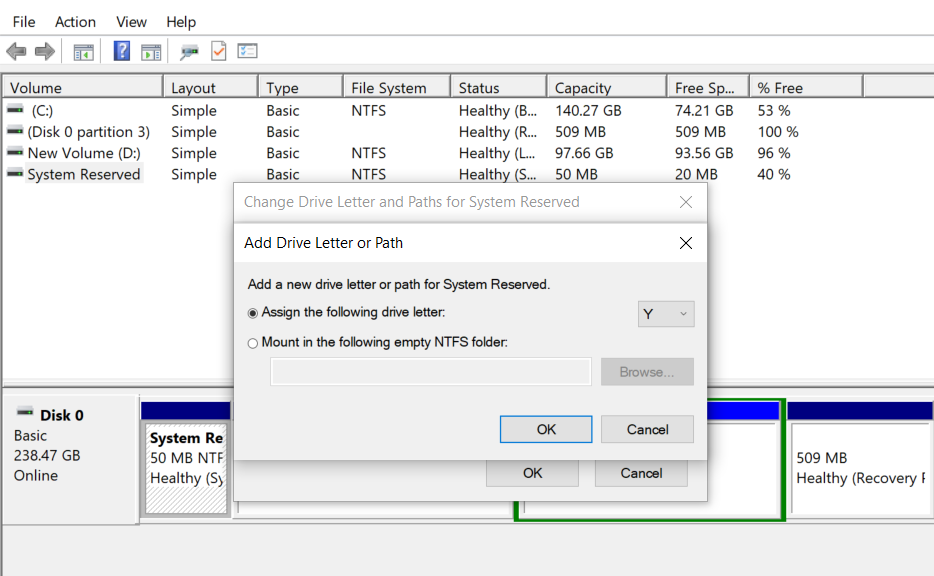
- Open Disk Management and choose System Reserve partition and right-click on it.
- Choose ‘Change Drive Letter and Paths’ and select Add and assign Y as the drive letter.
- Click OK.
- Type Y in the Command Prompt window to change to that drive letter.
- Launch Command Prompt as Admin
- Type takeown /d y /r /f . and press enter.
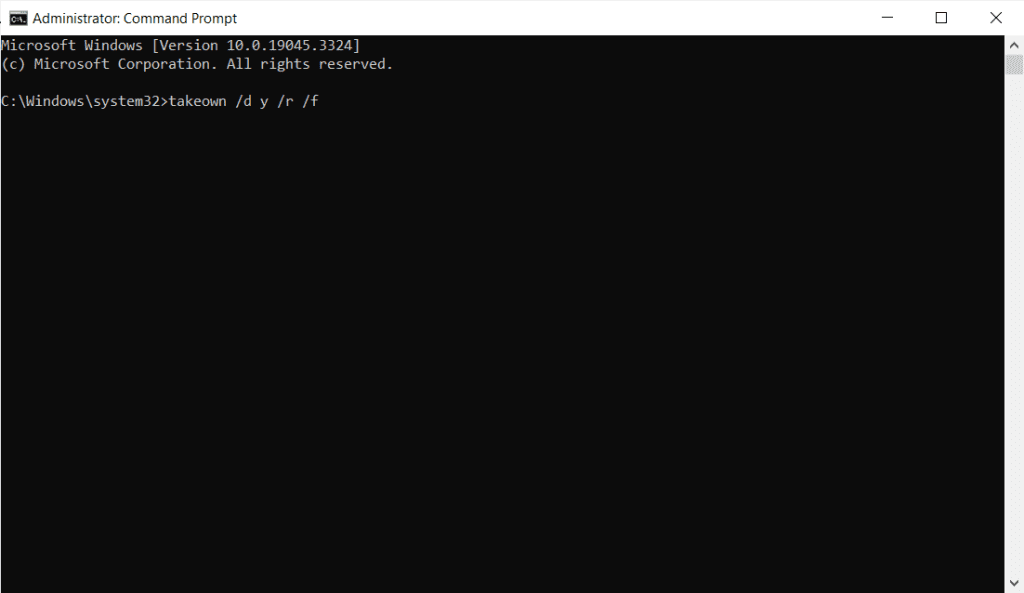
Note: make sure there is space & period after the letter f, or else command will not work.
- Type icacls Y:\* /save %systemdrive%\NTFSp.txt /c /t to backup the permission to the drive.
- Type whoamiand hit Enter. Write down the user name and type
- icacls . /grant<username from whoami>:F /t and hit Enter.
Note: There is no space between user name and :F
- Go to File Explorer, open SRP and access boot folder. Select and delete the language folders permanently.
Caution⚠: MBR plays a very important role in booting OS and Managing partitions. Hence be careful when you working with it. In case your MBR gets corrupt, then get Remo Recover tool and recover your corrupt partition data or when your important partition goes missing, formatted or gets deleted by mistake.
- Shorten NTFS Log
- First, check the NTFS log size in the Command Prompt. Type chkdsk /L Y: and hit Enter.
- If the size is >5000KB, you don’t have to truncate the file.
To truncate, type the following and press Enter.
- chkdsk /L:5000 /X /F
- Now, go to Disk Management, click Action tab and choose Check if the SRP has increased in size. If so, right click SRP and choose Change Drive Letter and Paths. Choose Y:and Select Remove.
- Restore Permission
- Type icacls Y:\ /restore %systemdrive%\NTFSp.txt /c /t and hit Enter.
You’ll get a message saying “some files failed” while processing. Do not worry! This is common as some of them were deleted to back them up.
- To Fine-tune the ACL again to System, type icacls . /grant system:f /t
- Set the System as owner of the drive by typing icacls Y: /setowner “SYSTEM” /t /c and hit press Enter.
- Go to Disk Management and refresh the files to make sure SRP has increased the free storage space.
- Right click SRP and choose Change Drive Letter and Paths.
- Select Y drive and select Remove.
- Click OK.
Windows 8/8.1 with MBR Partition
Ensure you have external drive with 250MB free space and formatted with NTFS.
- Open Disk Management and choose System Reserve partition and right click on it.
- Choose ‘Change Drive Letter and Paths’ and select Add and assign Y as the drive letter.
- Click OK.
- Launch Command Prompt as Admin
- Type Y in the Command Prompt window to change to that drive letter.
- Type takeown /d y /r /f . and press enter.
Note: make sure there is space & period after the letter f, else command will not work.
- Type whoamiand hit Enter. Write down the user name and type
- icacls . /grant<username from whoami>:F /t and hit Enter.
Note: There is no space between user name and :F
- After the above command is complete, type
- attrib -s -r -h Y:\Recovery\WindowsRE\winre.wim and press Enter.
- Go to File Explorer and write down the drive letter of the external HDD. Here we will be using F.
- Come back to Command Prompt and type mkdir F:\Recovery\WindowsRE and press Enter.
- Type xcopy Y:\Recovery\WindowsRE\winre.wim F:\Recovery\WindowsRE\winre.wim /h and press Enter.
- Map the fresh path by typing the below command and pressing Enter
C:\Windows\System32\Reagentc /SetREImage /Path F:\Recovery\WindowsRE /Target C:\Windows
- After verifying that the copy was created successfully, type del Y:\Recovery\WindowsRE\winre.wim /F and hit Enter.
- Now, go to Disk Management, click Action tab and choose Check if the SRP has increased in size. If so, continue with Windows 10 upgrade process.
- After the upgrade is complete, transfer back the wim file to Recovery Partition and re-map the path.
- Type xcopy F:\Recovery\WindowsRE\winre.wim Y:\Recovery\WindowsRE\winre.wim /h and press Enter
- To re-map type C:\Windows\System32\Reagentc /SetREImage /Path Y:\Recovery\WindowsRE /Target C:\Windows and press Enter.
- Go to Disk Management, right-click Recovery partition, and choose Change Drive Letter and Paths. Choose Y:and Select Remove.
If all the commands are followed properly, you’ll have a greater percentage of free space on System Reserve Partition to upgrade your OS to Windows 10. In future, However, this process carries a high risk of data loss if not executed correctly. if you experience any partition loss due to various reasons, you can make use of Remo Recover which will restore damaged, lost, corrupted, and formatted partitions with ease.
Conclusion:
We trust that this article has assisted you in addressing the "We couldn’t update the system reserved partition" issue. Please note that handling this requires some technical expertise. If you input the wrong command in the Command Prompt, your computer could get stuck in a non-bootable state.
Therefore, we strongly advise backing up your hard disk using a simple approach. In case you do not have any backups, you can use Remo Recover to retrieve all your data after the process is concluded.
If you have any alternative methods that might solve the problem, kindly share them in the comments section below.
Frequently Asked Questions
No system reserved partition cannot be formatted on an active state
500 MB is the minimum size of system reserved partition in Windows 10
Yes, it is possible to increase the size of the system reserved partition in Windows but the process is complex and risky.