Irrespective of the reason why you have lost your data, accidental deletion, intentional deletion, upgrading or downgrading to any other version of macOS, virus attack, etc. This updated article talks about four methods to help you recover deleted, lost, or missing files and folders from any Mac machine running on Monterey OS.
How To Recover Permanently Deleted Files From Mac Monterey?
- Recover Deleted Files From Mac Trash on Monterey
- Recover Backup Files on Monterey Using Time Machine Backups
- Recover Lost Mac Files from iCloud Backup on Monterey
- Recover Deleted Files From Mac Monterey using Remo Mac File Recovery Software
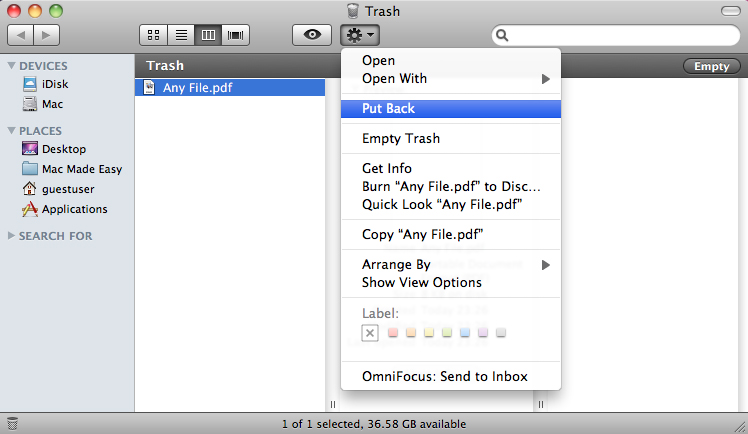
Method 1: Recover Deleted Files from Mac Trash on Monterey
Follow the below steps to start recovering deleted files using Trash Bin:
- Open the Trash by clicking on its icon.
- Search for files or folders that you want to recover.
- Right-click on the item you want to retrieve and select the Put Back option to recover it to its original location.
If you have deleted files from Mac Trash. You can refer to this article to find out how to recover files from Mac Trash.
Method 2: Recover Backup Files on Monterey Using the Time Machine
Time Machine is the easiest way to back up Mac, which is developed by Apple. Once you have a timely backup of your data using Time Machine, it’s very easy to restore backup files on Monterey in case of data loss.
Follow the below steps to restore your lost files using Time Machine:
- Connect the external drive you’ve used for the Time Machine backup.
- Open the folder where the missing files existed previously.
- Open Time Machine > select Enter Time Machine.
- Use the arrows to move the timeline to find the data backup for the lost item.
- Hit the Restore button.
- Try opening the recovered file to double-check if the data recovery went well.
Note: If you don’t have the backup of your files on a Time Machine or if you don’t use a Time Machine at all, then it’s high time to start using this tool to protect your data from uneven data loss.
Method 3: Recover Lost Mac Files from iCloud Backup on Monterey
If you have proper backup in iCloud, then follow the below steps to restore deleted folders from Mac Monterey using iCloud Backup:
- Go to icloud.com and sign in with your account credentials.
- Click on Settings.
- Click on the Restore Files option under the Advanced tab on the bottom-left of the window.
- Locate the files you want to restore and check the boxes to the left of their names. You can also Select All to get everything available at once.
- Click on Restore Files.
In case you don’t have a backup of your computer or you have deleted files from iCloud, read the next paragraph to find out how you can recover deleted Mac files using professional data recovery software with ease.
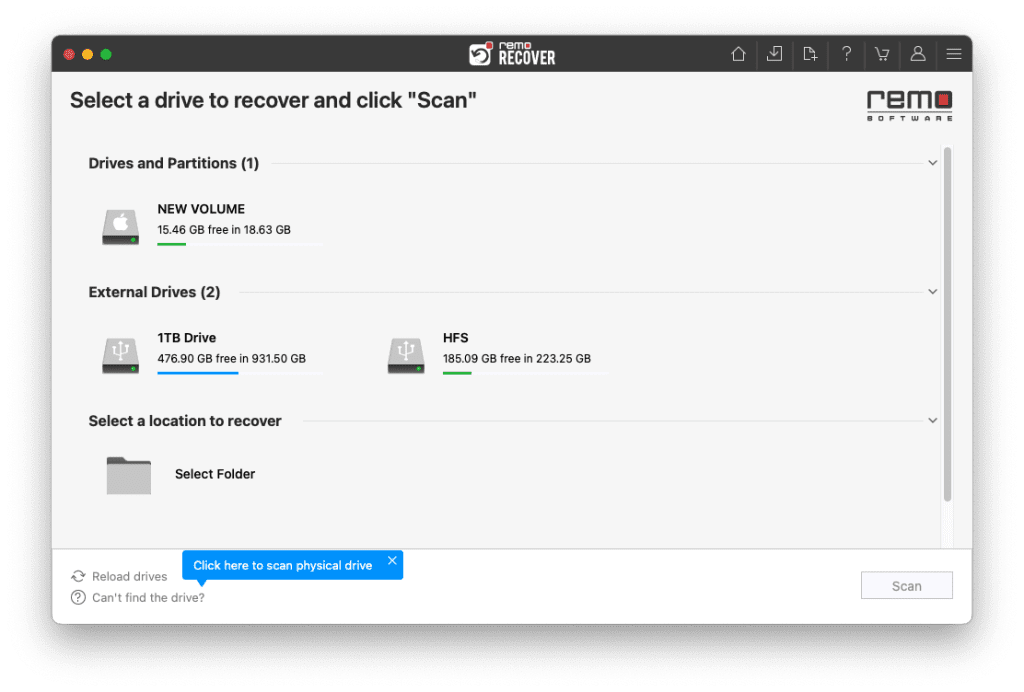
Method 4: Recover Deleted Files From Mac Monterey using Remo Mac File Recovery Software
Remo Mac File Recovery Software is an ideal data recovery app that can easily recover lost or deleted data on Macintosh machines running on MacOS Monterey. Remo Recover Mac is designed with a highly advanced drive scanning mechanism to produce fast, easy, secure, and complete data recovery from Mac Monterey. It works on all versions of macOS, including the latest Ventura, and can recover more than 500 file formats.
Steps To Recover Data From Mac Monterey Using Remo
To start the data recovery from Monterey process you are first required to download and install the Remo Recover Mac Software and follow the below steps:
- Launch the software on your Mac, select the Volume or Drive from which you'd like to recover files from Mac Monterey, and Click On Scan.
- Click on Dynamic Recovery View to see the data being recovered from Mac Monterey and locate them in Lost and Found or Lost Partition Folders.

- Double-click on any file to preview them for free.

- Finally, select the recovered files and folders you want to restore and click the Recover button to save them on your Mac.
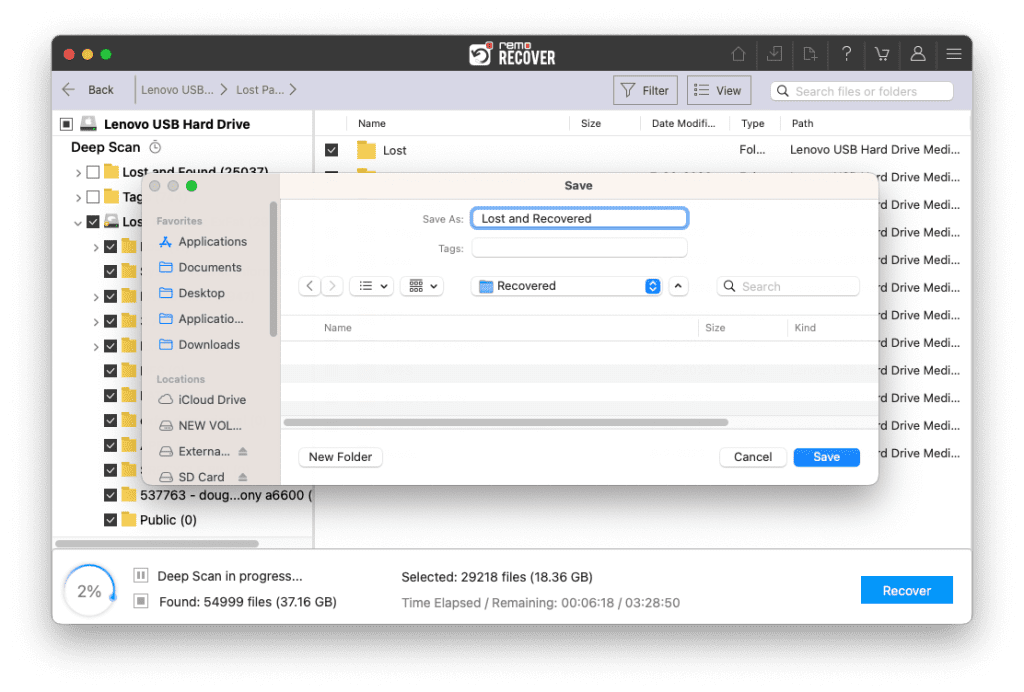
Caution: Save the recovered files in a different location from the previous location to avoid losing them again.
If you have lost your Documents folder on Mac. Then, read this article to learn how to use Remo Mac File Recovery Software to recover the missing Mac Documents folder.
Conclusion
This article talks about retrieving deleted files from Monterey, where we have talked about various solutions such as Trash Bin, Time Machine backups, iCloud backups, as well as a specialized Mac File Recovery tool, to help you recover deleted files from macOS Monterey.
I am sure you have found this article helpful in getting back your data from Mac Monterey systems.