Learning how to convert OST to PST files is quite easy, before proceeding with the procedure let us learn about OST files and Exchange servers.
In offline (Cached Exchange) mode, Microsoft Outlook saves all Exchange mailbox data in a local file called an OST file or Offline Outlook Data file. When the Exchange connection is re-established, the modifications made by the user in offline mode are updated to the server mailbox.
Because the OST file is stored locally on the user's PC, it is unaffected by Exchange Server failures, disasters, mailbox deletions, and so on. In such cases, end-users can employ OST files to restore user mailbox data.
Why should you Convert OST into PST?
At times OST files can become inaccessible due to various reasons leading to potential data loss. However, having a backup of your Outlook data in the form of a PST file can be a measure to avert data loss.
Not only this but there are other cases wherein converting OST to PST can be advantageous in instances such as:
- You only want to back up a few Exchange mailboxes when a few user mailboxes are deleted from the Exchange server.
- You intend to repair a corrupt OST file, but the file contains some unsaved data.
- Due to Exchange corruption, server crashes, or other factors, OST files are inaccessible, but you need to check emails immediately.
- During Exchange downtime or unavailability, or to re-establish email communication.
- To access Outlook data quickly even when the computer is not connected to the internet.
Can I convert an OST file to a PST file?
Yes, you can easily convert OST to PST using the steps given below in the article. Firstly, you can log in to Outlook with the same Exchange profile that is connected to the exchange server, and then employ some of the best methods for converting OST to PST given below:
- By using the help of the Export-Import Feature
- Using a professional tool.
1. Export Outlook data file as a PST file:
To manually convert OST files, your PC must be set up with Outlook and linked to a Microsoft Exchange server. The steps for the rest of the procedure are as follows:
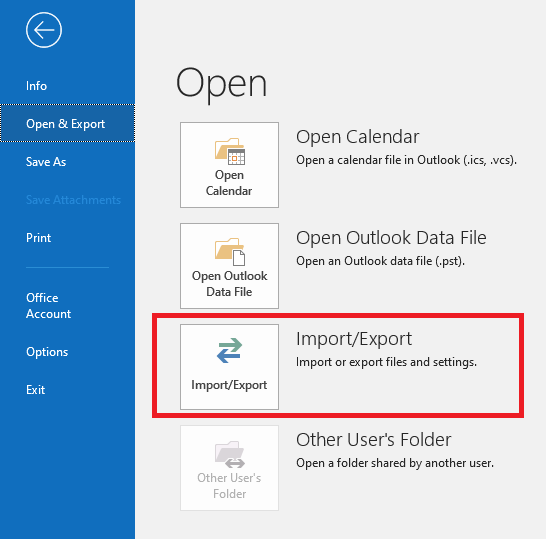
- To begin, open MS Outlook, then select File and Import/Export from the drop-down menu.
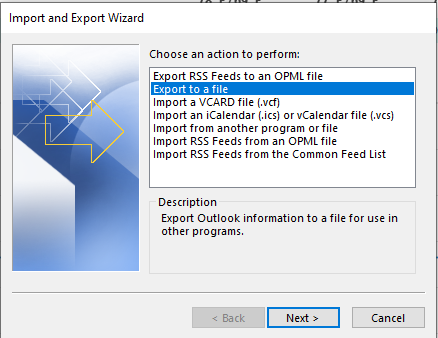
- Choose an action to perform that appears in a new dialogue box. Proceed by selecting Export to a File.
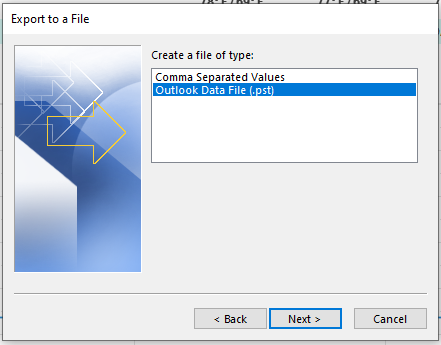
- The following screen will ask you to select the file type you want to import. Select Outlook data file (.pst) and then click Next.
- Now, select the folder from which you want to export data and click Next.
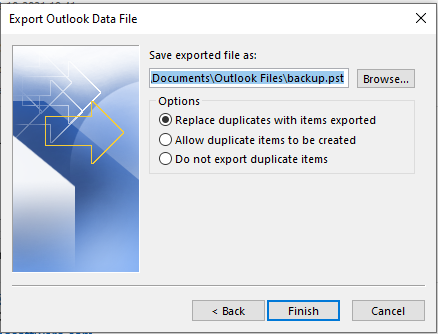
- Select Allow duplicates to be created from the drop-down menu and click Finish.
- Following this, a second pop-up will appear, asking for an optional password. It is simple to proceed without entering it.
You've now manually converted Microsoft OST files into an Outlook PST file. Now at the designated location, you can verify your OST files that have been stored in converted PST format.
Limitations of Manual Method:
The manual approach for converting OST to PST Outlook has several downsides, which are listed below:
- You'll need to configure an Outlook account with an exchange server.
- When compared to direct procedures such as using a professional tool, the process is slow.
- While exporting OST, data loss or corruption of OST files is a possibility.
- File size restriction.
To get over the limitations, we suggest using an automated tool to convert OST to PST in Outlook 2021, 2019, 2016, and other versions of Outlook.
Remo OST to PST Converter is one of the best Outlook file conversion tools for making this task simple and convenient for a user. The software completes the conversion procedure in just a few simple steps and is completely risk-free.
This tool not only helps in OST file conversion to PST files but also helps you recover, backup, and retrieve all data items from offline OST files.
It also allows you to make conversions without any file size restrictions and also you can preview data like emails, contacts, calendars, and other mailbox items before converting them.
2. Convert OST to PST Using Remo OST to PST converter:
Easy Steps to Convert OST to PST File in MS Outlook
Step 1. On your computer, download, install, and launch the Remo OST to PST Converter tool.
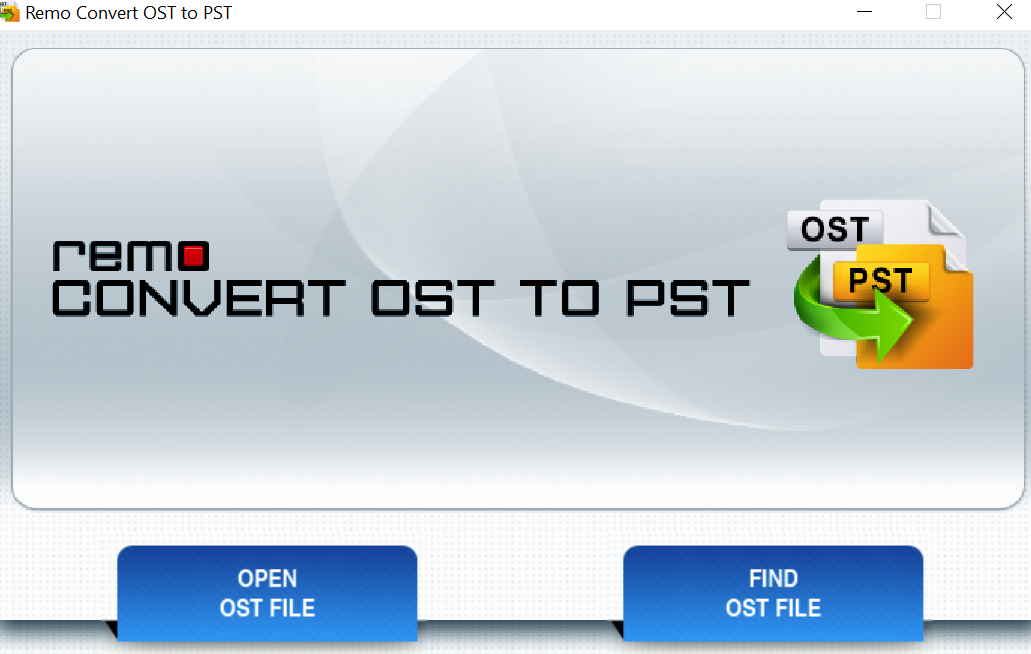
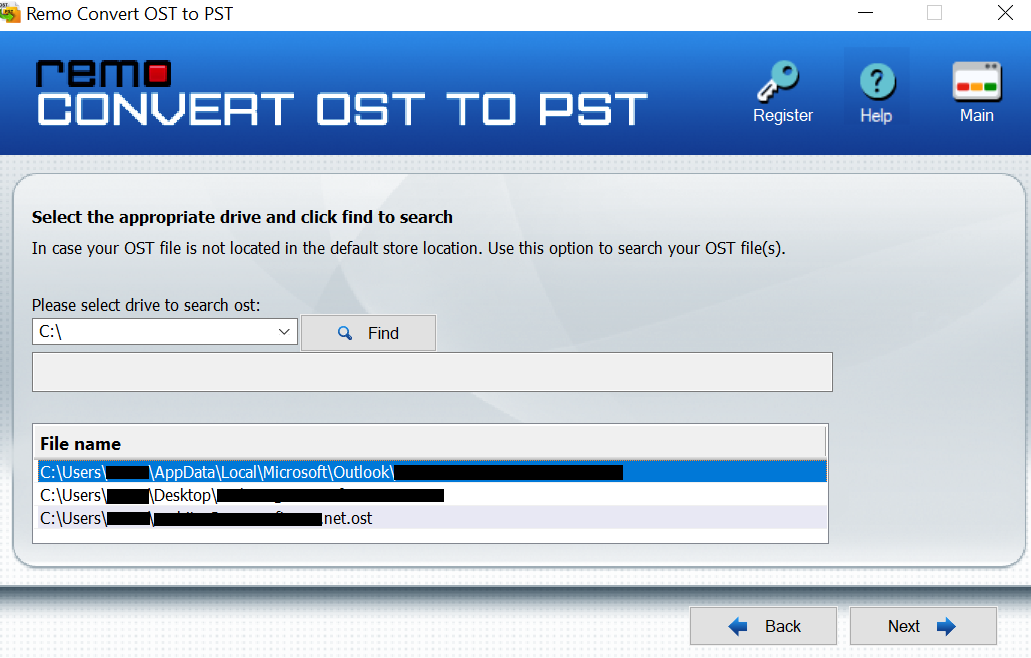
Step 2. Choose either Open OST File (if you want to locate the OST file manually) or Find OST File (if you want the software to locate the OST file automatically) before clicking Next.
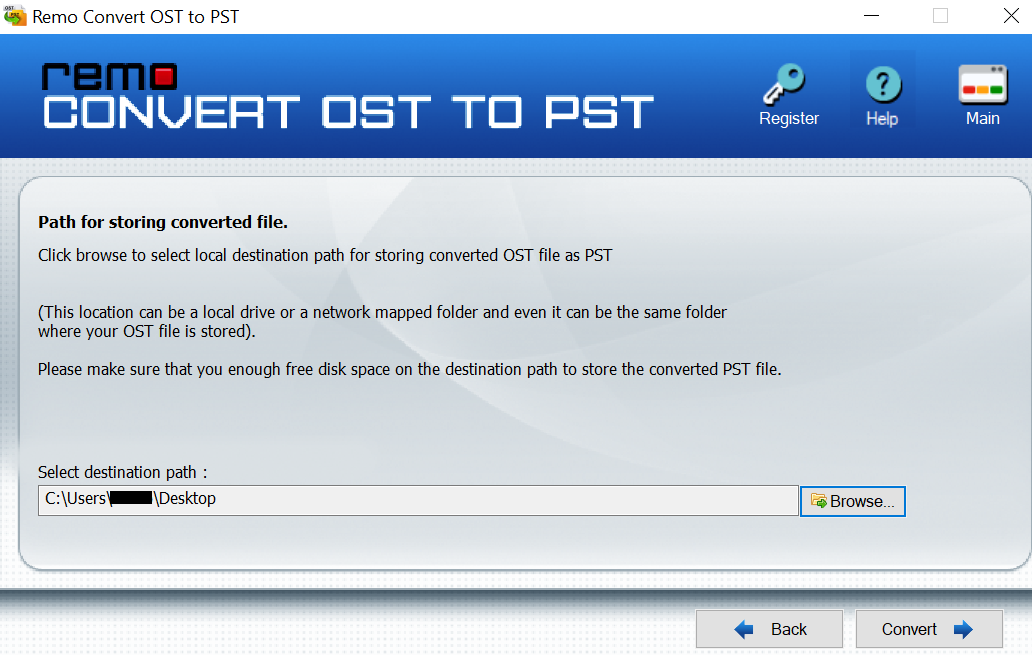
Step 3. On the next screen, choose the Browse option to provide the destination path for the converted PST file and then click on Convert.
Step 4. The Remo OST converter tool now starts the process of converting the OST file to a healthy PST file.

Note: Even without an Exchange profile or server connection, the Remo OST to PST converter software can convert inaccessible, corrupted, or even convert orphaned OST files to PST format.
Conclusion:
Manual methods are quick and easy to use, but they do have certain drawbacks. If your computer has MS Outlook configured with Exchange Server, you can convert OST to PST manually for free. These processes are frequently more time-consuming.
Using reliable software is a convenient and effective technique. This software is recommended since it is user-friendly and has extensive features. Use this trustworthy and effective software to manage your important data.
Frequently Asked Questions:
You can easily convert an OST to PST in Office 365 using the Remo OST to PST Converter Tool you can also use it to transform files in Outlook 2021, 2019, 2016, 2013, 2010, 2007, and Office 365 as well. Follow the three simple steps given in the article to make the conversion quick and easy.
To convert the OST file into PST in Mac, follow the steps given:
1. Open a data file in Outlook (. pst or . olm)
2. Click Import from the File menu in Outlook for Mac.
3. Then, on the right arrow, click Outlook Data File.
4. Click the right arrow after selecting a data file type.
5. Select Import after you've found the data file on your computer.
6. Click Done when the import process is finished.
To manually convert an OST file to a PST file, follow these steps:
1. Navigate to the File menu in Outlook.
2. Choose Import/Export from the drop-down menu.
3. Select Export to a file from the drop-down menu.
4. Choose the Outlook Data File option (. pst)
5. Select whether you want to export a single folder or the entire account.
6. Include subfolders option should be checked.