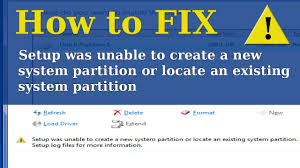
When you install a new operating system, there may be an error message ‘Setup was unable to use the existing partition because it does not contain the required free space’.
Before you begin the troubleshooting process, make sure you have allocated enough space for the new OS installation. If the error still persists, follow the steps below to troubleshoot the error.
Step 1: Format the partition
- Turn on your system and insert Windows installation media CD
- Reboot the device from the installation media inserted
- Follow the instructions and Install Windows
- In the step which says ‘Where do you want to install Windows’, select Drive Options advanced feature
- Select the partition in which you want to install OS
- Click on Format and follow the instructions to format your drive
- Then reboot your device once the process is complete
If this process does not solve the error, follow the steps to delete the partition.
Step 2: Delete partition
- Right-click on Start menu and select Disk management
- You should see a Window with all the partitions listed
- Locate the partition in which you intend to install a new OS and right-click on it
- Click on Delete Volume from the menu that appears
- Confirm to delete your partition
Once the partition has been deleted, it will be listed as Unallocated Space. Now, install your OS (in this space) and check if it resolves the problem.
If this doesn’t solve the problem, delete all partitions on your drive, again create partitions, and install the required OS.
Now, if you haven’t backed up your data before deleting partitions or installing a new OS, all data would be lost. This is a difficult situation to deal with if it was important data and you need it back. There’s no need to panic, however. You can use specific data recovery tools to recover your partitions.
Also Read: How to Turn on ActiveX in Windows 8?
About Remo Recover
Remo Recover is designed to recover deleted/lost partitions. The software uses powerful scanning algorithms to scan your drive, locate partitions, and recover data. It can also be used to recover data from formatted and partitioned drives. The article on how to recover data from partitioned hard drives explains the recovery process in detail.
The software supports recovery from FAT16, FAT32, NTFS and ExFAT partitions. The article on how to recover lost files from FAT32 partition explains the recovery process in detail. In addition to recovering data from your system, it can also be used with external hard drives, USB’s and other storage devices.
- The software supports latest versions of both Windows and Mac operating system
- Two advanced features of the software are Preview feature and Save Recovery Session. The preview feature allows you to preview recovered files before saving them. Save Recovery Session allows you to save and resume the recovery process at a later time.
Steps to recover deleted partitions using Remo Recover
Partition recovery can be performed in a few simple steps using the software.
- Download and install Remo Recover on your system
- Run the software and select Recover Drives from the main screen
- Then choose Partition Recovery and select your drive
- Once software completes scanning process, a list of recovered files is displayed
- You can choose the required files and save them in the desired location.