Finally, Windows users can have the luxury of transferring files between two Windows 10 PC using nearby Share. The similar file sharing option was only available in Apple computers until Windows came up with the new update in April which supports file transfer between two Windows 10 PC.
Usually external storage devices are used to transfer files between two PC’s. The chances of losing files occur due to external device corruption or due to malware infection. Though recovering lost files after cut and paste or due to any other file transfer method is possible, it is again a time-consuming process which can be avoided using Nearby Sharing.
Note: A lot of Windows users try tools like the User State Migration Tool to create a compressed copy of the user’s data and settings to move the user data to another system running on another Windows OS version .
If you are one of those who has lost their MIG files or WET files. Then, refer to this article to recover MIG files.
Enable Nearby Sharing:
Nearby Share is the newest update that is available only to Windows 10 users. Normally it is enabled by default, if it is not enabled you have to manually enable it to transfer files between two Windows 10. Follow the steps below to enable nearby share:
- Go to Settings
- Click on System
- Click on Shared Experiences
- Turn on Nearby Sharing switch
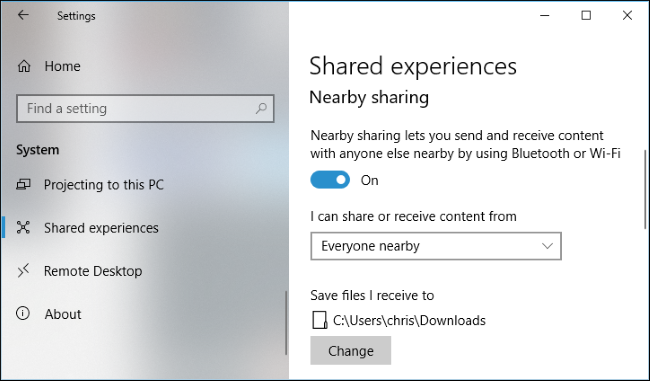
Image Source : Howtogeek.com
How to share files using Nearby Sharing?
You can share a file, image or a video using Nearby Sharing in Windows 10. Follow these steps to share a file, image or a video using Nearby Sharing:
- Right click on the file you want to share
- Click on Share option
- If the person receiving the file has enabled Nearby Sharing, you will see the name of receiving device
- A notification will pop up in the receiving Windows PC asking for confirmation
- The file transfer will start once it is confirmed the receiving end and the duration depends on the size of the file.
You can not only share files using Nearby Sharing in Windows 10, it also supports link sharing directly from Microsoft Edge and other files like images and videos can be shared using Nearby Sharing option.
Customize Nearby Sharing Settings
You can customize Nearby Sharing settings according to your requirement. The settings will allow you to decide who can share data with you using Nearby Share. Following steps will guide through the settings available in Nearby Sharing:
- Go to Settings and Click on System
- Click on Shared Experiences
- Under Nearby Sharing you’ll find I can share or receive from Click on the drop-down list and Select either of the following according to your requirement:
Everyone Nearby: This option will enable your PC to share or receive data from all nearby Windows 10 PC.
My Devices Only: This option will allow your PC to share or receive data from your devices using Microsoft only.
By default, all the files received using nearby sharing will be stored in the downloads folder. You can always change the location if you want to by going to shared experiences in System Settings.
Note: If you have deleted downloaded files. Refer to this article to find out how to recover files from the downloads folder.
One disadvantage of using Nearby Sharing is that you cannot select between Wi-Fi and Bluetooth, as Windows 10 manages the choice. This is a disadvantage because sharing data over Bluetooth can be time-consuming.
Other than this, the new PC sharing option is useful and helps you avoid data loss that occurs while trying to transfer files using external devices. You need not worry about how to recover lost files after accidentally formatting a device holding your data or losing files due to hard drive corruption.