OST file stands for Offline Storage Table. It is used to save Outlook data and works great for offline use. Microsoft Exchange Server enables users to work with their Outlook emails and other Outlook data with the help of the .ost file without connecting to the server. The changes you make to the OST file items are automatically synced after regaining access to the server.
There are 3 ways to transfer an OST file to a new computer.
- Taking a backup of the OST file
- Converting OST to PST format
- Directly migrate the OST file to a new or another computer using an automated tool like Remo Outlook Backup and Migrate
How do I Open OST File to a New or Another Computer:
- Method 1: Manual way of moving OST file to a new computer
- Method 2: Automated way of moving OST File to New Computer
Method 1: Move OST File to New Computer Manually
When you want to copy the OST file to a new computer, there are only a few reliable ways to do it. Here is the most proposed manual method you can follow to move the .ost file to the new computer.
This manual process is broadly categorized into the following 2 steps to move OST file to the new computer successfully:
Step 1. Convert OST File to PST File Format.
Step 2. Import PST File Into a New Computer.
Step 1: Convert OST File to PST File Format:
You can convert OST file to PST file format using:
i) Manual method
ii) Remo Convert OST to PST
1. Convert OST to PST Manually
Utilize the below Import-Export Wizard (Outlook’s Import/ Export feature) to migrate the OST file to a new computer. However, this method requires technical expertise. Any mistake while implementing this method might lead to OST file corruption. However, you can avert any kind of damage to the .ost file by making use of the Remo Outlook Backup and Migrate software, which can safely transfer the OST file to another computer.
- First, convert the OST file to PST by exporting or backing up Microsoft Outlook PST.
- Copy the converted PST file to your external hard drives like a USB or memory card.
- Connect your external drive to your new computer and transfer the .pst file to your new computer and follow the below-mentioned steps to import the PST file. This will successfully transfer your OST file data to a new computer in the form of a PST file.
Note: Manually converting the OST file to PST format cannot transfer the complete Outlook data to the new computer. Hence, using a tool to convert OST file to PST is recommended
2. Convert OST to PST using Remo Convert OST to PST Tool
The safest and easiest way to convert OST file to PST format is by using Remo Convert OST to PST Tool. This application performs the process of converting all OST items to PST in the original format without any data loss
In addition, it is designed with an easy-to-understand GUI that makes working with it very simple and comfortable. With the help of this user-friendly tool, all individual items along with default folder structures (Inbox, Calendars, Contacts, etc.) will be accurately converted to a PST file format with no technical expertise.
Steps to Convert OST to PST Using Remo Convert OST to PST Tool
Download Remo Convert OST to PST software > Click Find OST File option to locate the OST file > Click Browse to select the location to save the converted file > Click Convert option to start converting OST file to PST file process.
After the completion of the converting process, you will have a PST file that contains all your Outlook items that were saved in the OST file. Copy the converted PST file into an external drive and then transfer it to a new or another computer.
Step 2: Import PST File Into A New Computer:
By importing the converted PST file into another computer, you can successfully transfer OST to the new computer and thereby access all Outlook attributes.
- Run the Outlook setup on the new computer
(Note: If you have already created an Outlook profile, you cannot set up an OST file for it. So, delete the profile and then double-click the Microsoft Outlook icon to create the profile again.) - Set up a new email account
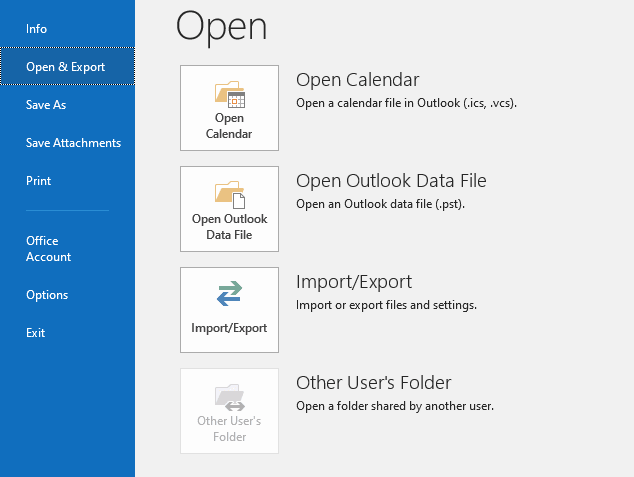
- Choose File and select Import/Export.
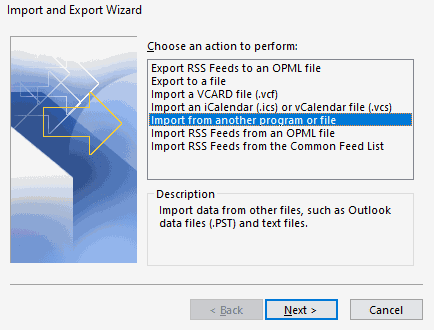
- Now click Import from another program or file and click Next.
- Now, choose the Outlook Data File (.pst) option and click Next.
- Browse and import the converted file (the copied file from the other computer) and click Next.
- Choose Allow duplicates to be created option and hit Next to import all personal information from the copied PST file to the new Outlook.
In this way, you can successfully move the OST file to the new computer. But manually migrating Outlook PST file to a new computer is considered risky if you improperly implement the steps. Sudden interruptions like power failure, computer shutdown, or any other errors while executing the importing method can lead to severe OST file corruption.
The best way to migrate an OST file to a new computer is by making use of the Remo Outlook Backup and Migrate tool which not only eliminates the manual process of importing the PST file but also moves the OST file to another computer without any corruption or damage.

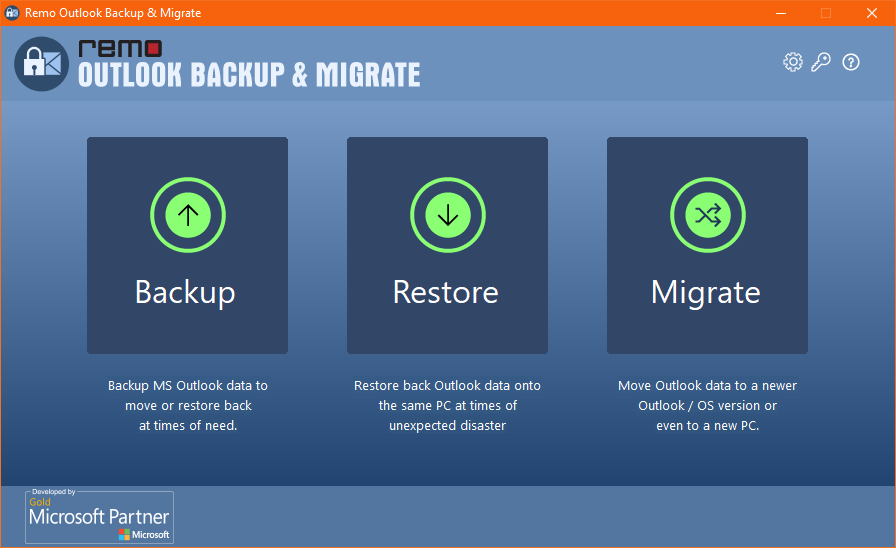
Method 2: Transfer Outlook OST File to New Computer using Remo Outlook Backup and Migrate tool
Using Remo Outlook Backup and Migrate tool you can easily migrate OST file to a new computer. This user-friendly tool first creates a backup of your OST file in the .obm extension which is one of the safest file formats to save both the .ost and .pst files. And thereby easily migrates your Outlook OST file to another computer without causing any damage to the source OST file.

How to Move OST File to New Computer?
- Download and install Remo Outlook Backup and Migrate tool on your old computer and click on the Backup option.
- Select the Smart Backup option and click Yes to start copying the OST file.
- Now, choose the location of your choice to save the copied OST file and click Finish.
- (Note: A copy of the Outlook OST file will be created in .obm format. This copied file contains all your Outlook items that were saved in the original OST file including emails, contacts, folder and file structure, autofill text, rules, and many more.)
- Copy the .obm file (i.e., Copied OST file) into an external drive such as a pen drive and then transfer it to your new computer.
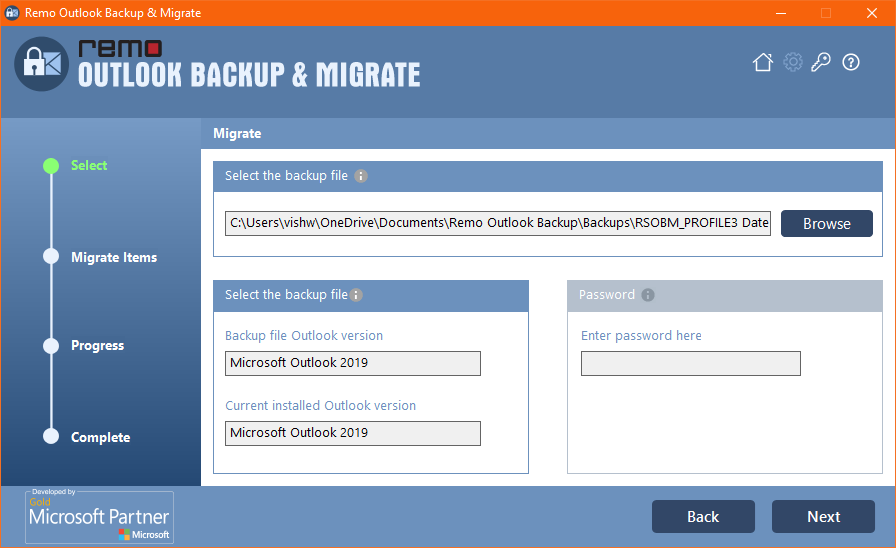
- Download and launch Remo Outlook Backup and Migrate tool on your new or another computer and select the Migrate option.
- Click on the Browse option to select the recently saved .obm file and click Next to start transferring the OST file to this new computer.
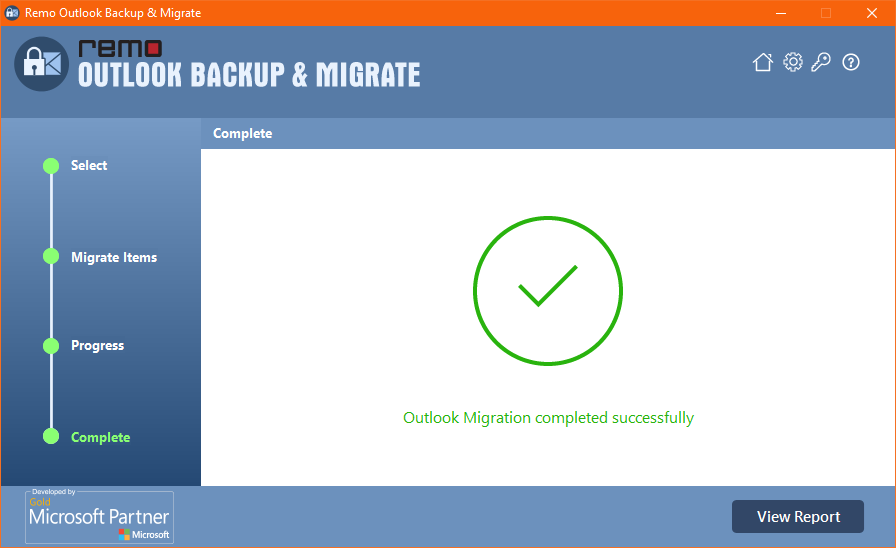
(Note: After the transferring process ends, you can run Outlook to verify the results on your new computer.)
Conclusion:
This article has given you detailed instructions on how to move the OST file to a new computer using 2 different methods. Manually converting the Outlook OST file to a PST file for transferring the OST to a new computer is subjected to corruption. However, by making use of Remo Outlook Backup and Migrate software you can easily transfer the OST file without any corruption or damage.
Frequently Asked Questions
1. Close your outlook
2. Locate PST or OST files: By default, pst files are stored in the local's users' “Documents/outlook files” folder, while OST files are stored in the AppData/Local/Microsoft/Outlook” folder. however, the exact location may vary based on the version of Outlook and the operating system you are using
3. Copy or Move the files: Once you have located the PST or OST file, you can either copy or move the file to the desired location. To move the file, right-click on the file and select the CUT or Move option. Then navigate to the desired location and paste the file. To copy the file, right-click on the file and select copy option then go to the desired location and paste the file.
4. Update Outlook: After moving the PST or OST file, you need to update outlook with the new file location. Open Outlook and select File then navigate it to Account settings.
5. Select the file and click OK to add it to Outlook.
6. Once you have updated the file location in outlook you can access your OST files.
For more information, you can refer to the article How to move OST to PST files.
The OST files are usually stored on a hard drive
For Outlook 2010, outlook 2013, and Outlook 2016 on windows 7,8, or 10
Here is the path where the OST files are stored.
C:/users/username/AppData/Local/Microsoft /Outlook/filename.ost.
How do I Export and import an OST file?
Exporting OST files:
1. Open Microsoft Outlook and Click on File
2. Click on the Open and Export option and then click on Import/Export.
3. In the Import and Export Wizard, select the option to export a file and click on Next.
4. Choose the option to Export to a file type of outlook Data File and click on Next.
5. Select the folder that you want to export and choose the location where you want to save the exported file.
6. Choose any additional options that you require, such as including subfolders, and then click on finish to complete the export process.
Importing OST files:
1. Open Microsoft Outlook and click on the file.
2. Click on the open and export option and then click on Import/Export.
3. In the Import and Export Wizard, select the option to Import from another program or file and click on Next.
4. Choose the option to Import Outlook Data from an Outlook Data File and click on Next
5. Go to the location where the OST file is saved and select it.
6. Choose the folder that you want to import and then select any additional options that you require.
7. Click on Finish to complete the import process.